🚨 Build an Alerting / Notification System
805
On this page, you'll learn:
- how to add alerts / notifications on your app
- how to customize and trigger the alerts
How to add alerts on your app
To add alerts to a page, go to Add > UI kit > Alert and drop it anywhere on your page.
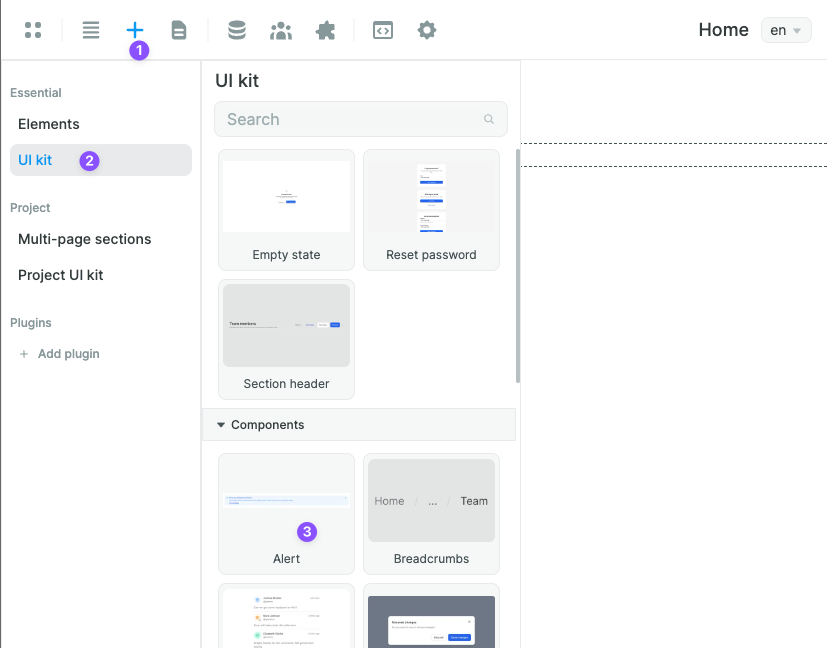
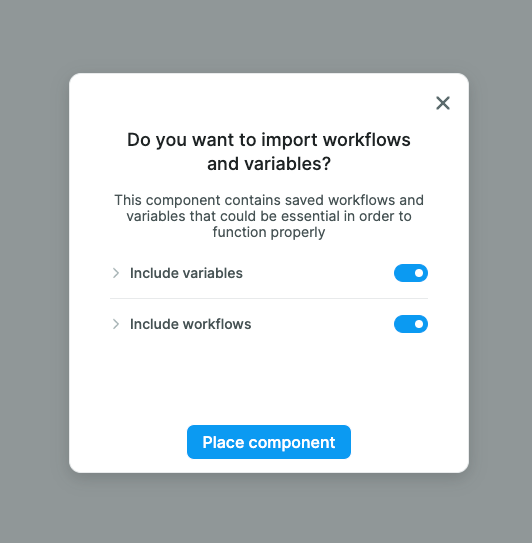
Also import the section's variables and workflows so that you'll be able to use the alerts from the get-go.
Once dropped, you can find the alert section in the navigator.
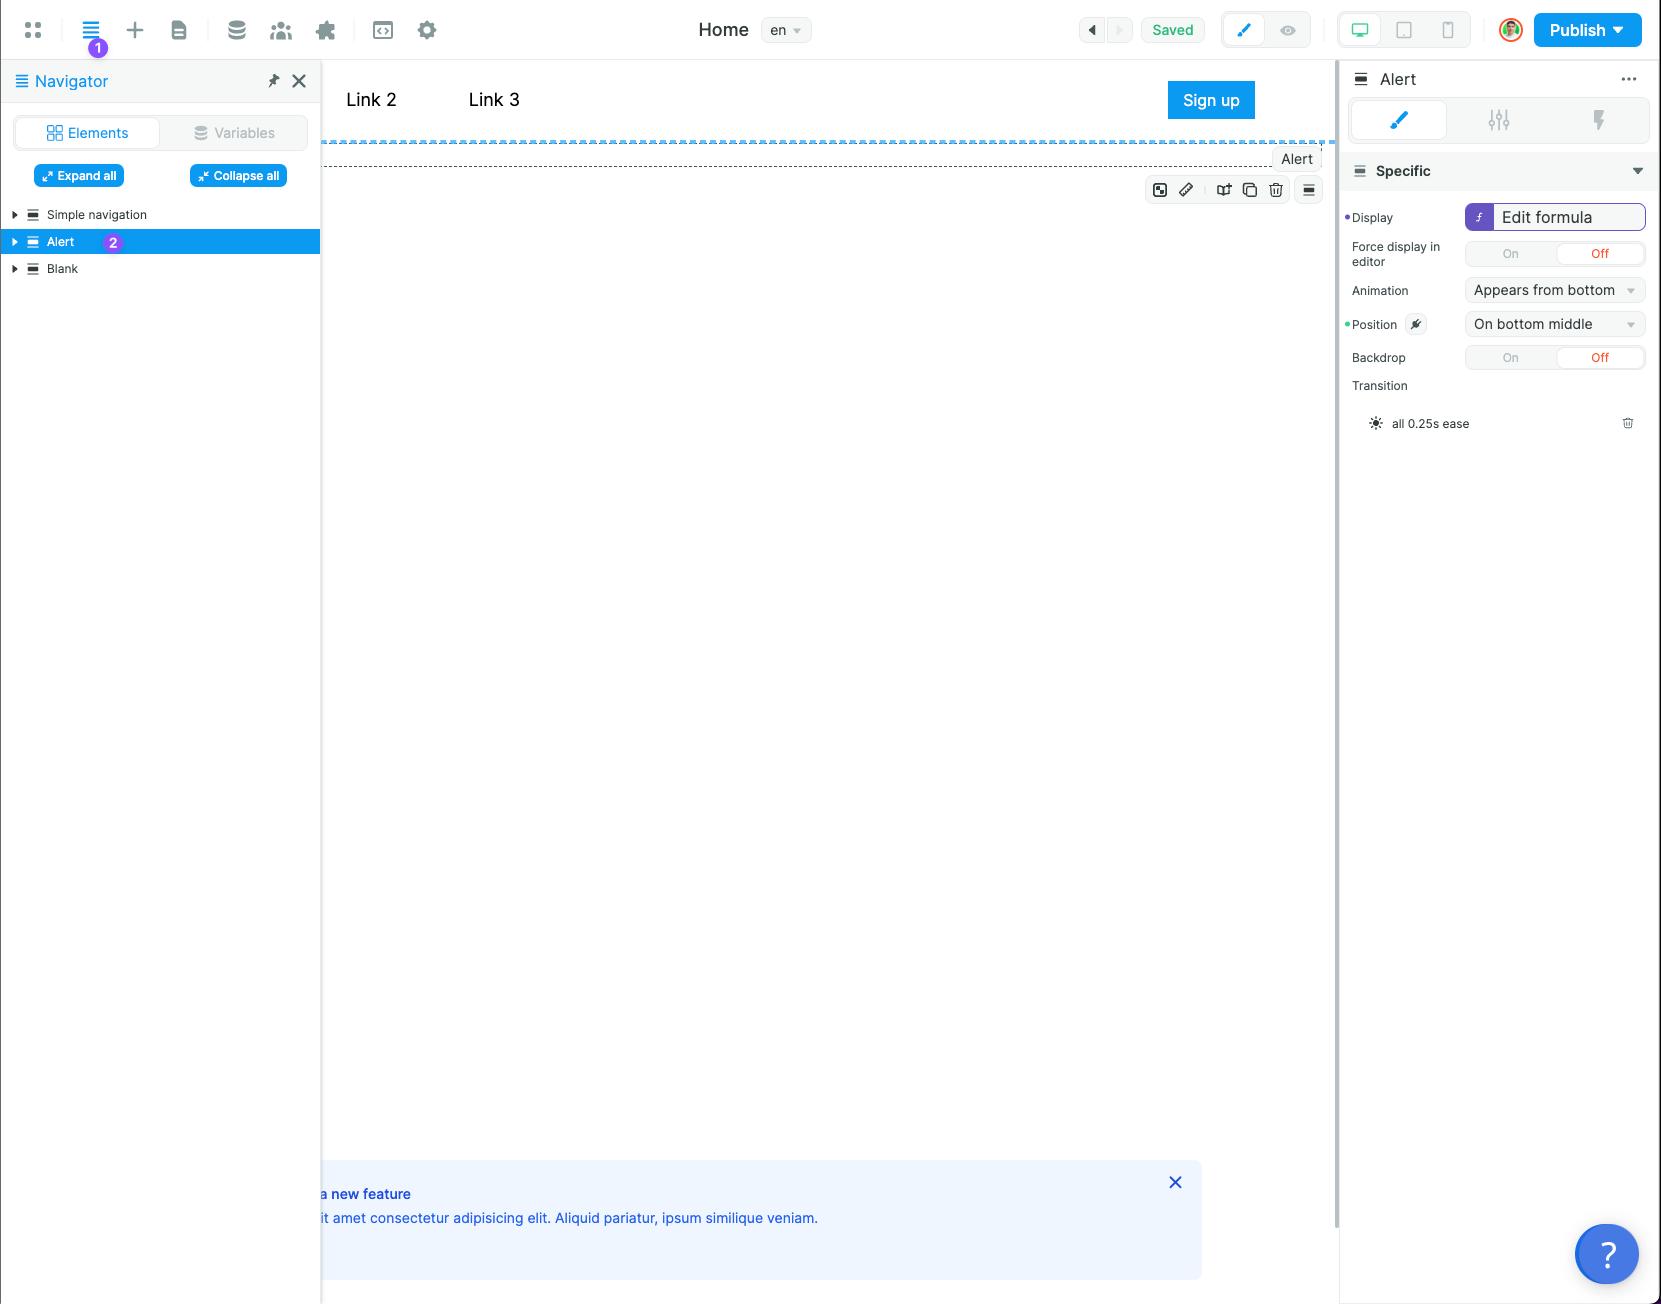
As you can see, the alert is bound to a configuration variable. This variable is the alert's current state, telling it how and what to display. Edit the display option to false to make the alert stop appearing by default:
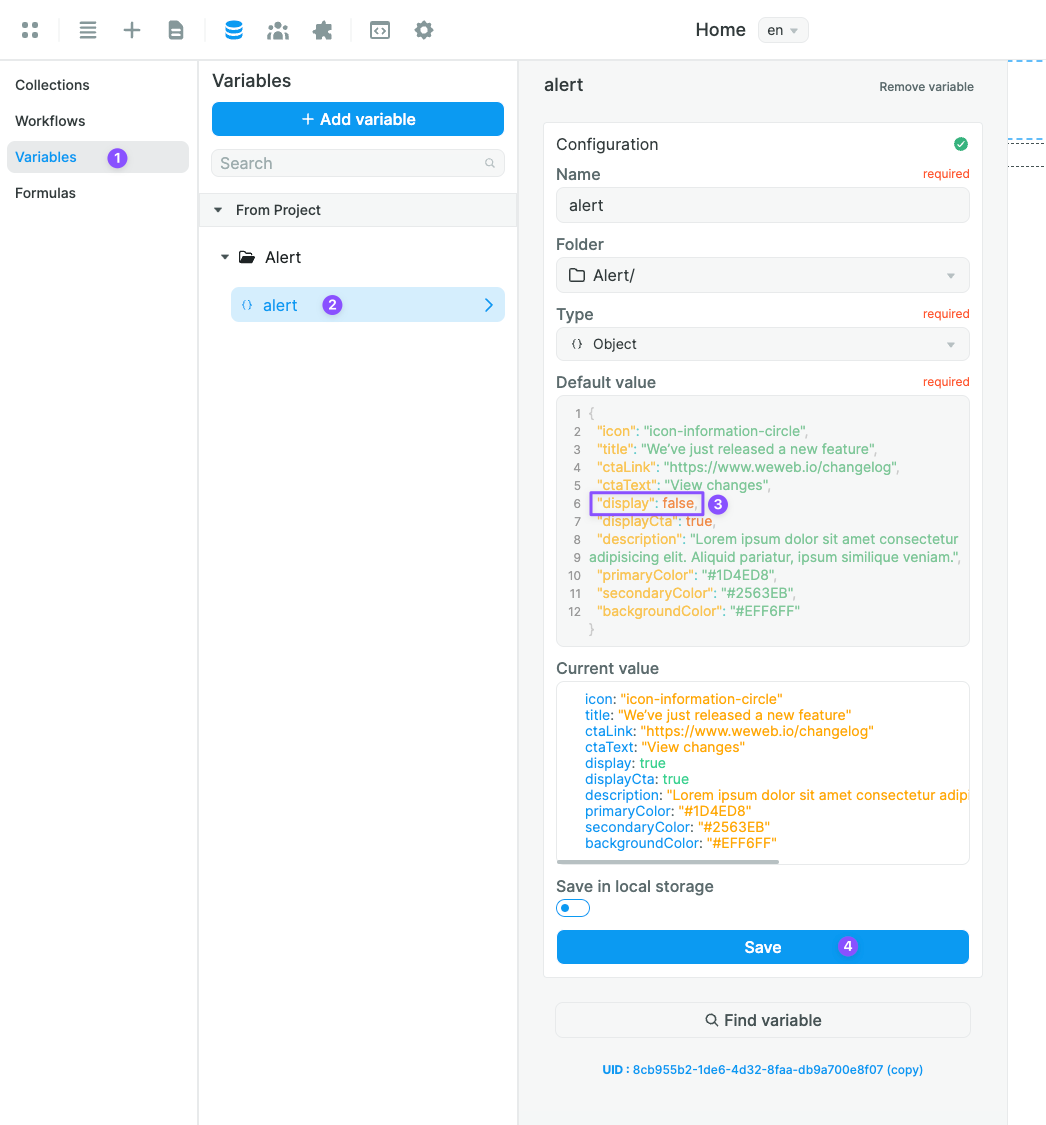
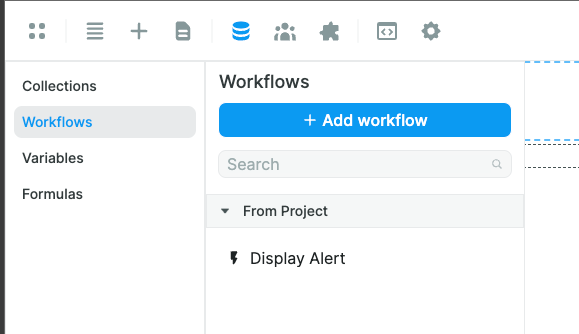
It also comes with a workflow called Display Alert which we'll use later to trigger an alert.
How to customize and trigger the alerts
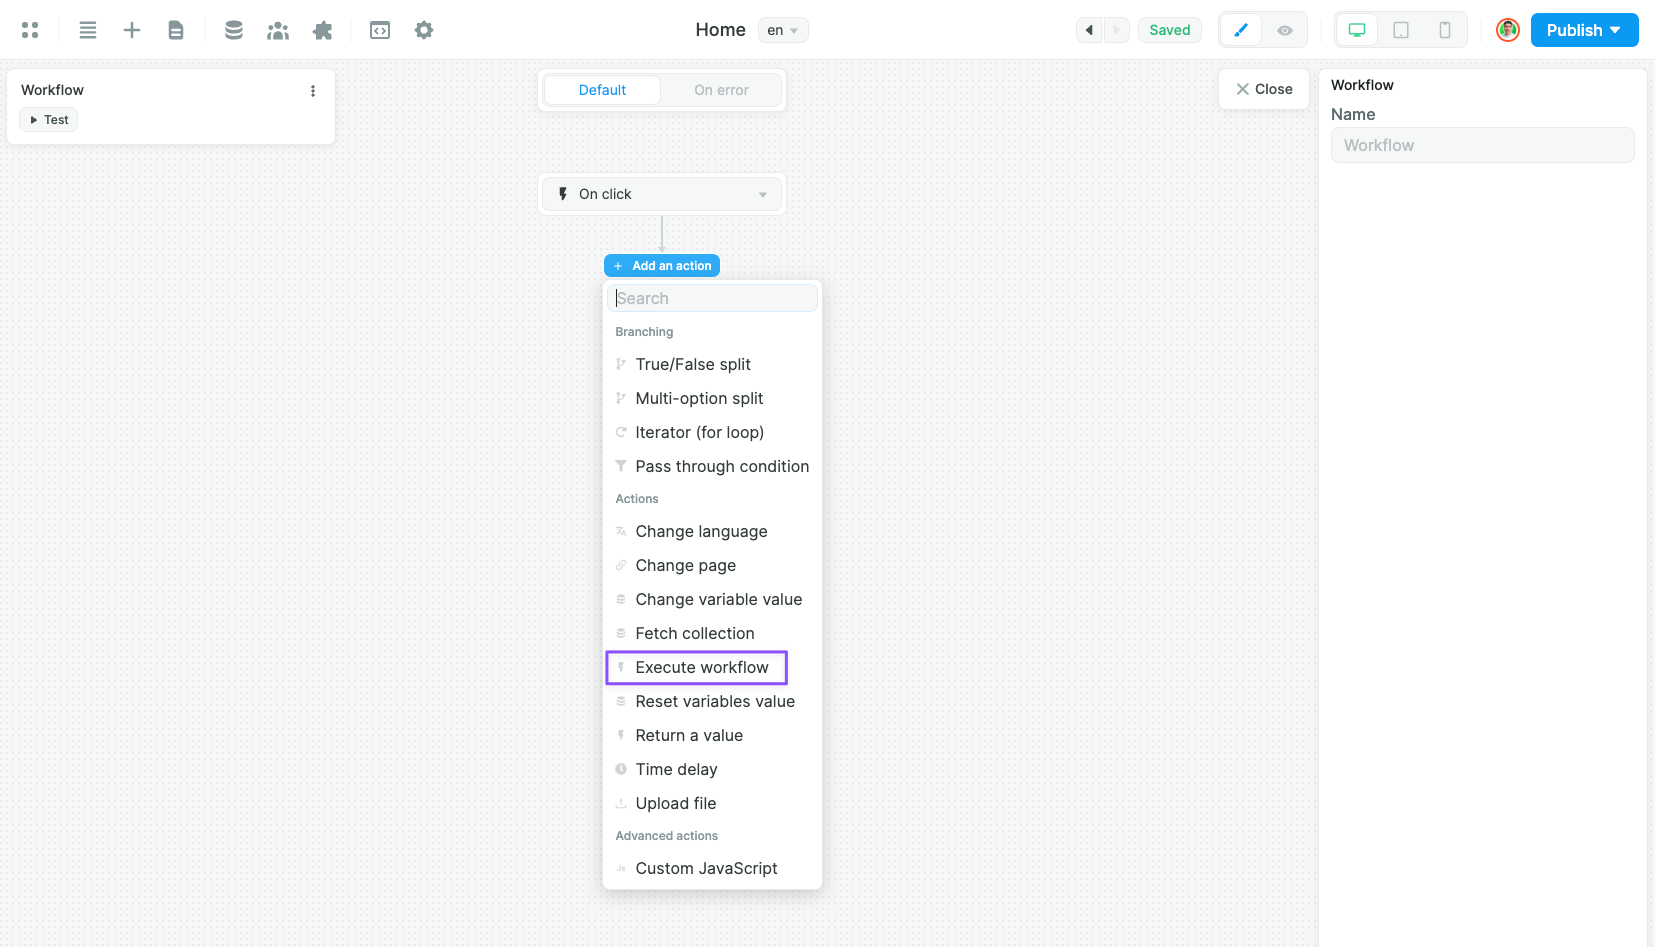
To trigger an alert from a workflow, choose the Execute workflow action and then the Display Alert workflow:
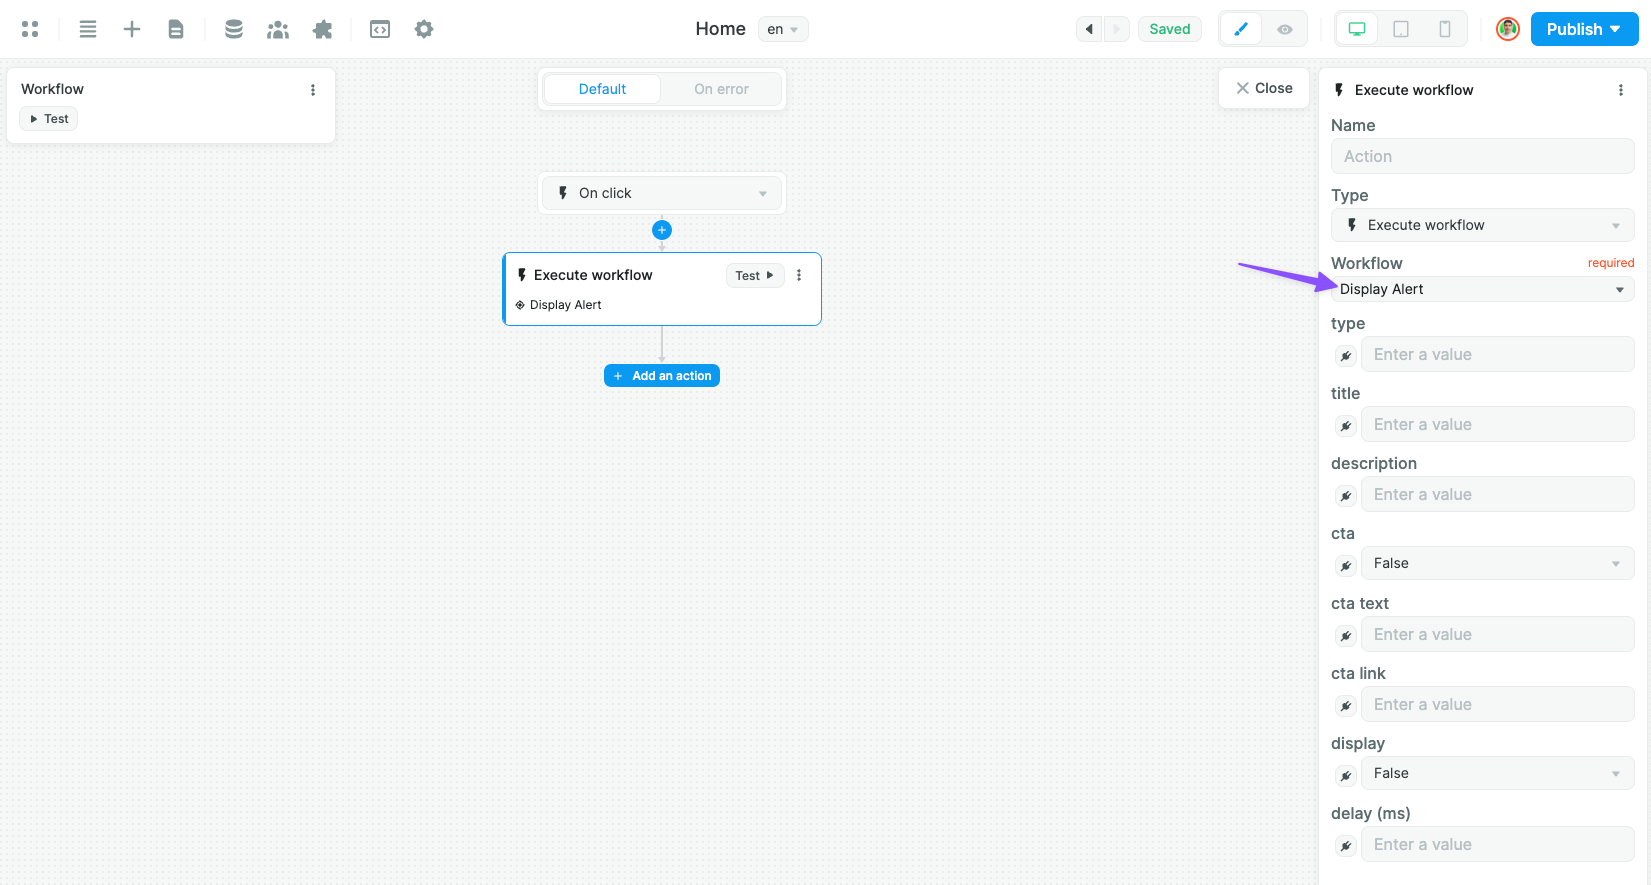
In this action, they're several options you can use to trigger the alert and customize it:
- "type": the type/color of the alert. It could be: "info" (blue), "warning" (yellow), "error" (red), "success" (green), "info-neutral" (grey)
- "title": the alert's title
- "description": the text that'll appear in the bulk of the alert
- "cta": whether or not to display a call to action
- "cta text": the text of the call to action
- "cta link": the link the call to action leads to
- "display": whether of not to display the alert. To trigger it, switch this value to "true"
- "delay (ms)": how many milliseconds the alert will display before to disappear (best practice is 3000 to 5000ms, so 3 to 5 seconds).
Here's a visual explanation of the fields:
