📬 Custom Domain
701
A WeWeb app comes automatically with a weweb-preview.io subdomain, served over SSL. For instance, yourapp.weweb-preview.io.
If you want to customize this and use your own domain name, you can do this in the Domains section of the project Settings Tab.
🚨 Keep in Mind 🚨
Depending on your registar, it can take up to 48 hours for your website to be live on your domain.
First, go to your Project Settings:
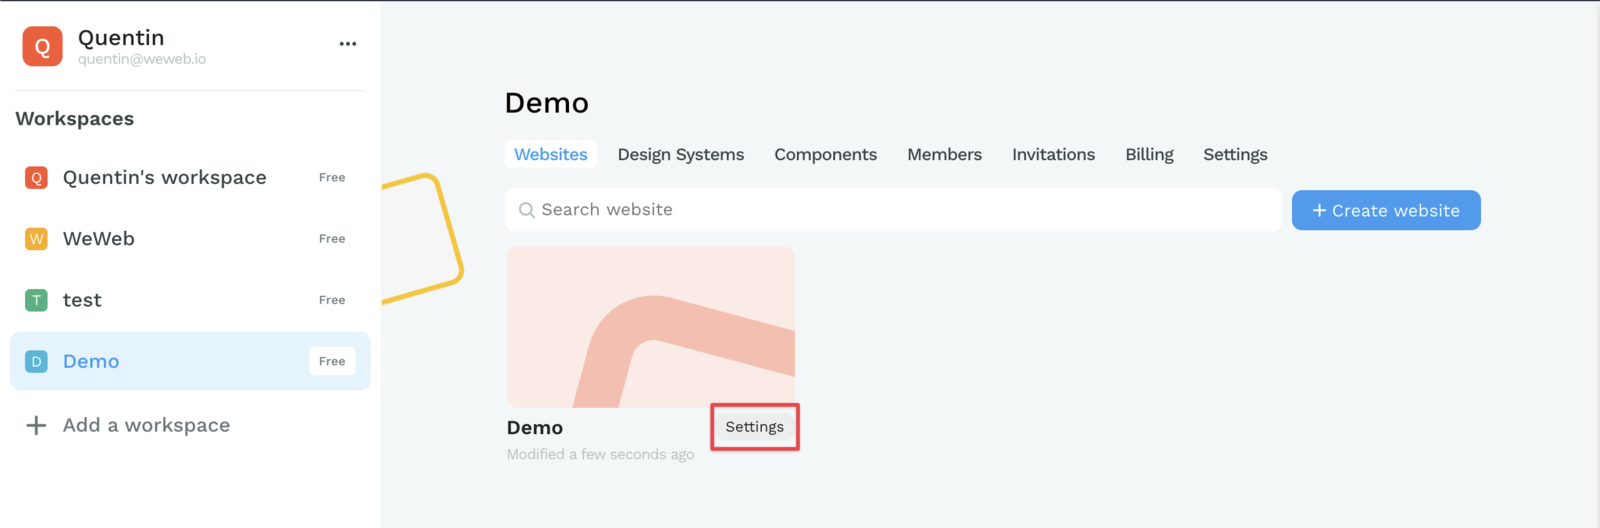
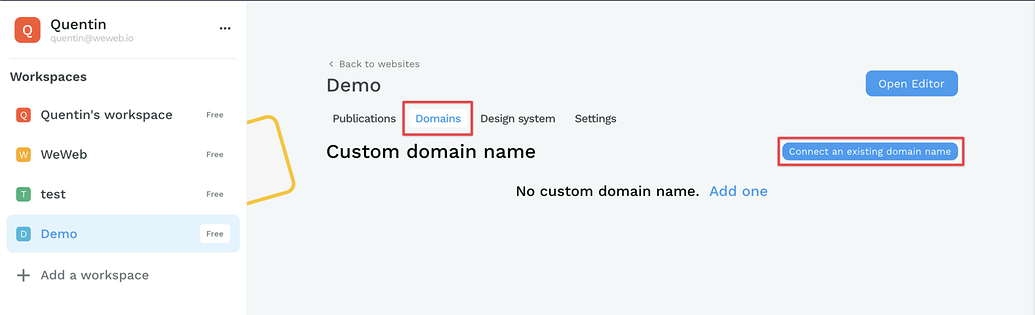
Here, click on "Domains", then on "Connect an existing domain name":
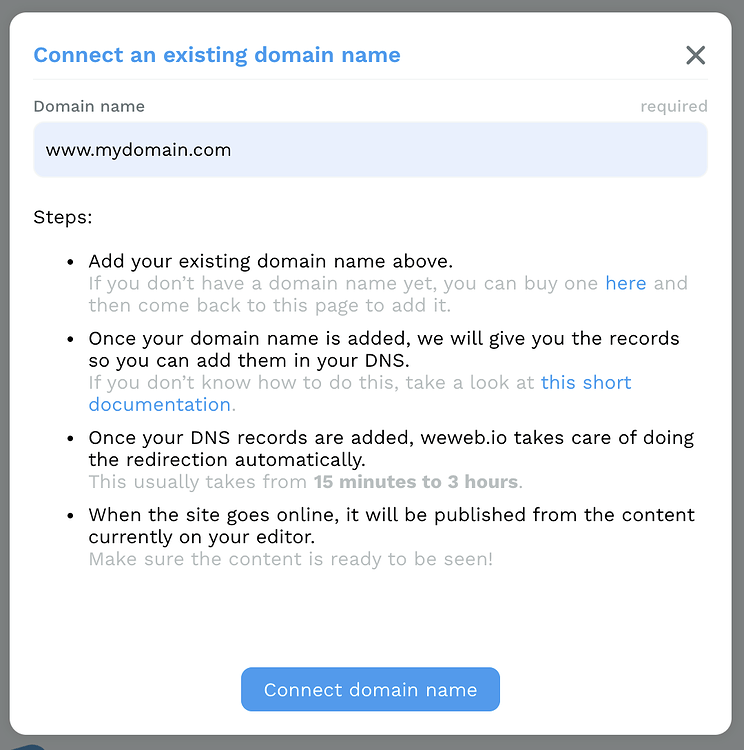
Here, type the domain you want to use and click Connect domain name:
🚨 Warning 🚨
WeWeb doesn’t support naked domain for the moment. Be sure to use a subdomain (the most common one is www)
Then, you’ll land on this page with the data you’ll have to setup on your domain’s registrar:
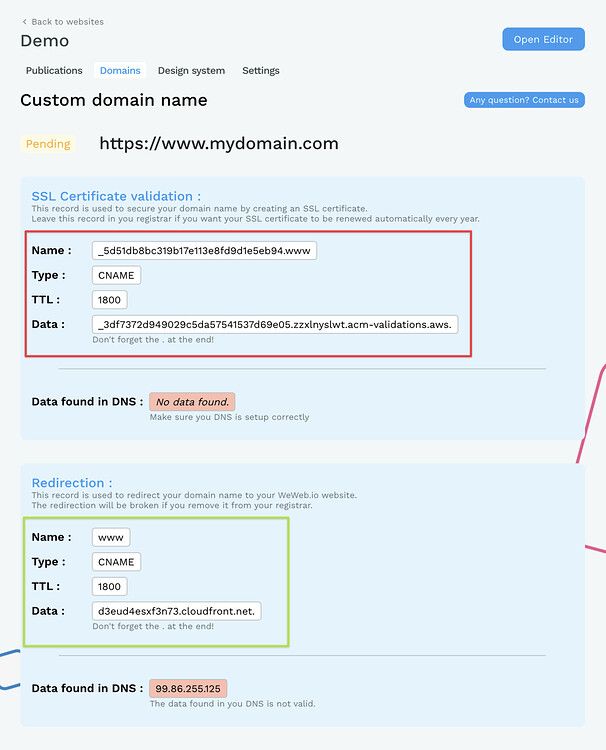
The first one (in red) is a CNAME record that you should add so that your site uses SSL (HTTPS).
The second one (in green) is a CNAME record too, that you should add to link your subdomain (here www) to the website.
For both, the Name is the subdomain you should add the value in Data to.
To help you, here is the documentation to do so for specific registrars:
If your registrar is not on this list, feel free to contact us in the chat.
🚨 Warning 🚨
Once redirected (it can take up to 48 hours depending on your registrar), your website should be live on your domain!
Namecheap
👉 On the Namecheap dashboard, go to Domain list.
Then click Manage on the domain you want to connect:

👉 Click on Advanced DNS:

👉 Click on Add new record:

👉 Add 2 records like the following image:

- Both records should be of Type "CNAME"
- Replace Host by the "Name"
- Replace Value by the "Data"
GoDaddy
On your GoDaddy dashboard, go to My Products. You'll find here the domain list.
👉 Click on DNS on the domain you want to add to WeWeb:

👉 On the DNS management page, click on Add:

👉 Add 2 records like the following images:


- Both records should be of Type CNAME
- Replace Host by the "Name"
- Replace Points to by the "Data"
OVH
On your dashboard, go to Domain names, then click on the domain you want to link to WeWeb:

👉 Click on DNS Zone:

👉 Click on Add an entry to add two entries like the following images:


- Both records should be of Type CNAME
- Replace Sub-domain by the "Name"
- Replace Target by the "Data"
Go to My domains in your Google domains dashboard, then click Manage next to the domain you want to add to WeWeb:

👉 Click on DNS and scroll to Custom resource records:

👉 Add 2 records like the following image:

- Both records should be of Type CNAME
- Replace Name (@) by the "Name"
- Replace Data (Domain name) by the "Data"
Gandi
Go to Domain on your Gandi dashboard, and click on the domain you want to connect to WeWeb:

👉 Click on DNS Records and on Add:

👉 Add 2 records like the following images:


- Both records should be of Type CNAME
- Replace Name by the "Name"
- Replace Hostname by the "Data"
Cloudflare
We are working on a step-by-step guide to setup a custom domain on Cloudflare.
In the meantime...
🚨 Please make sure that the Proxy status of your CNAME is disabled 🚨
If the Proxy status of your CNAME is "Proxied" as shown below, it will not work.
