🗄 Data Grid
323
In this article, we will show you how to:
- add the Data Grid Element to your project,
- display data in the Data Grid Element,
- let users edit or delete a record.
Add the Data Grid to a Project
When you drag-and-drop the Data Grid Element on the Canvas, you will be asked if you want to import Variables:
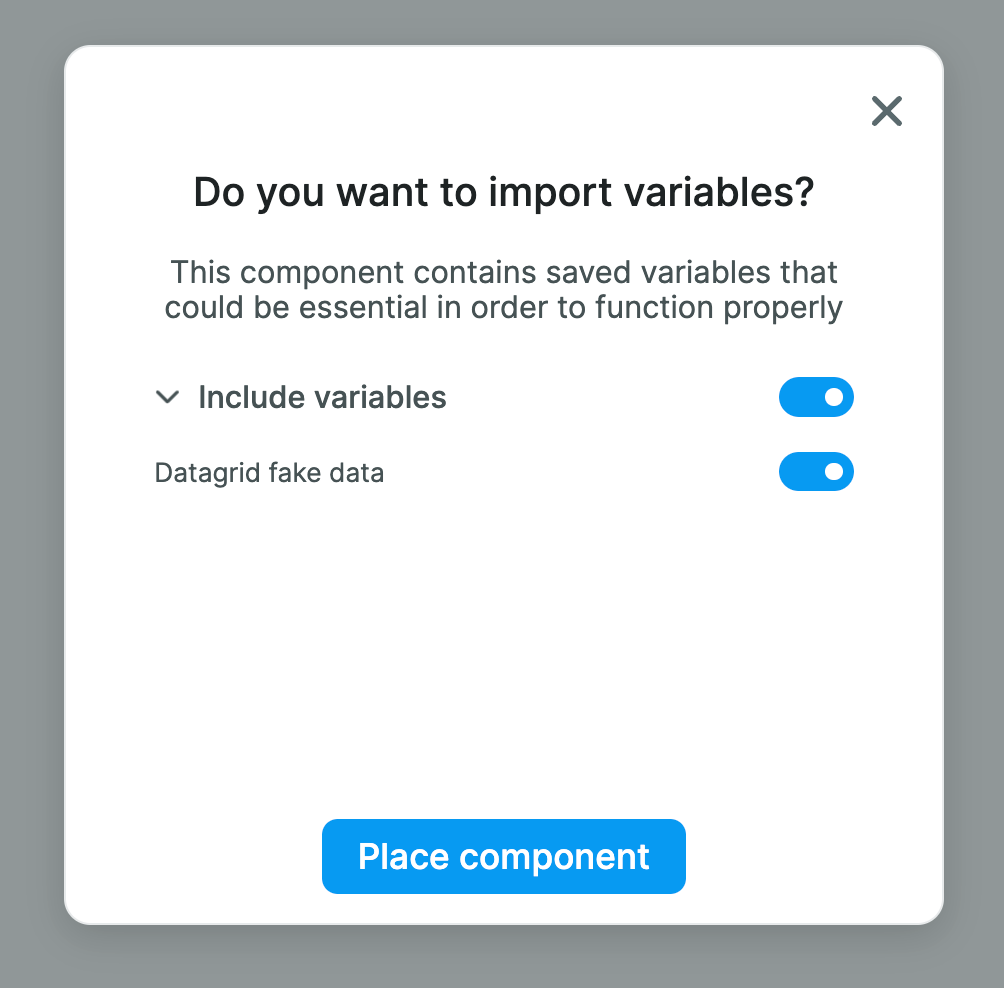
You don't have to but, if you do, the Element will come with a ready-made Variable that contains fake data:
We did this to help you understand what kind of data the Element expects – in this case, a list of items – and how it works.
But let's have a look at how you can display your own data in the Data Grid.
Display Data in the Data Grid Element
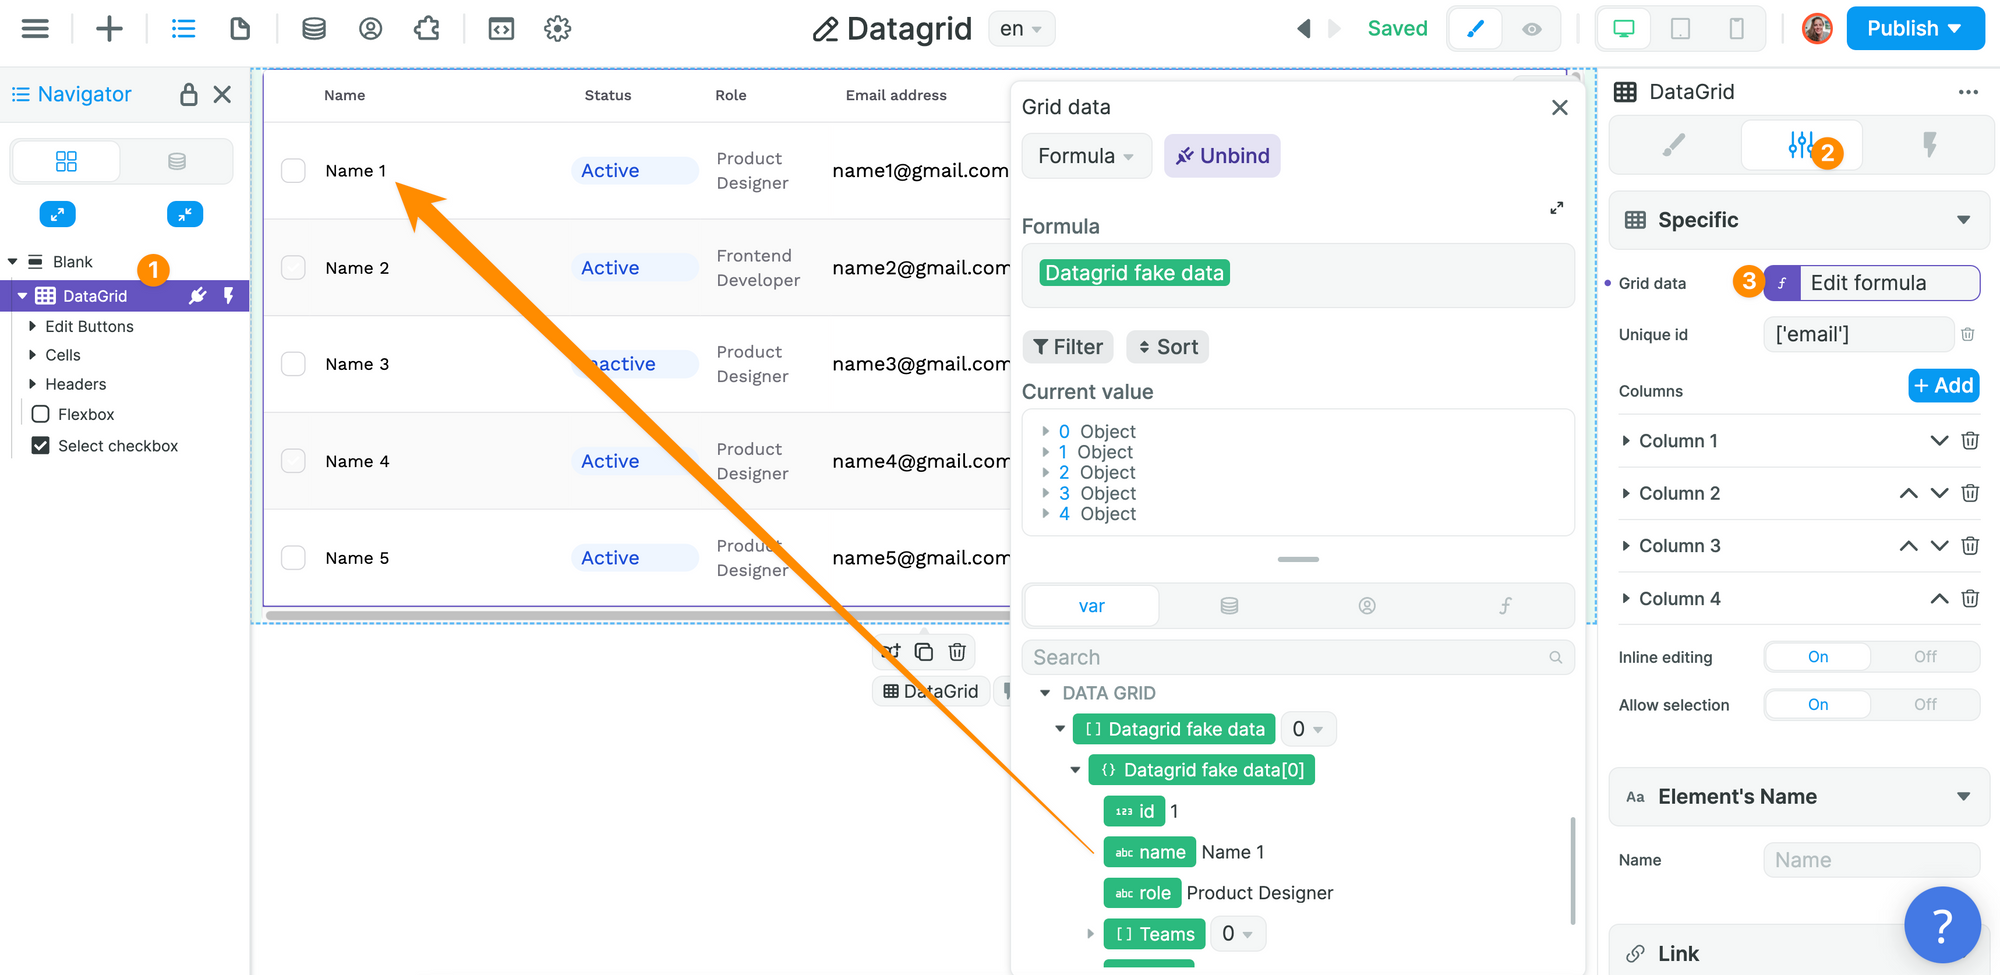
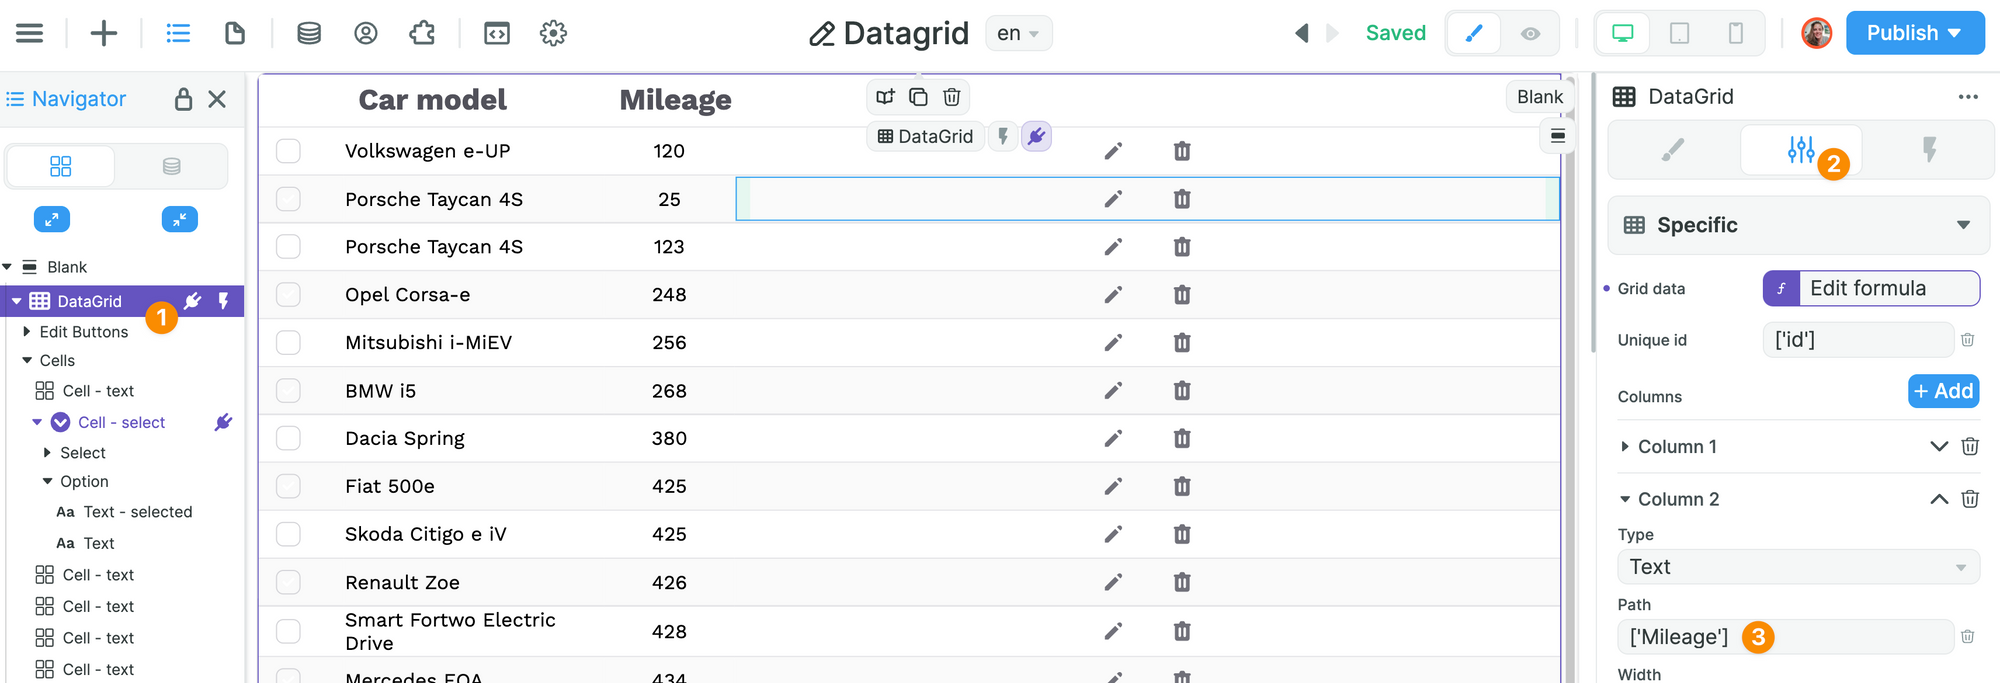
In the example below, we replaced the fake data with one of our Collections, a list of rental cars with their current location and mileage:
To ensure the Data Grid can understand which are unique, we mapped the "Unique id" property to the Airtable id in our Collection.
Then, we mapped each column in the Data Grid to a field in our database:
🔥 Pro Tip 🔥
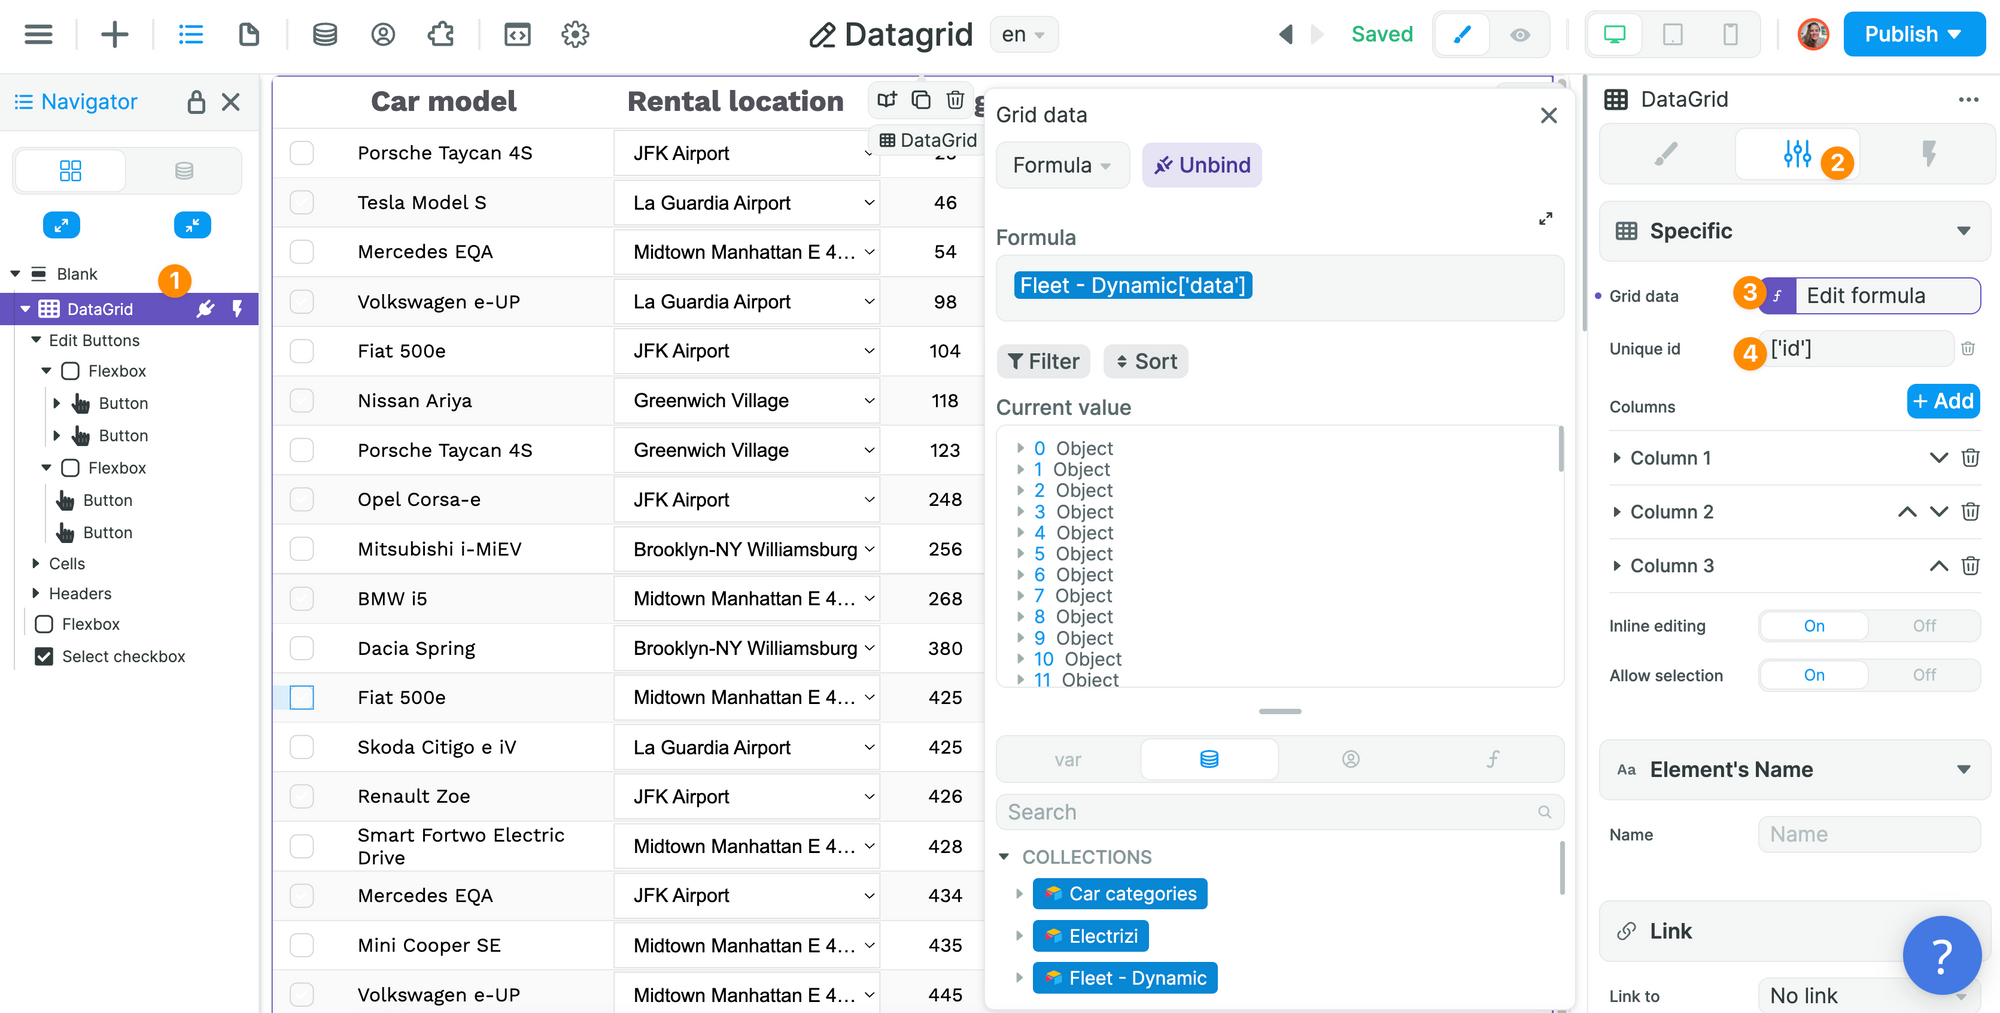
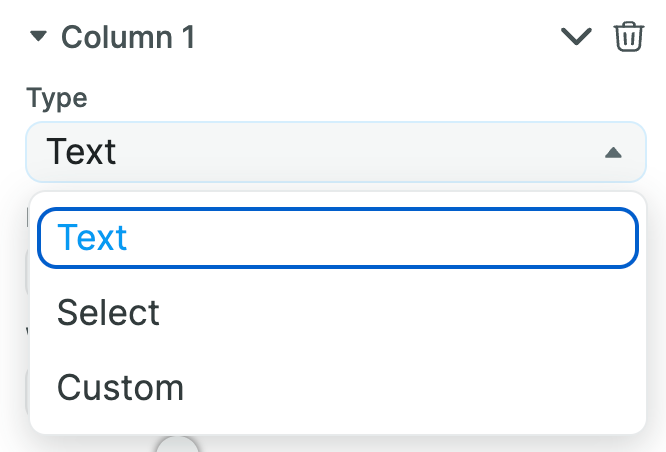
You can currently edit the fields that are available in the Data Grid, i.e. "Text" and "Select" as shown below. You can display other Elements using the "Custom" type but users won't be able to update the values of these fields.
Let Users Edit or Delete a Record
The first thing to know is that if you want to edit or delete a record in your database, you'll need to enable the "Inline editing" option in the Data Grid:
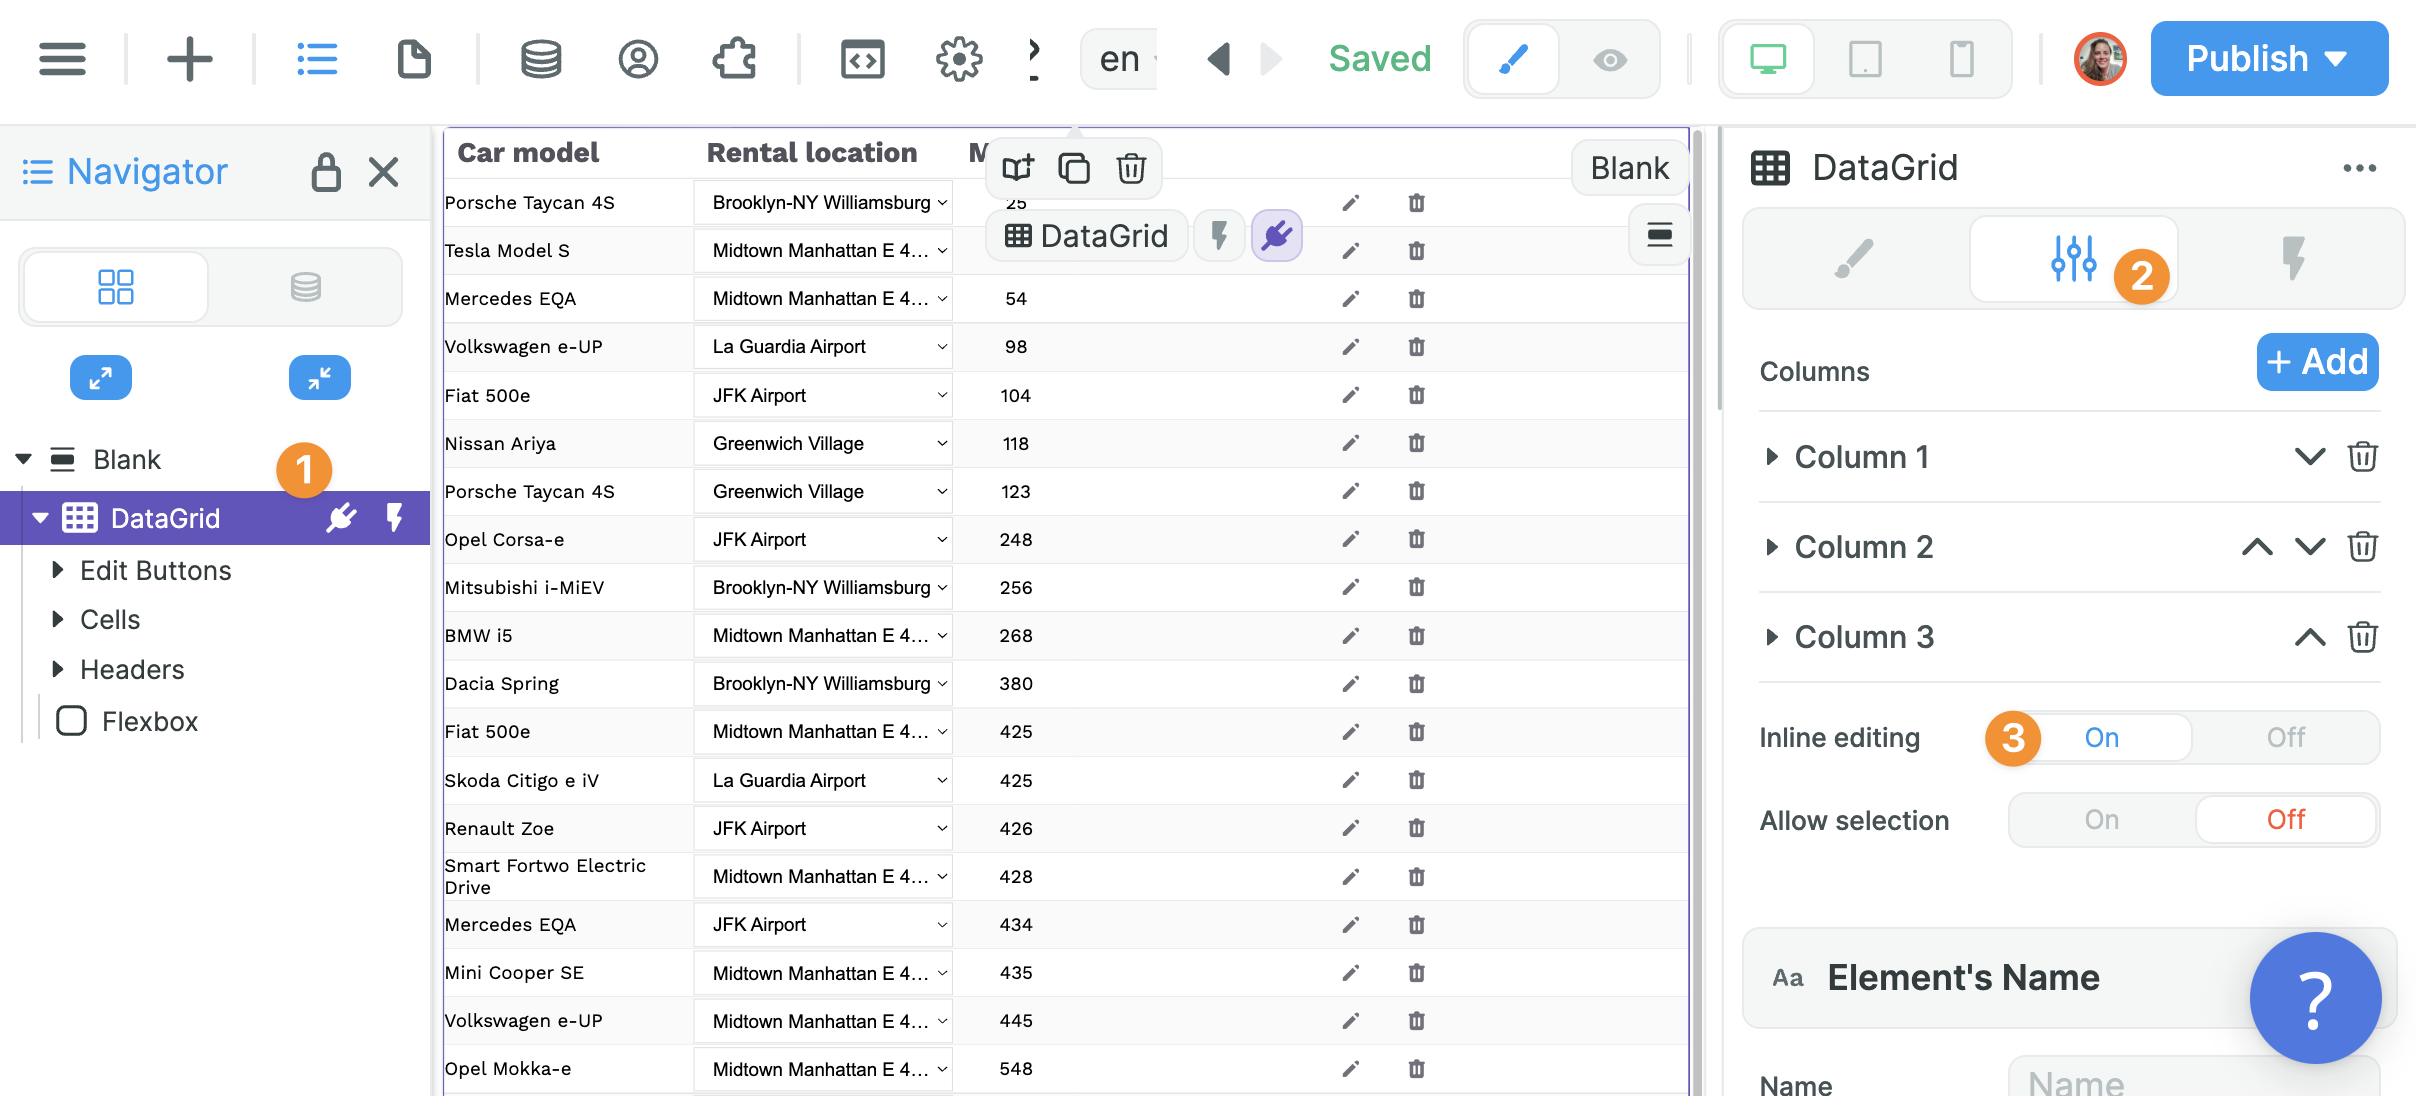
This will display the column with the little pencil (to edit) and bin (to delete) records.
When the user clicks on one of these icons, it will trigger the corresponding Workflow:
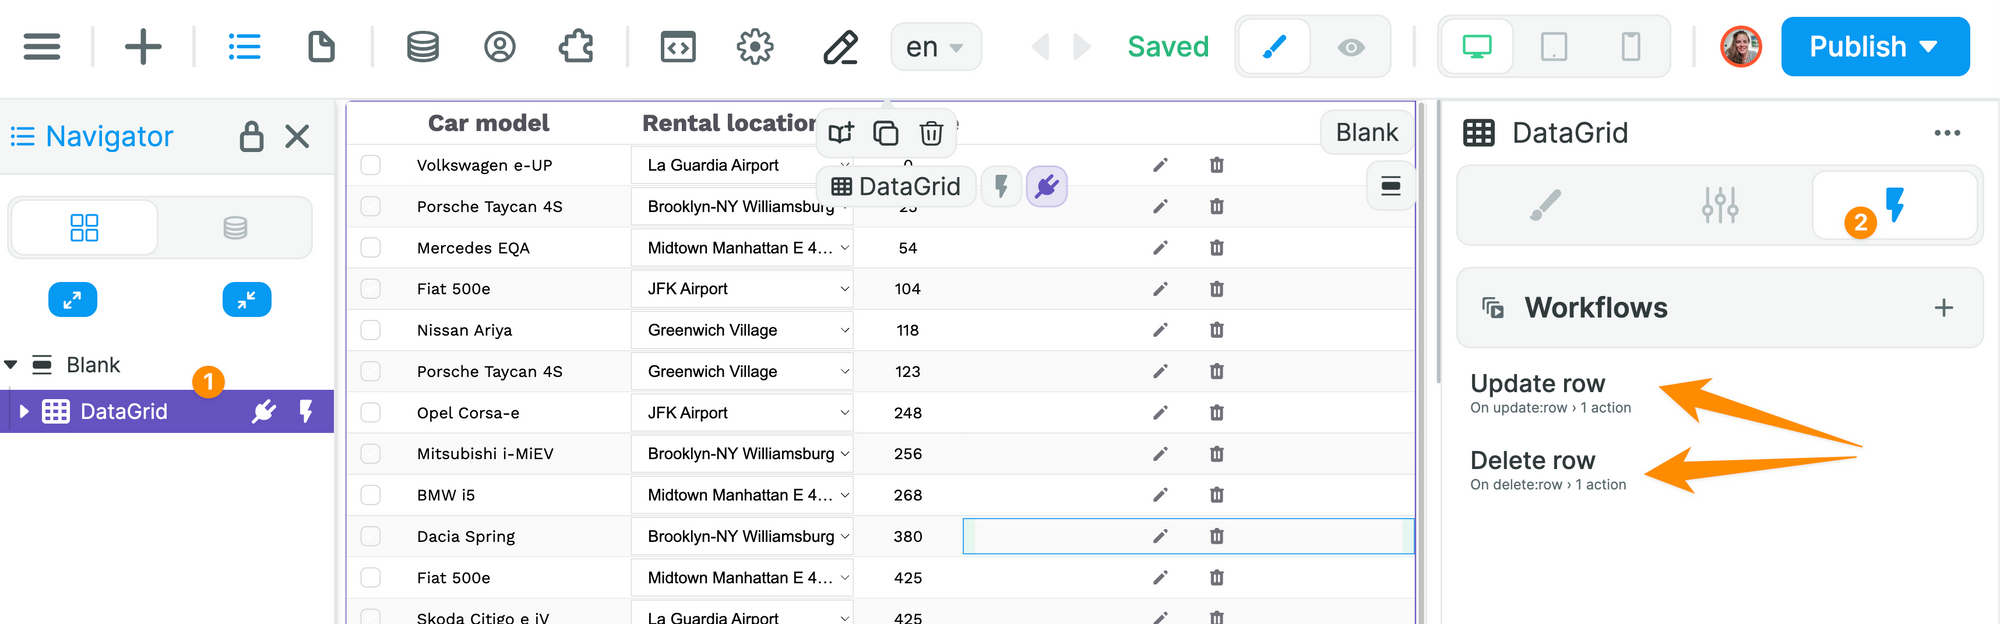
Note that the two triggers are:
- On update row, and
- On delete row.
If you delete them by mistake, you can easily recreate them with these triggers 🙂
To update (or delete) a record, the first thing you'll need to do is tell your database what is the unique id of the item you selected:
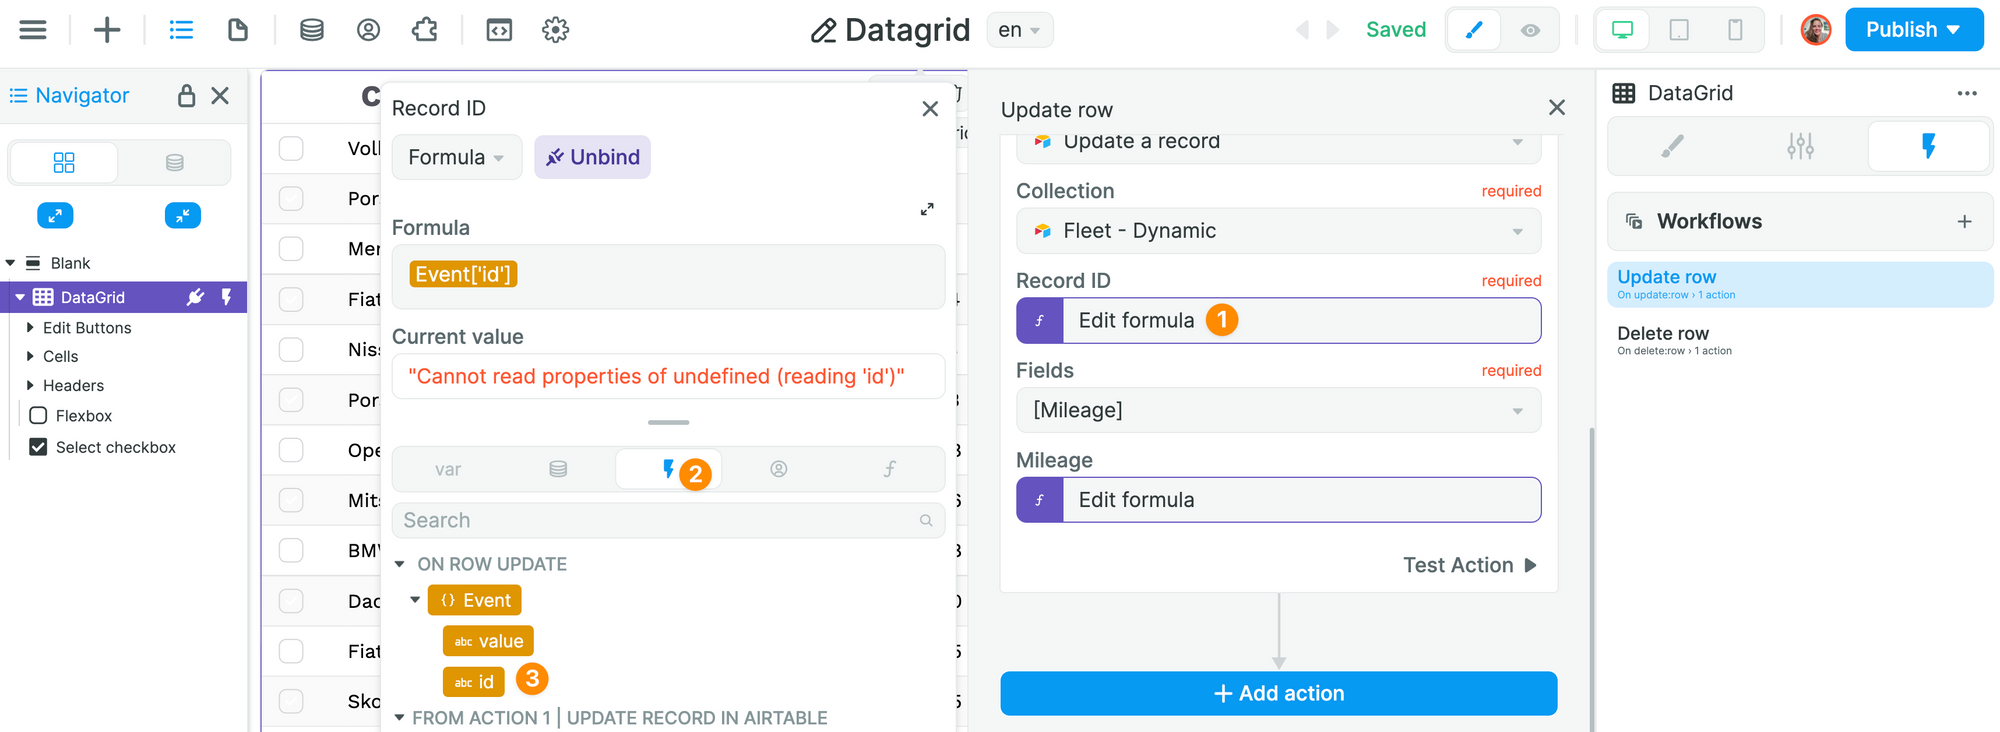
Then, you can update the fields you want in your database.
In the example below, we are updating our record with the value we have for the mileage field in our Data Grid:
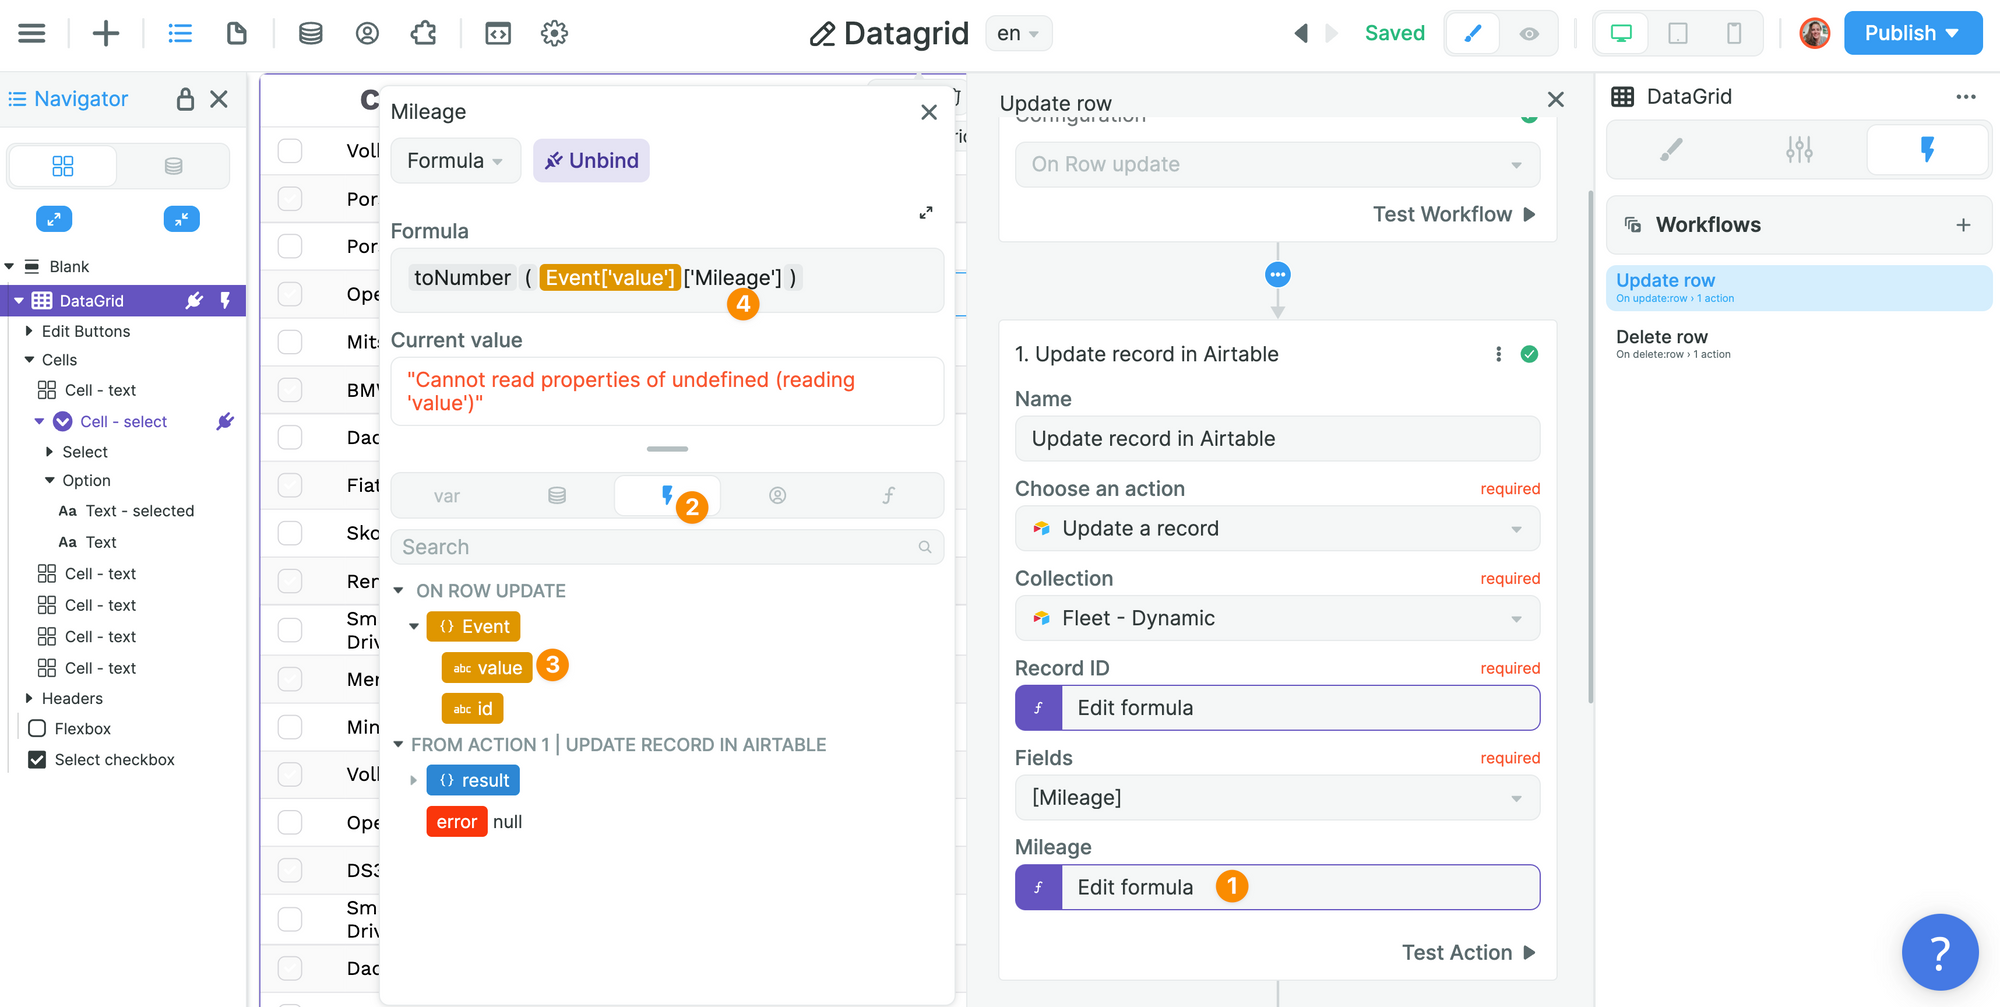
Because we used a Text element in the Data Grid, we added the "toNumber" formula to convert it into an integer which is the expected format for this field in our database.
Because the "Event['value']" Variable is an Object that contains all the fields of the row, we need to add ['Mileage'] to return the value of that column. This should match the Path we defined when setting up our Data Grid:
🚨 Warning 🚨
Note that for now the "Current value" is not displayed when we bind our event info and we have to go to Preview mode to test the Workflow. We will improve this in the near future so you can test this type of Workflows like others.