🏓 Dynamic Collection Item
423
What do we mean by “static” versus “dynamic” page?
A dynamic page is a page that is created on-the-fly, when the user clicks on a button to learn more about an item for example.
By opposition, a static page is a page that is pre-rendered, it exists before the user needs to access it.
When should you create a dynamic page?
If your content doesn't need to rank with search engines and you need to create pages on the fly based on the current user's information and interactions, you can create Collection Item pages dynamically in WeWeb.
How to Create Collection Item Pages Dynamically?
Let's say you have a Collection List and you want to create a page dynamically when the user clicks on a Collection List Item.
Step 1 – Create a template page
Before you can redirect users to an Item page, you'll need to create a template page.
In the example below, we created a template page to display the details of a job offer:
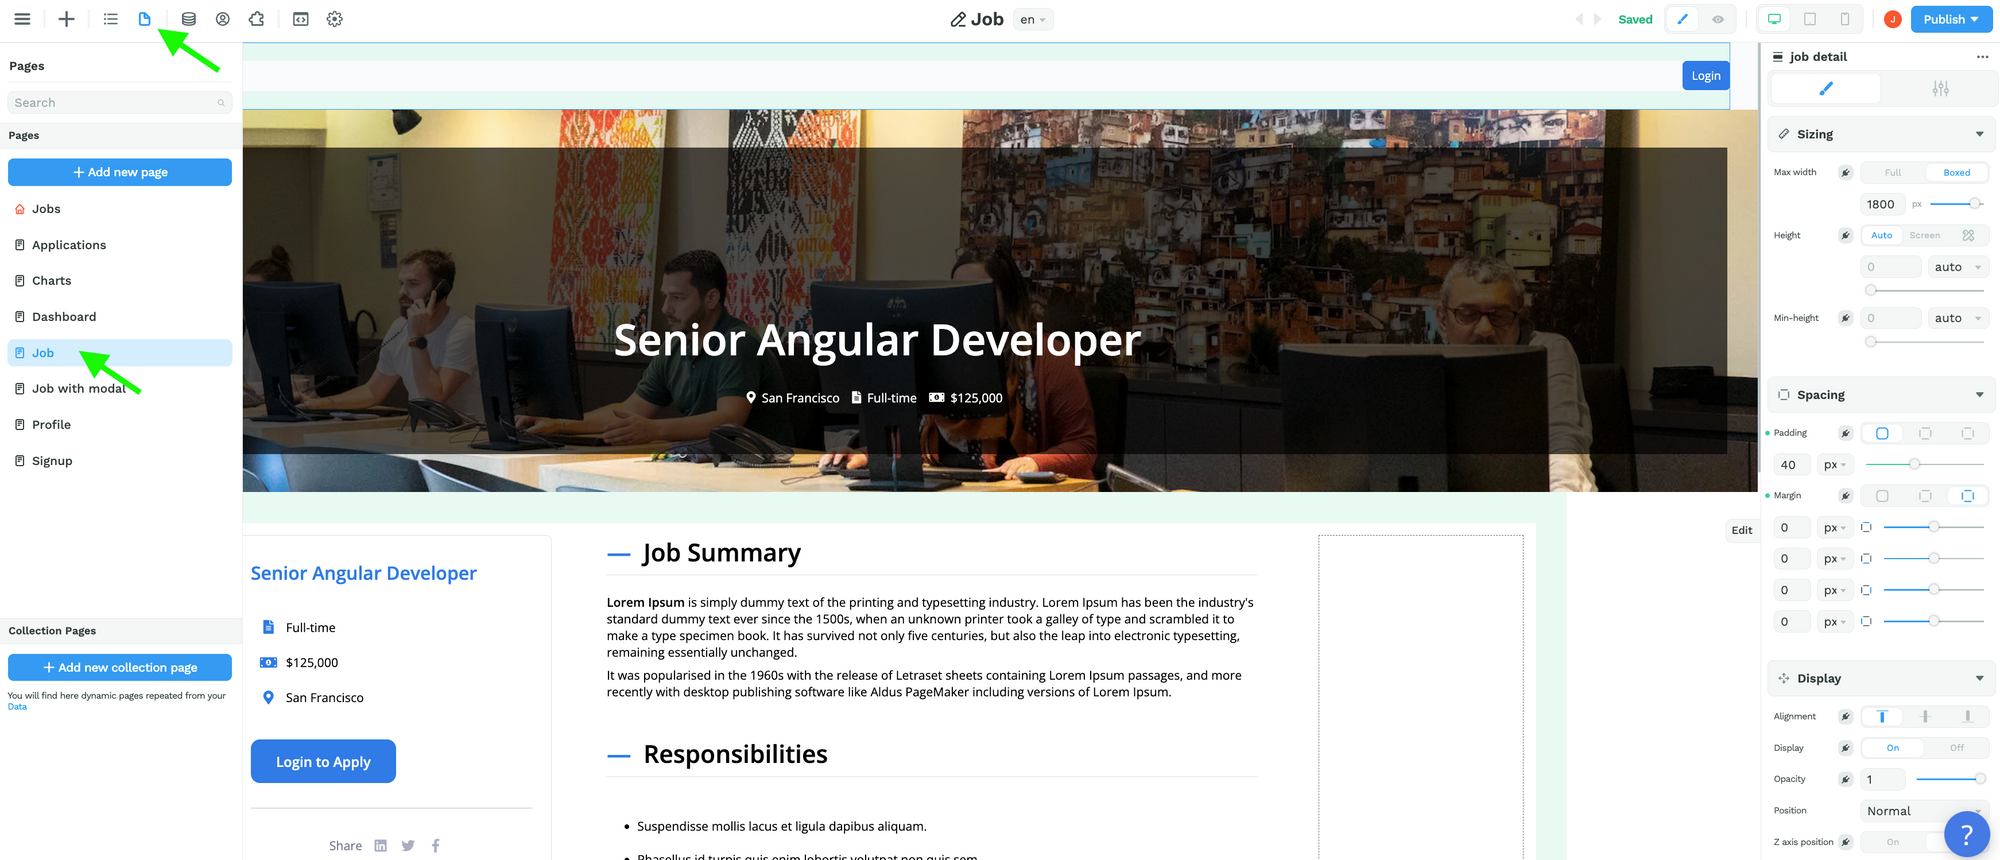
We will use this template page to display every item in our "Jobs" Collection List.
Step 2 – Create an empty Query string variable
Then, you'll want to create an empty Variable of type "Query":
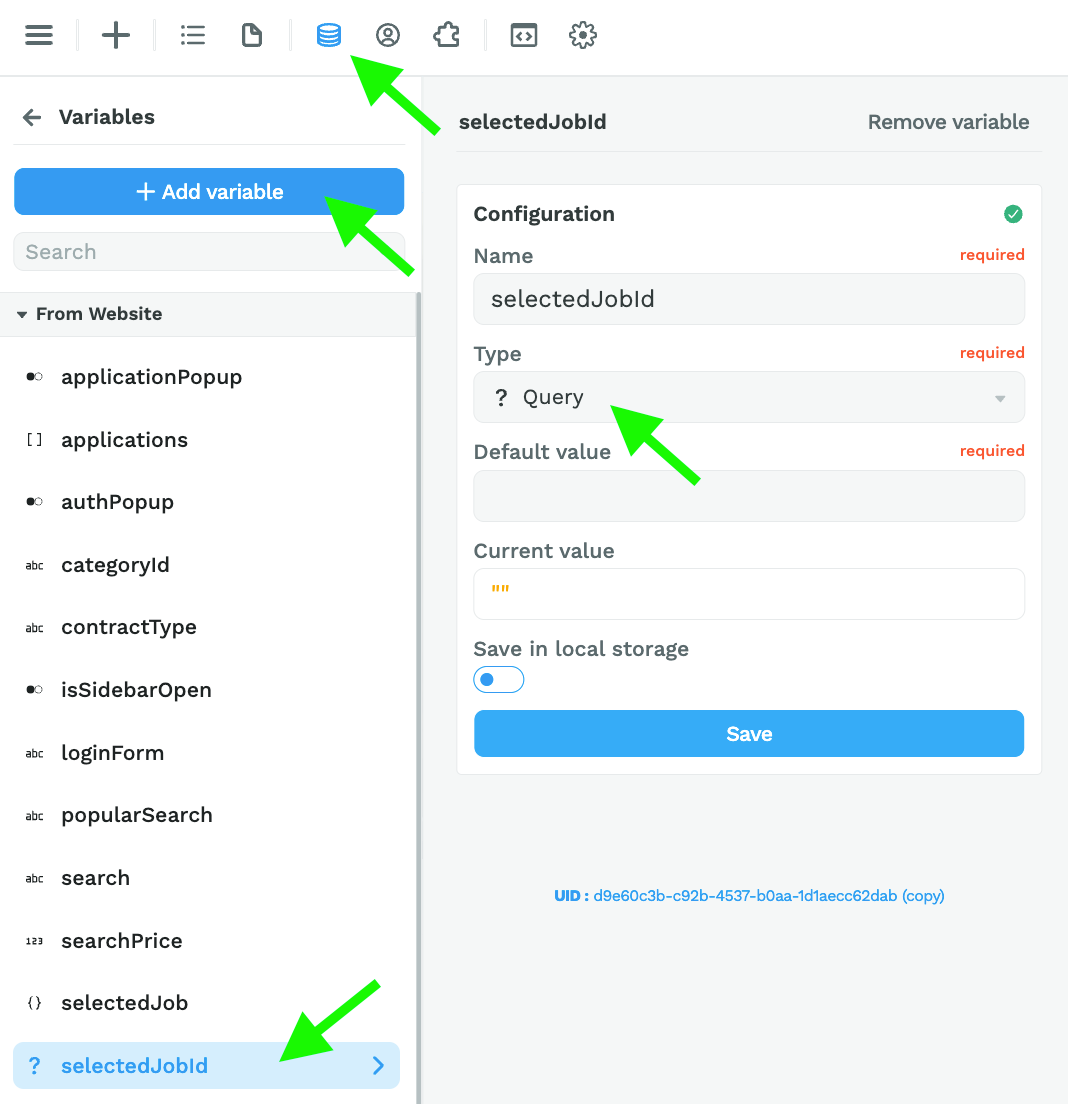
You'll use this to add a query string to the URL of the page you create dynamically.
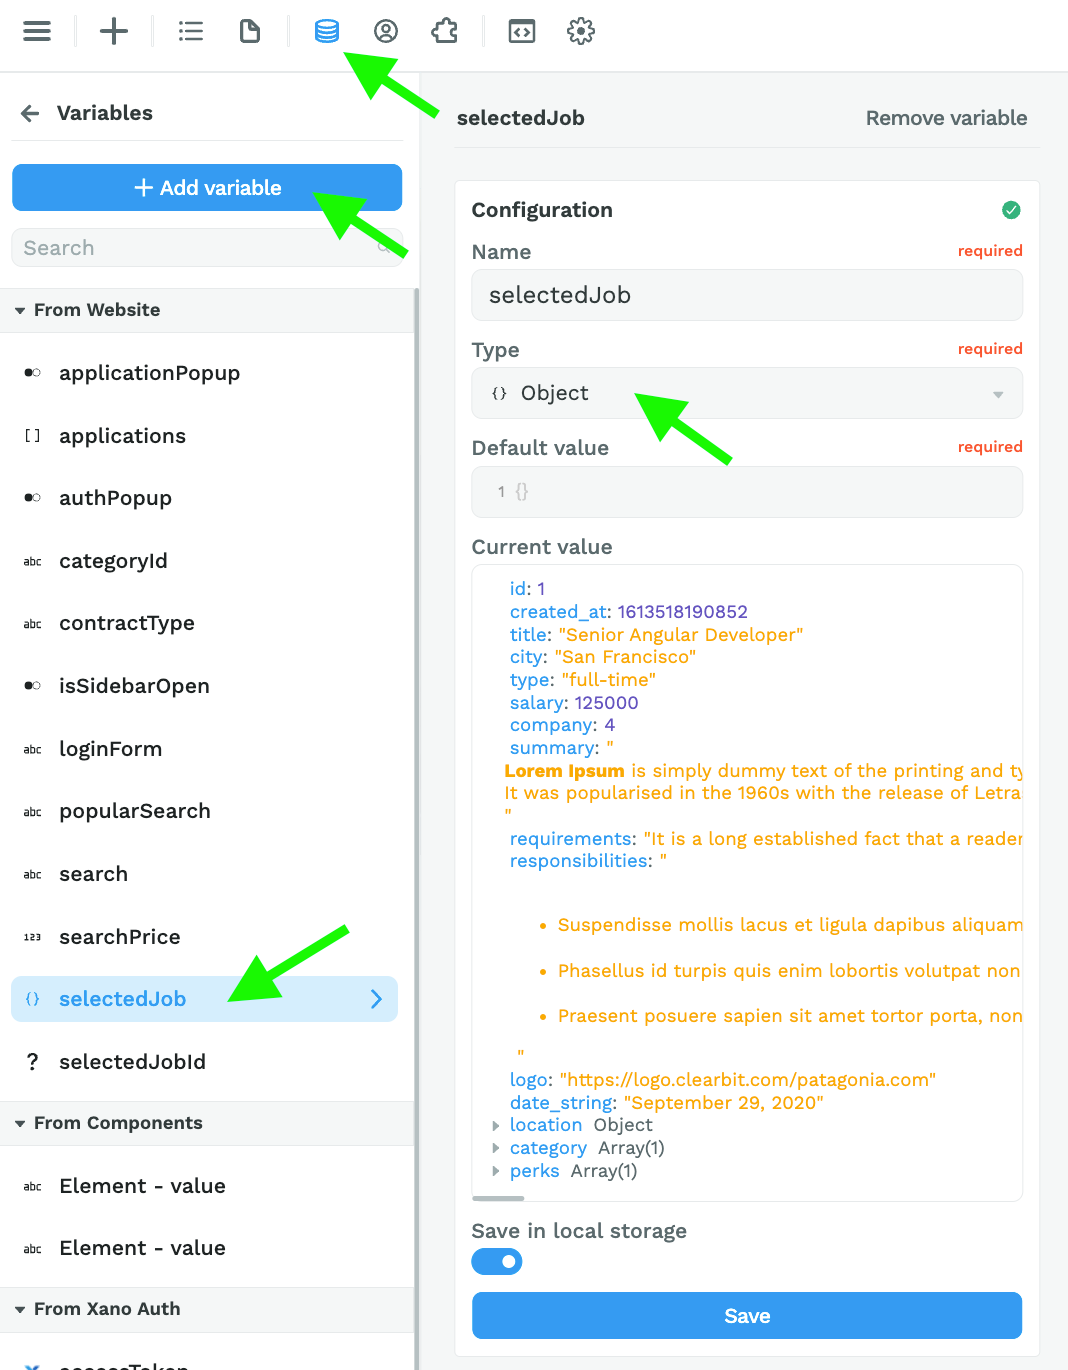
Step 3 – Create an empty Object variable
Once that's done, you'll want to create an empty variable of type Object.
In the example below, you see the variable after it has been set with the information from a Collection List Item (more on that in step 4) 👇
Step 4 – Create a Workflow to change page
In the example below, we want to redirect the user to the template page when they click on a "Job" offer:
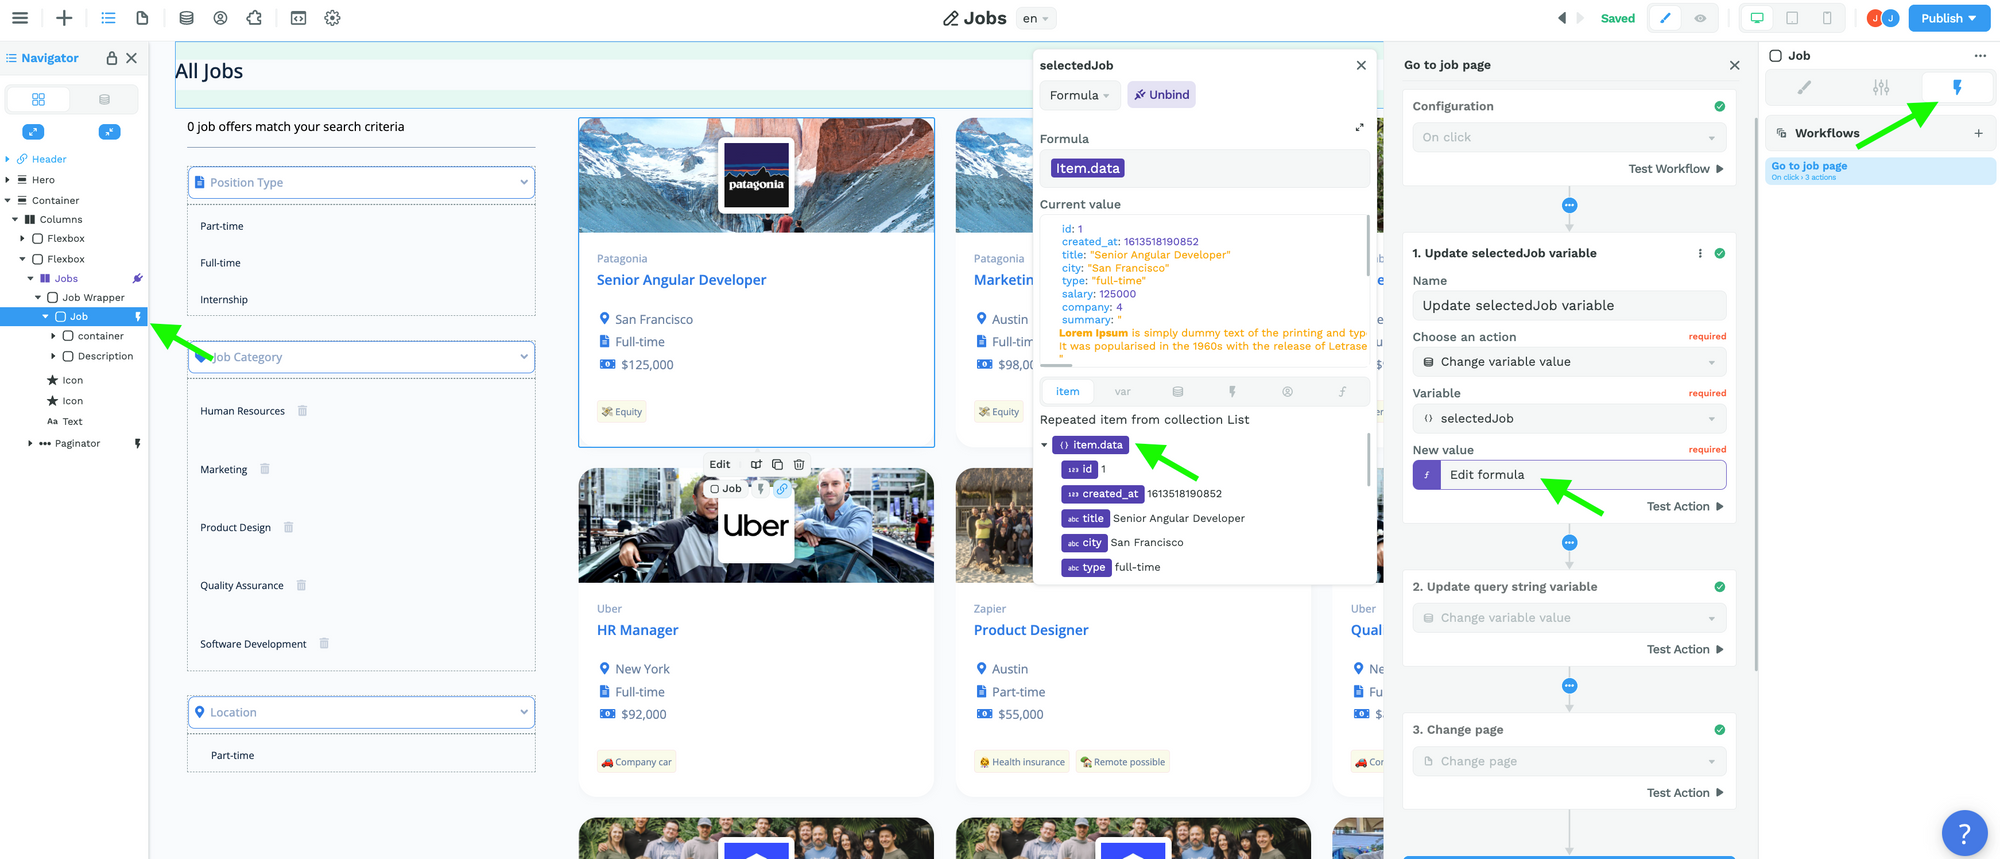
There are 3 steps to our workflow:
1- We update the selectedJob variable (of Object type) with the current Collection List Item, i.e. "Item.data" as shown above ☝️
2- We update the selectedJobId variable (of Query type) with the id of the current Collection Item, i.e. "Item.data['id']"
Since the Query variable expects a string and our job id is a number, we make sure to convert it into a string using a no-code Formula:

3- We change page, redirecting the user to the "Job" template page we created in step 1.
Since we want to display a query string in the URL of the new page, we need to add a parameter:
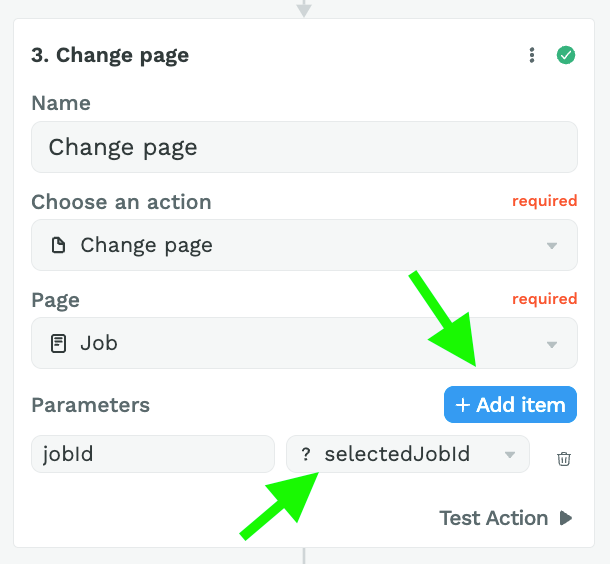
You can call the key of the parameter whatever makes sense to you (here we chose jobId) and pass your query string variable as a value.
Once we’ve done that, we can go back to preview mode and see that when the user clicks on a job offer:
- the variables are updated,
- the page changes, and
- the query string at the end of the URL matches the selected job's id.
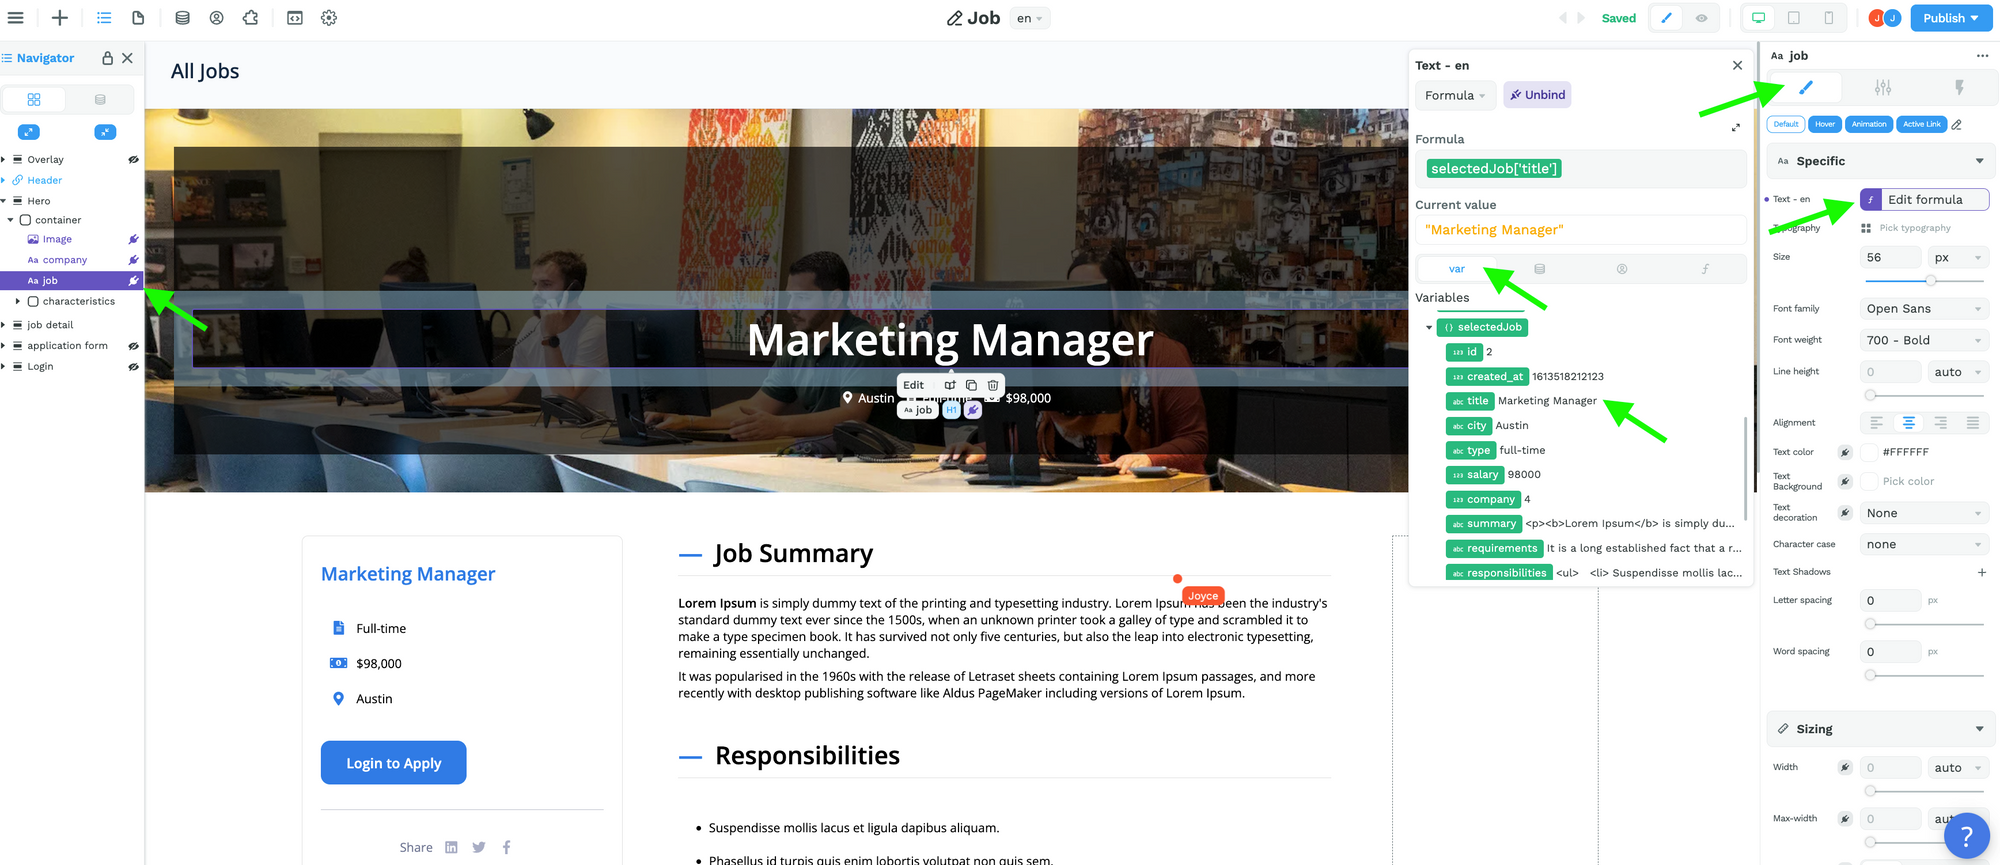
Step 5 – Display item data on the template page
Now that our selectedJob variable is no longer empty (updated by the workflow in step 4), we can bind the Elements on our "Job" template page to the fields in our selectedJob variable: