📮 Form Container
327
Form containers are the go-to element when you need the users of your web-app to send you information via the user interface.

For example:
- Subscribe to a newsletter,
- Update their profile information, or
- Create a new entry in your database.
In this article, we show you how to:
- Add a Form Container,
- Style a Form Container
- Add Input Fields,
- Work with Component Variables,
- Change the Data Type of an Input Field,
- Trigger a Workflow on Form Submit,
- Display a Success or Error Message when a Form is Submitted.
But first, let’s cover a few essentials.
We cover these at length in later sections on Workflows and CRUD, but it helps to understand how things work during the Design phase.
Form Essentials
1- Form Containers are the go-to element when you need the users of your web-app to send information via the user interface.
2- When you add a Form Container or Form Input Field on the Canvas, it will automatically create one Component Variable for each Form Input Field.
3- To keep your Workflows manageable when you start using Forms for CRUD, we recommend you rename the Component Variables with descriptive names. (more on that below)
4- To send data from a user interface to a backend, the Data Type of the Input Fields in the frontend must match the Data Type of the Fields in the backend.
5- If you want to trigger a Workflow when a user submits a Form, make sure to add the Workflow to the Form Container element with an “On Submit” trigger. Form submissions will not work if the Workflow is on the Button element.
Add a Form Container
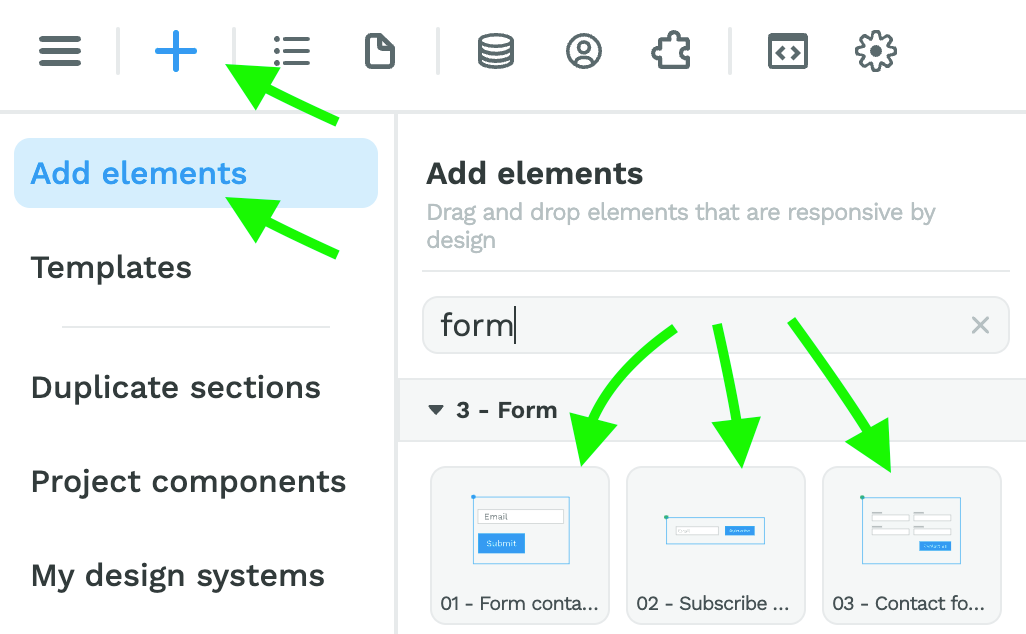
In WeWeb, you can drag and drop a form container in a Section on the Canvas.
You'll find regular form containers in the "Add" menu > "Add elements":
Some plugins come with specific form containers. For example, when you setup the Xano Auth plugin, you will get access to specific login, signup and user profile forms.
You'll find plugin specific containers in the "Add" menu under the plugin name, for example “Xano Auth”:

Style a Form Container
To style a Form Container, all you have to do is select it on the Canvas or in the Navigator.
Once you’re sure you’re on the Form Container, you can access its style settings as you would any other element:
Add Input Fields
Once you have a Form Container on the Canvas, you can add all sorts of Form Inputs inside that Form Container:
- Radio buttons,
- Multi-selects,
- File upload,
- Time input,
- Toggle, etc.
To add a Form Input in WeWeb, go to the “Add” menu:

🔥 Pro tip 🔥
To save time, you can also copy / paste Form Inputs in the Navigator or on the Canvas and change the Input type in the Form Input’s specific settings (more on this two sections below).
Form Component Variables
Once you add a Form Container on the Canvas, you will be able to access its Component Variables in the "Navigator" > "Variables".
In the example below, you can see that we have one Component Variable for each input field:

In preview mode, when the user interacts with the form, the component variables in the Navigator are updated:

🔥 Pro Tip 🔥
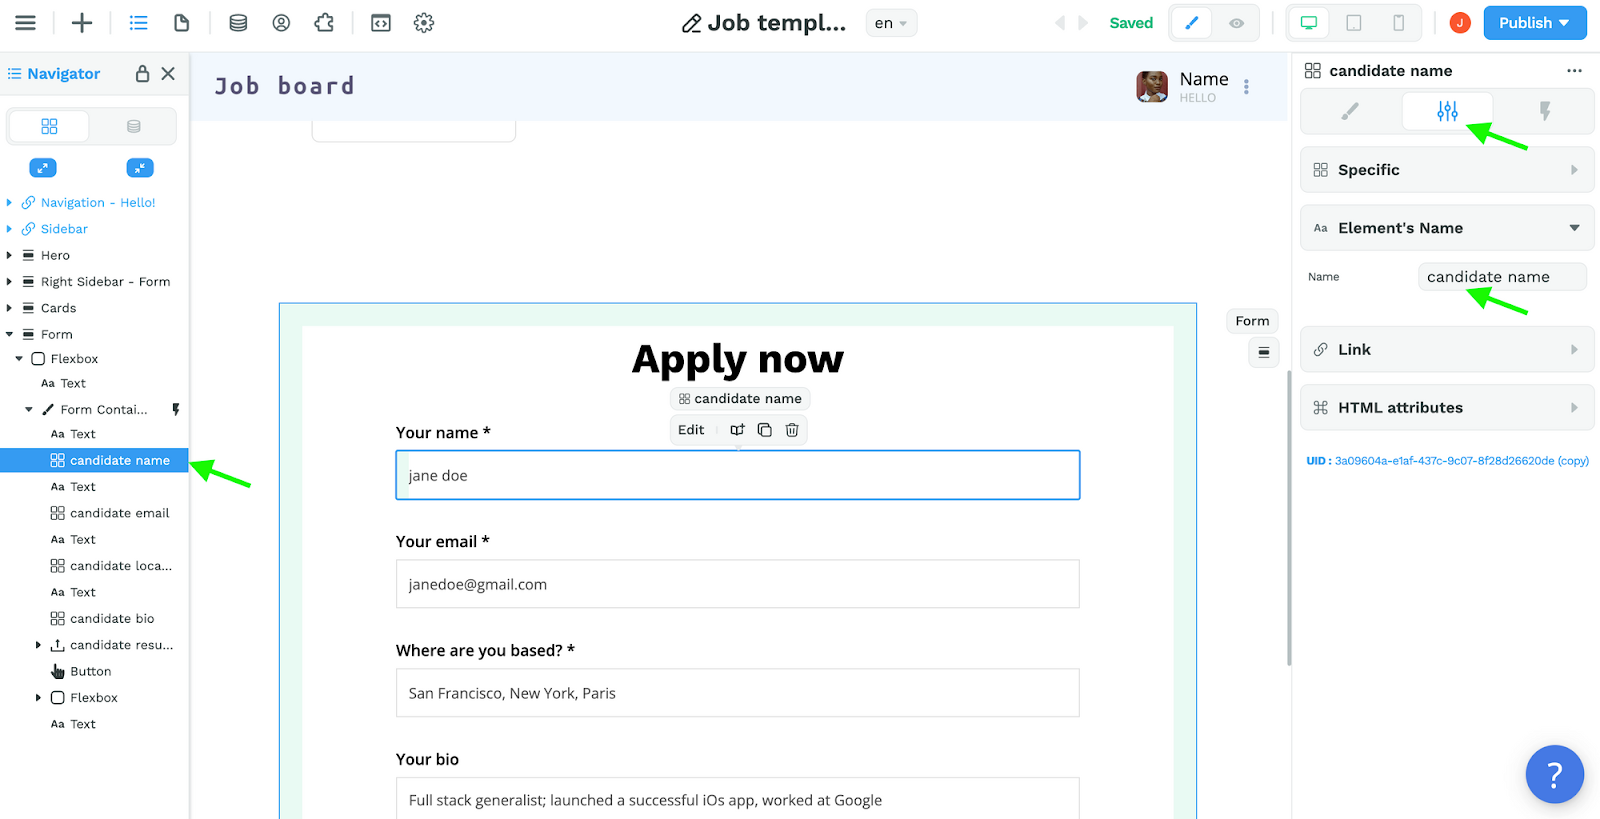
We highly recommend that you rename component variables based on the expected input. It'll become more and more important as your app grows.
Here's how you do it:
Change the Data Type of an Input Field
To change the Data Type of an Input Field:
- select the Input Field you wish to modify,
- go to the Specific Settings tab in the Right Panel, and
- change the “Input type”

This is important because, when you are sending data from a frontend to a backend, the backend expects certain input types.
Therefore, you need to make sure that the frontend is sending the information in a form that is accepted.
If you try to send a string to a backend that expects an integer, your CRUD will fail.
If you try to send a string to a backend that expects an array of strings, your CRUD will also fail.
Trigger a Workflow on Form Submit
For the Form to be validated properly when the user submits it, the workflow should be on the Form Container, not on the submit Button.
The workflow should be triggered On submit, when the user submits the form, not On click when the user clicks on the submit button.
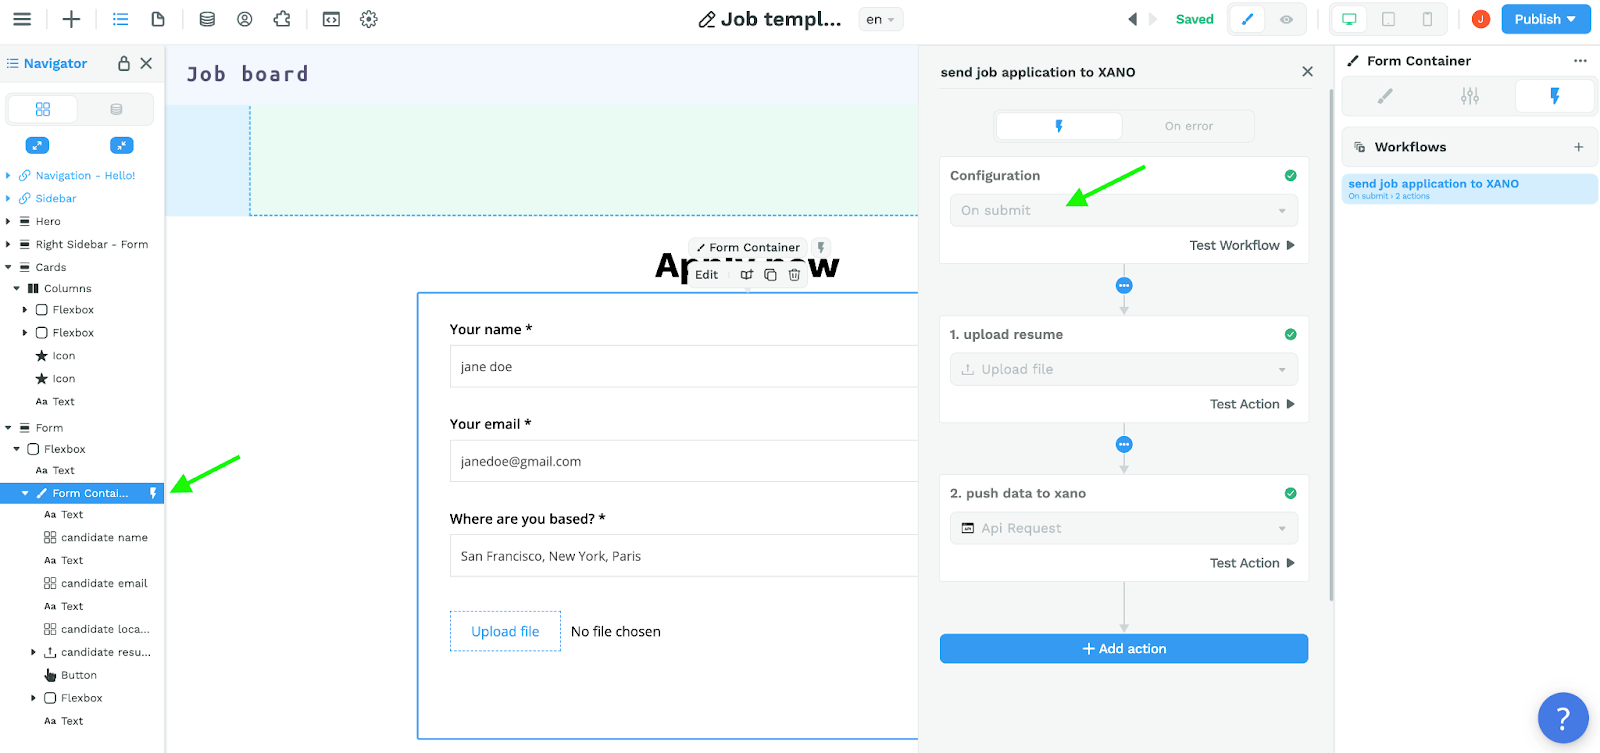
🔥 Pro Tip 🔥
To check that the Workflow is on the Form Container, look out for the lightning icon ⚡️ in the Navigator.
Display a Success or Error Message
At WeWeb, we have decided to give you complete freedom over how you want to design and display a success or error message after a user submits a form.
You could add a short text below the submit button to inform the user that you received their form submission.
Or you could hide the Form Container and replace it by a funny GIF.
Whatever floats your boat.

The logic is as follows:
1- Design your success and error messages,
2- Create two boolean variables with the default value “false”. For example, “displaySuccess” and “displayError”.
3- Bind the display setting of each container to the relevant variable. The success message container to the “displaySuccess” variable and the error message container to the “displayError” container.
4- Add two “Change variable” Actions to the Workflow: one to change the “displaySuccess” variable to “true” when the Workflow is successful, and one to change the “displayError” variable to “true” when the Workflow runs into an error.
Not sure how that would look in real life?
Read our step-by step guide to display messages after a Form submission.