📄 Pagination in the Frontend
510
In this tutorial, we show you how to add pagination in the frontend.
🚨 Warning 🚨
This is not intuitive but, for the Paginator element to work, the Collection it relates to must be bound to Collection, not Collection['data']
Adding Pagination in the Frontend
Before we go any further, note that when you add pagination in the frontend, all your collection items loaded in the user's browser, even if only 10 items are displayed on the page.
If you do not want this to happen, consider adding pagination in your backend before fetching the collection in WeWeb.
Learn more about server-side (backend) vs client-side (frontend) pagination here.
If you do want to add pagination in the frontend, here's how you do it in WeWeb:
🔥 Pro Tip 🔥
With frontend pagination, data that is not displayed on the page is still accessible in the browser.
This has two consequences:
1- the data being loaded may still be heavy enough to slow the browser down or strain your visitors' data plans
2- even though it is not displayed on the page, the data is accessible to anyone who knows where to look for it, i.e. in the inspector / network.
If you want to avoid this, consider adding pagination in the backend instead.
🚨 Warning 🚨
Backend pagination is not available with Airtable because Airtable is a database, not a backend. If you want to filter data before the fetch, you'll need to work with Airtable views or consider using a real backend. Xano and Supabase are great no-code backend options.
Styling the Paginator
You can style any element inside the Paginator, change the style of the arrows or change the color of the active page number for example.
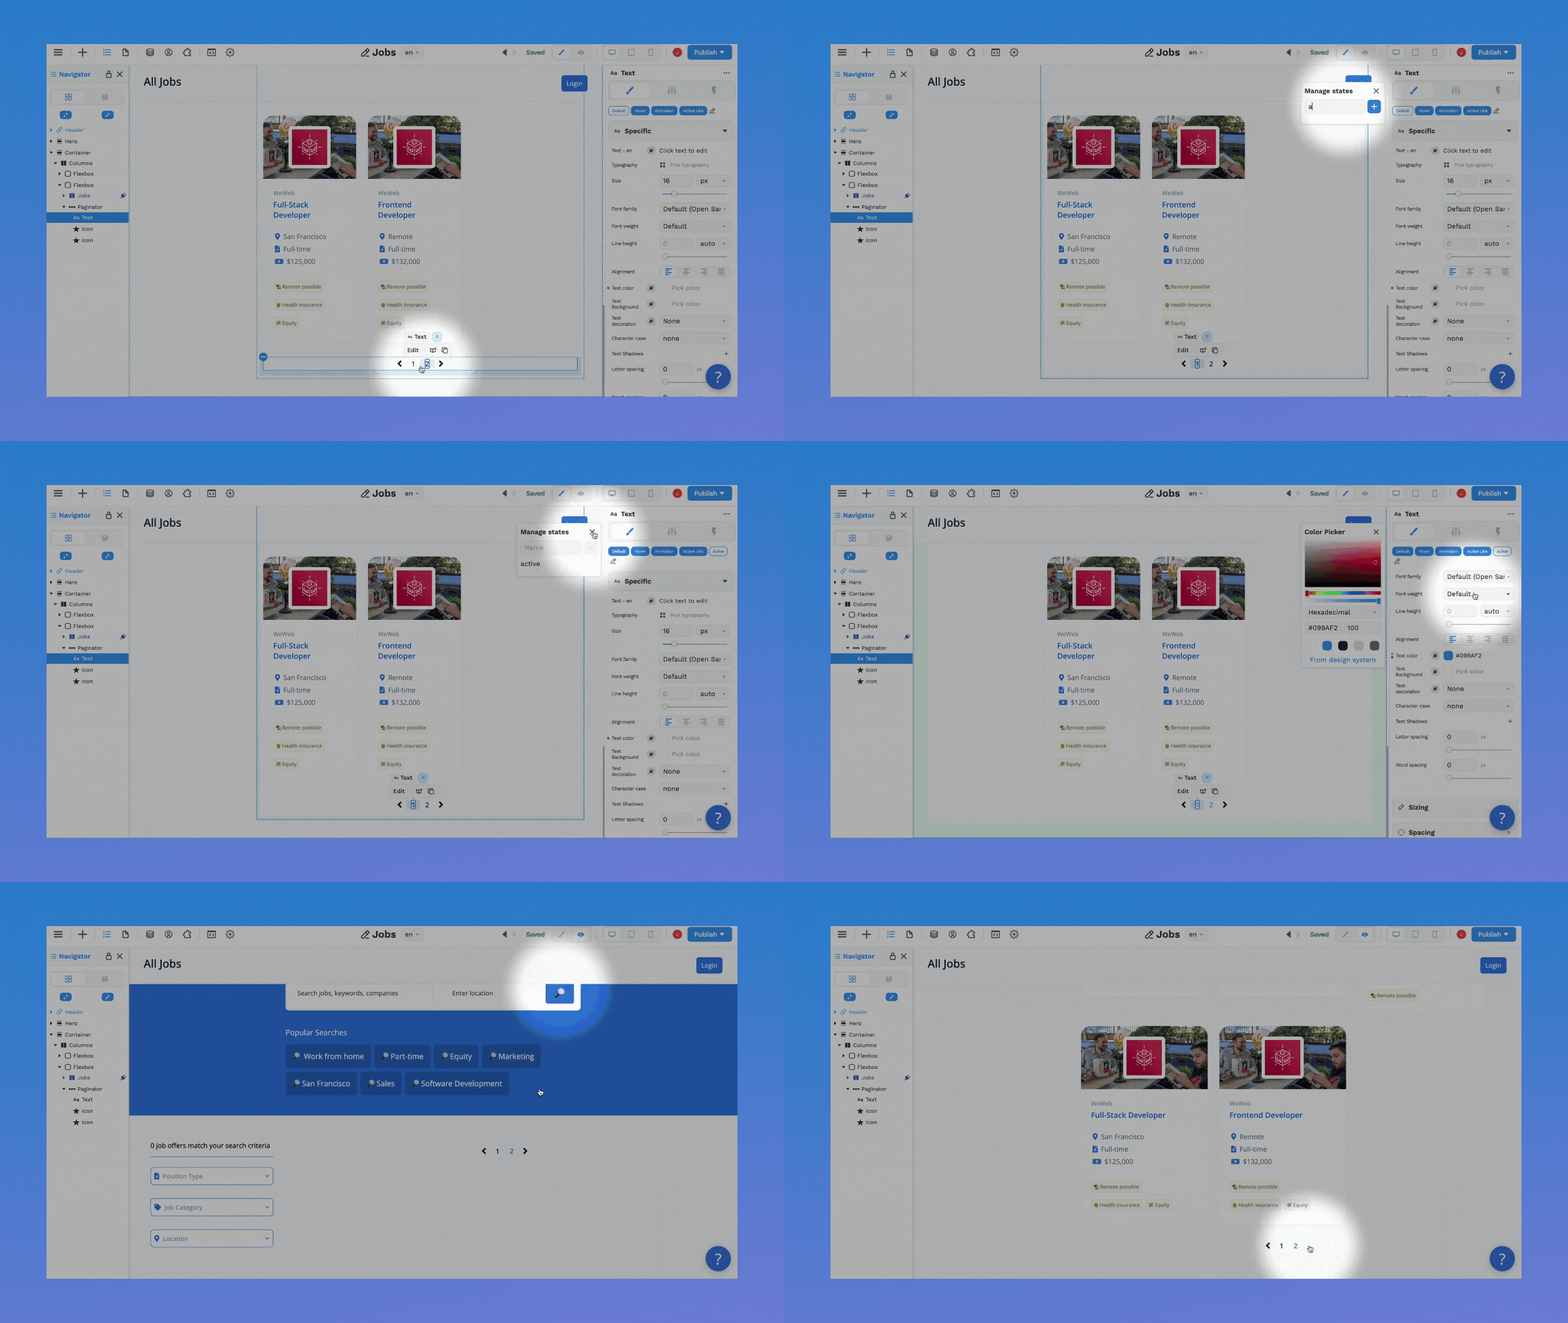
To change the color of the active page number:
- select the "Text" element inside the Paginator,
- create an "active" state in the style section of this element,
- select the "active" state and style it like you would any other state.
In the example below, we styled the Paginator's "Text" element so that the active page number appears blue and bold:
Setup a Load More Button
You don't have to use the Paginator element to paginate your Collection.
You could add a Button element with a workflow to load more items from your Collection.
Here's how.
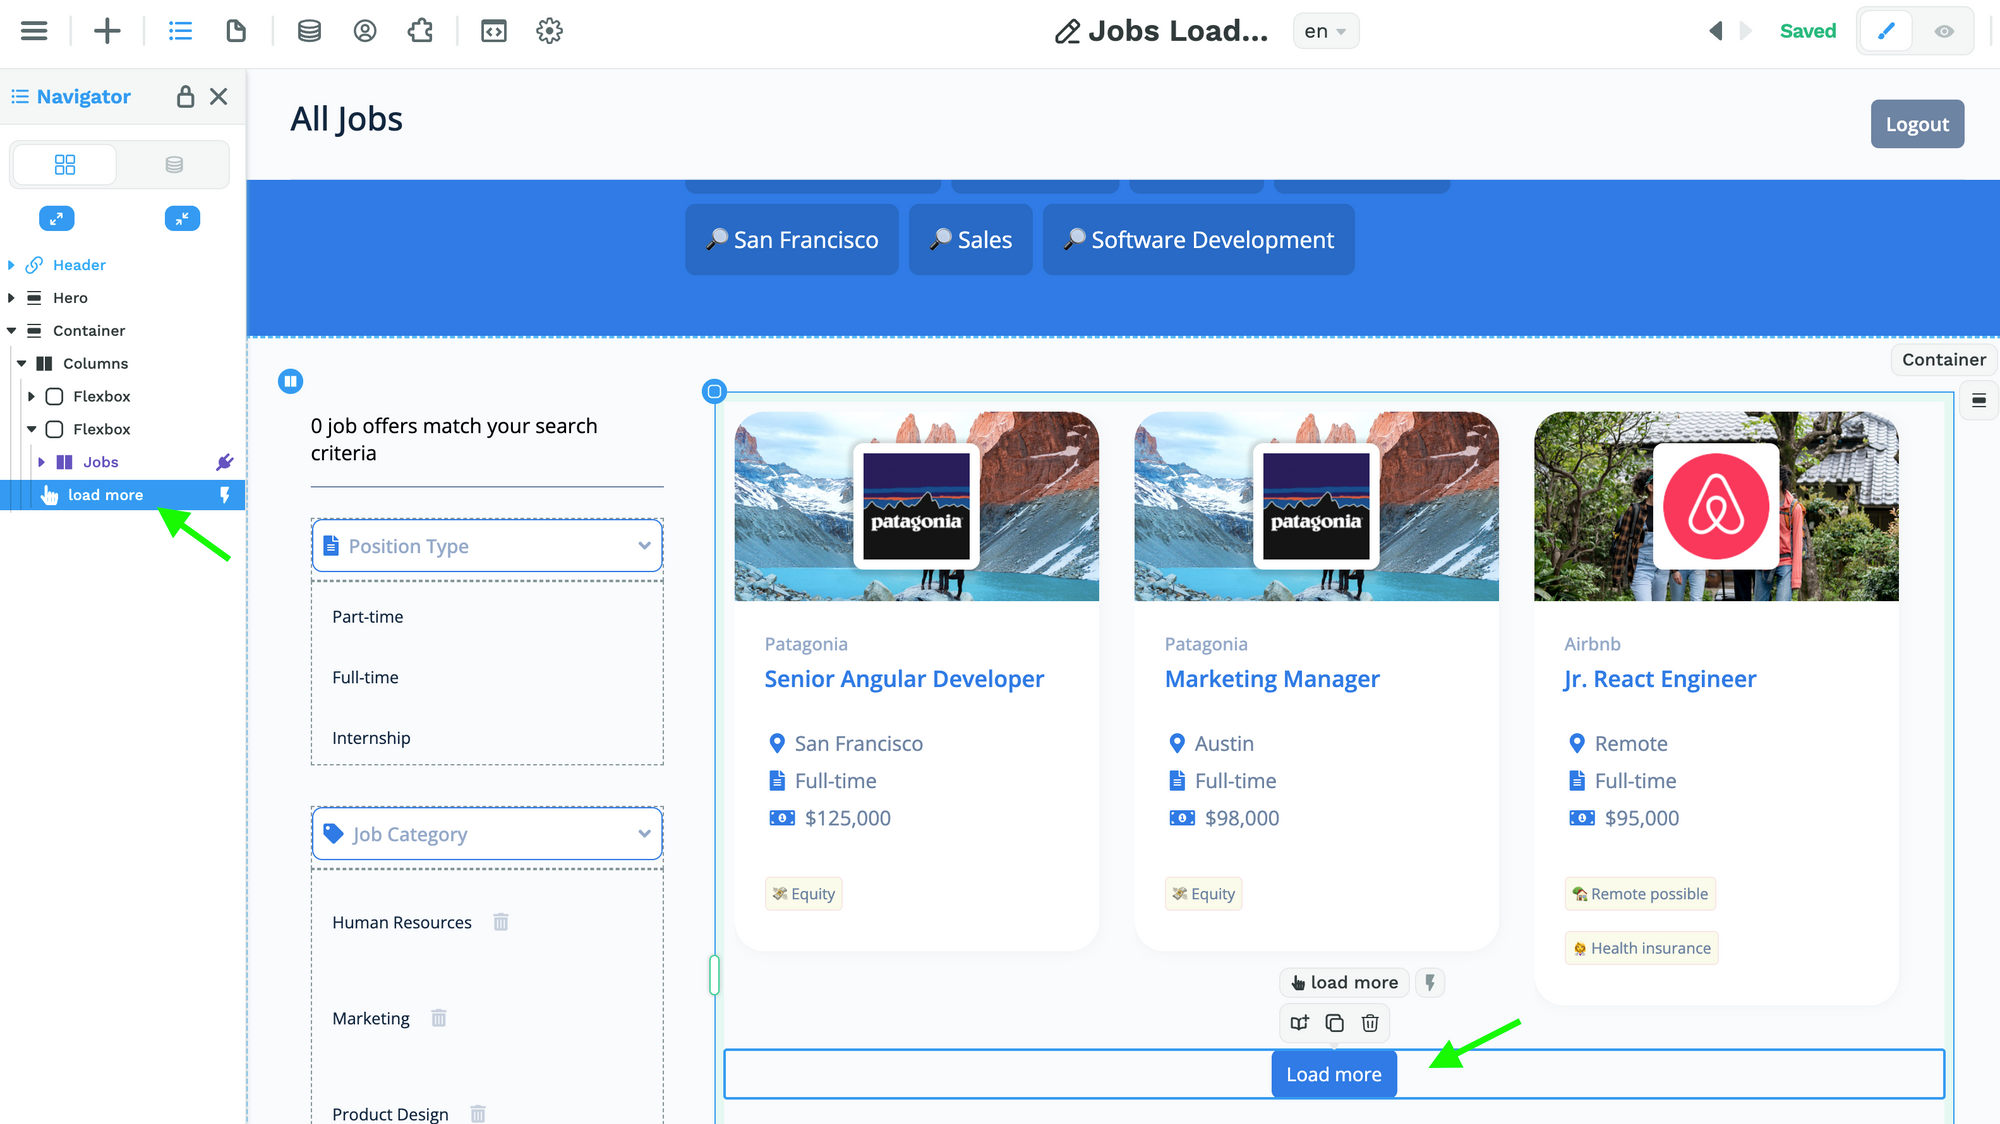
Step 1: Add a Button to your Page
Drag-and-drop a Button on the Canvas or Navigator, wherever you want to display it on the Page.
In the example below, we placed it below our list of jobs:
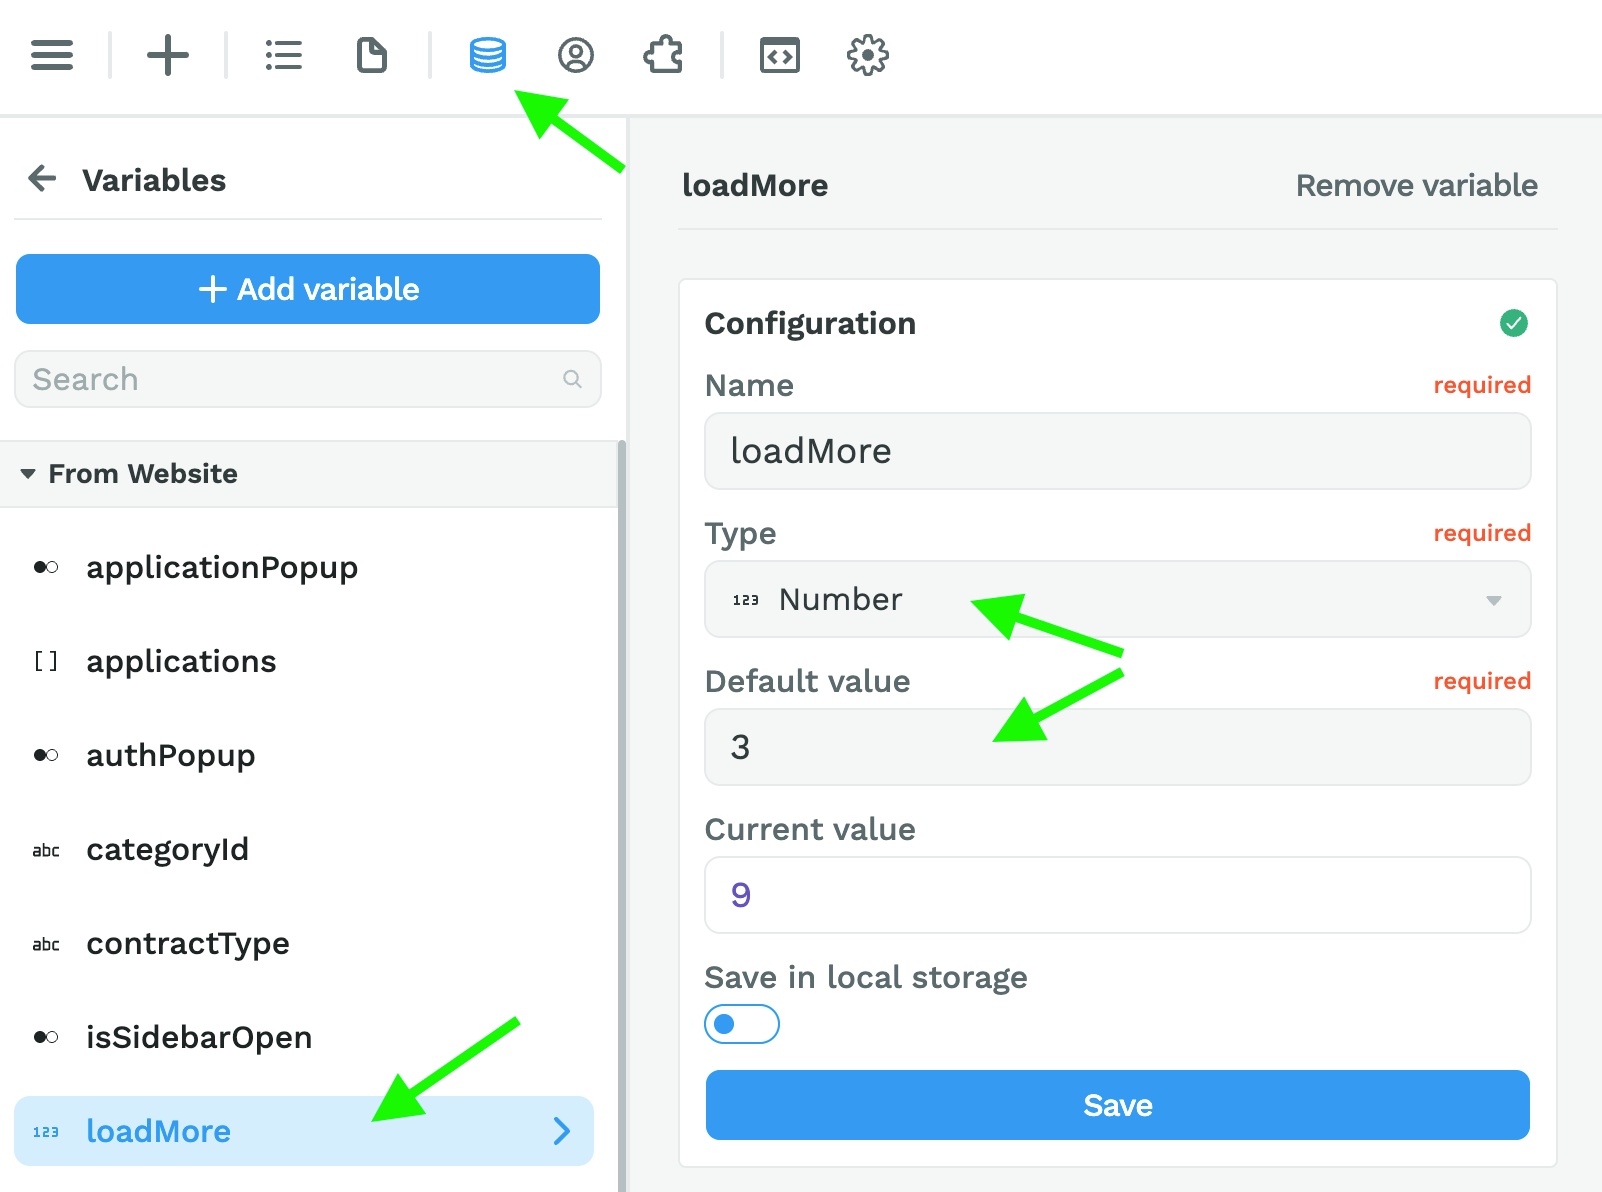
Step 2: Create a loadMore Variable
This Variable will be of Type "Number".
Its default value will be the number of additional items you want to load every time the user clicks on the button to load more items.
In the example below, we want to reveal 3 new items:
Step 3: Add a Workflow on the Button
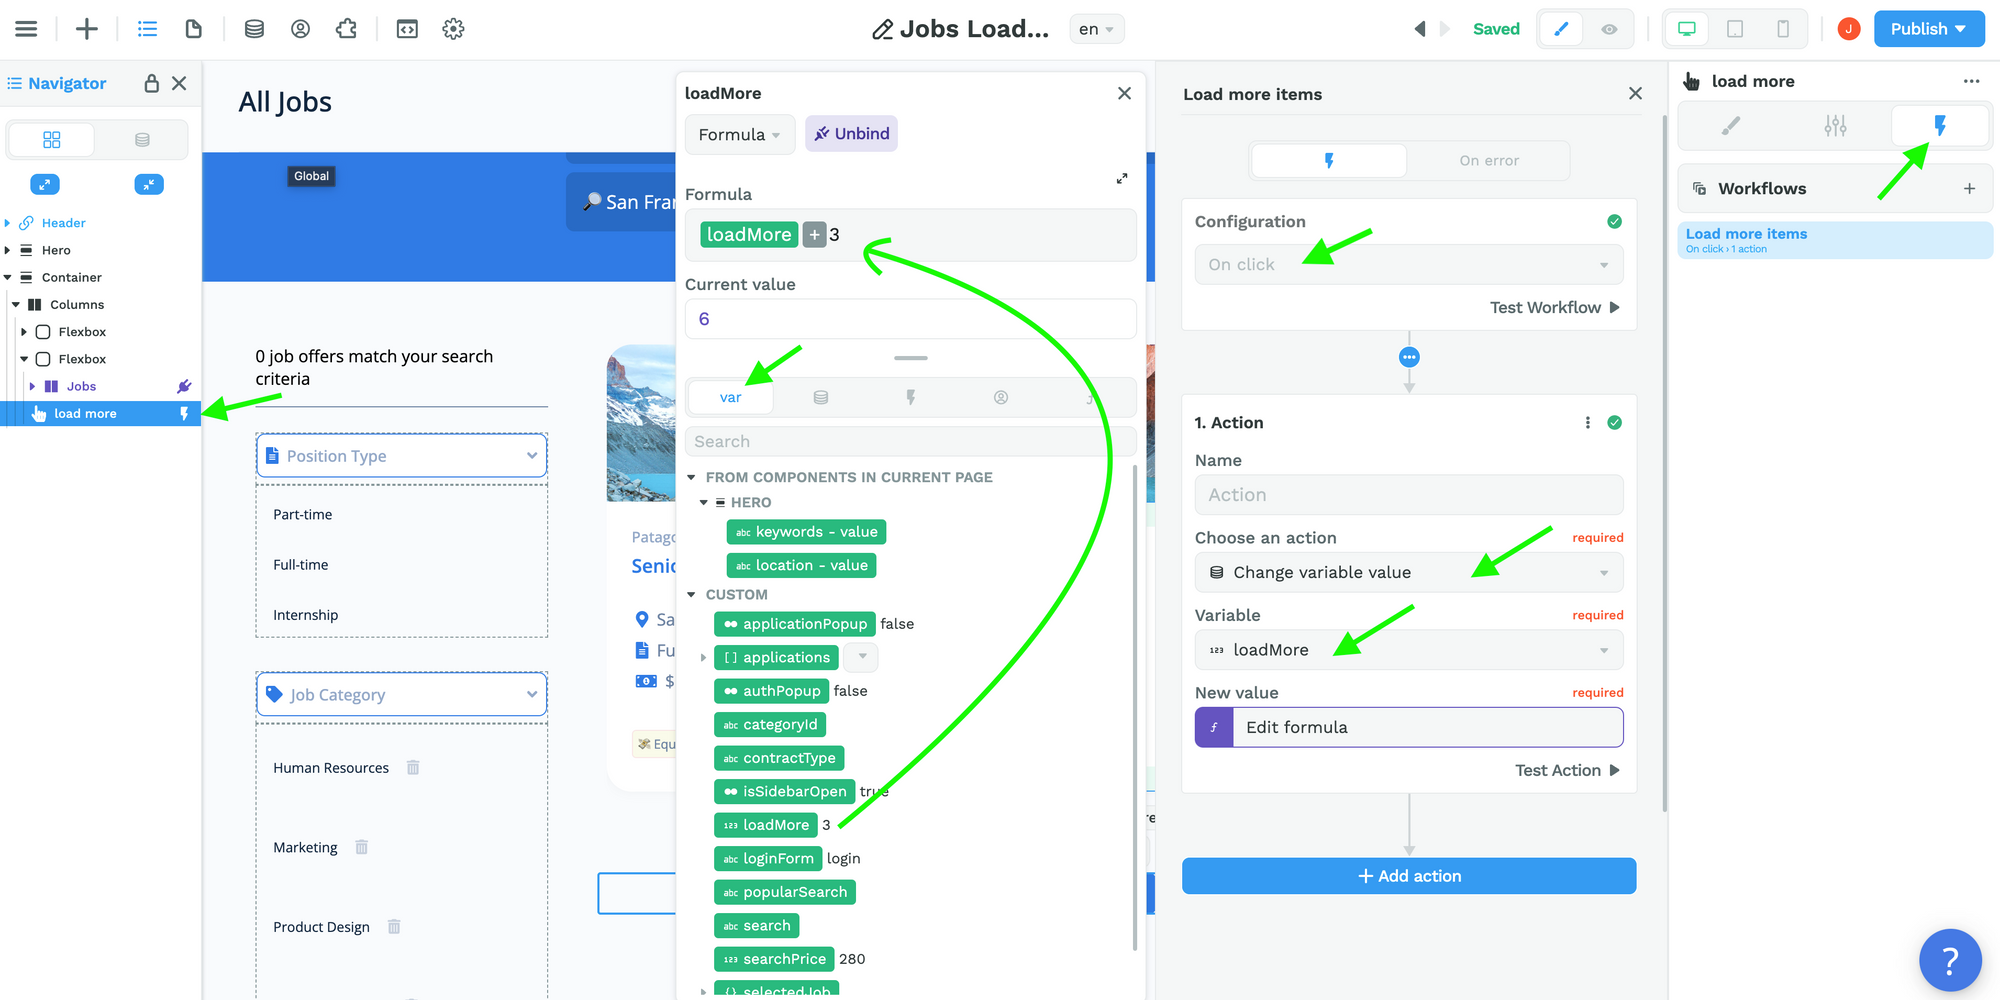
On the Button you created in step 1, add a Workflow with to Change variable value of the Variable you created in step 2.
In the example below, we are saying:
- when the user clicks on the button,
- add 3 to the
loadMorevariable
Step 4: Link the Collection List to the "loadMore" Variable
Now, when we bind our Collection List , we need to tell the browser to only display the default number items we defined in step 2.
In order to do that, we have to "slice" our list:
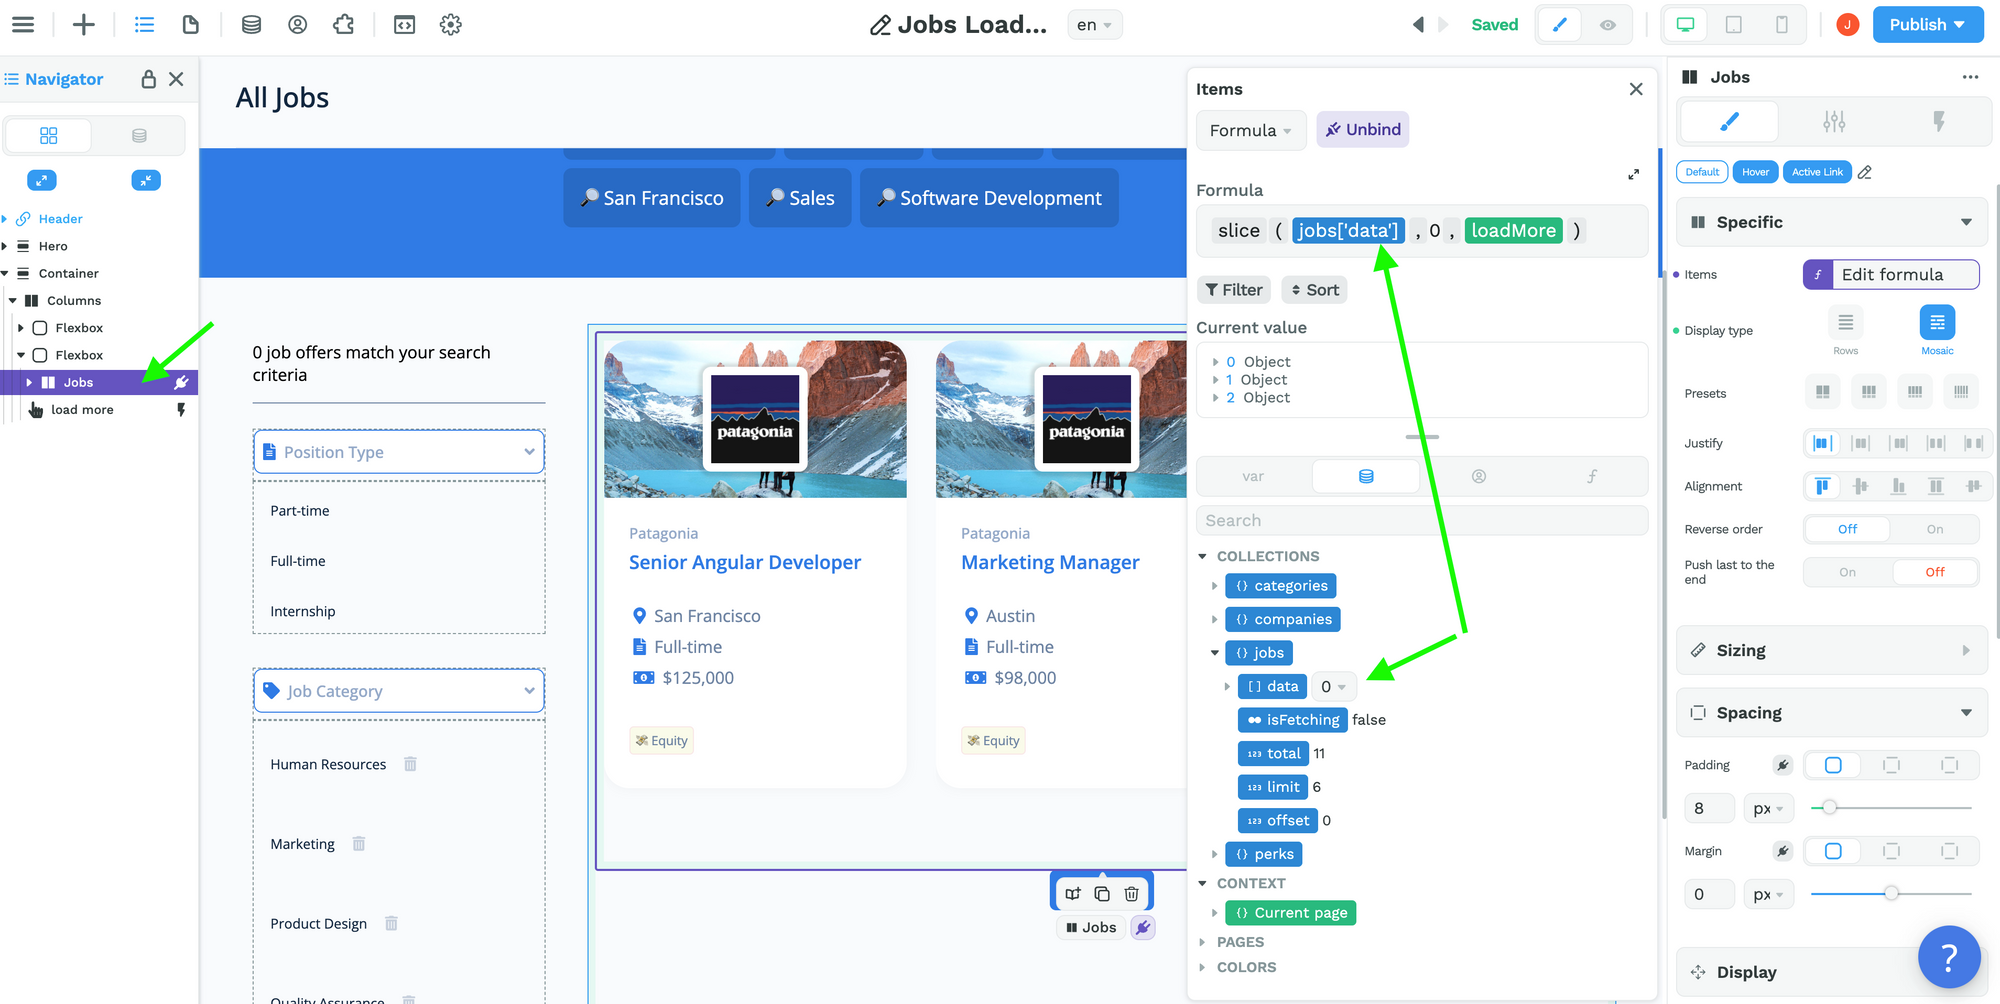
In code, this is how the slice formula works with arrays:
- it takes an array –
jobs['data']in the example above, and - returns a portion of that array into a new array object selected from
starttoend(endnot included) wherestartandendrepresent the index of items in that array.
In our example, the start index is 0 – which means the first item in the Array in code – and our end index is 3 – as defined in the loadMore variable.
As a result, you can see in the "Current value" preview above that items with index 0, 1, and 2 are returned.
🚨 Warning 🚨
Thesliceformula is an Array function so you need to bind to yourcollection['data']. If you bind to{}collection, it will not work because you are binding to an Object.
Step 5: Test in Preview Mode
Ok, that should work. Back in Preview mode, you can click on the "Load more" Button to see the loadMore variable be updated in the Navigator and the additional items displayed on the page: