🗺 Map Element
425
You will find the “Map” element in the “Add” menu > “Add elements” submenu:

You can drag-and-drop this element in the Canvas or in the Navigator.
The map element needs the following data:
- A Google API key
- Name of the location
- Latitude
- Longitude
With that in mind, there are two-prerequisites to use the map element in WeWeb:
- You are able to generate a Google API Key
- You have added a Collection with a list of locations in WeWeb
If you’re not sure how to add a Collection in WeWeb, learn how to get data from Airtable or get data from Xano with the REST API plugin.
Create a Google API Key
The first thing the map element needs is a Google API Key that is enabled for the Maps Javascript API:

To get this API key, you will need to:
- Log into to the Google Cloud Platform
- Create a developer project
- Enable the Maps Javascript API as shown above
- Create an API key in the Credentials menu as show below
- Add editor.weweb.io/* as an HTTP referrer
- Restrict the API key to the Maps Javascript API
- Enable the free trial in Google
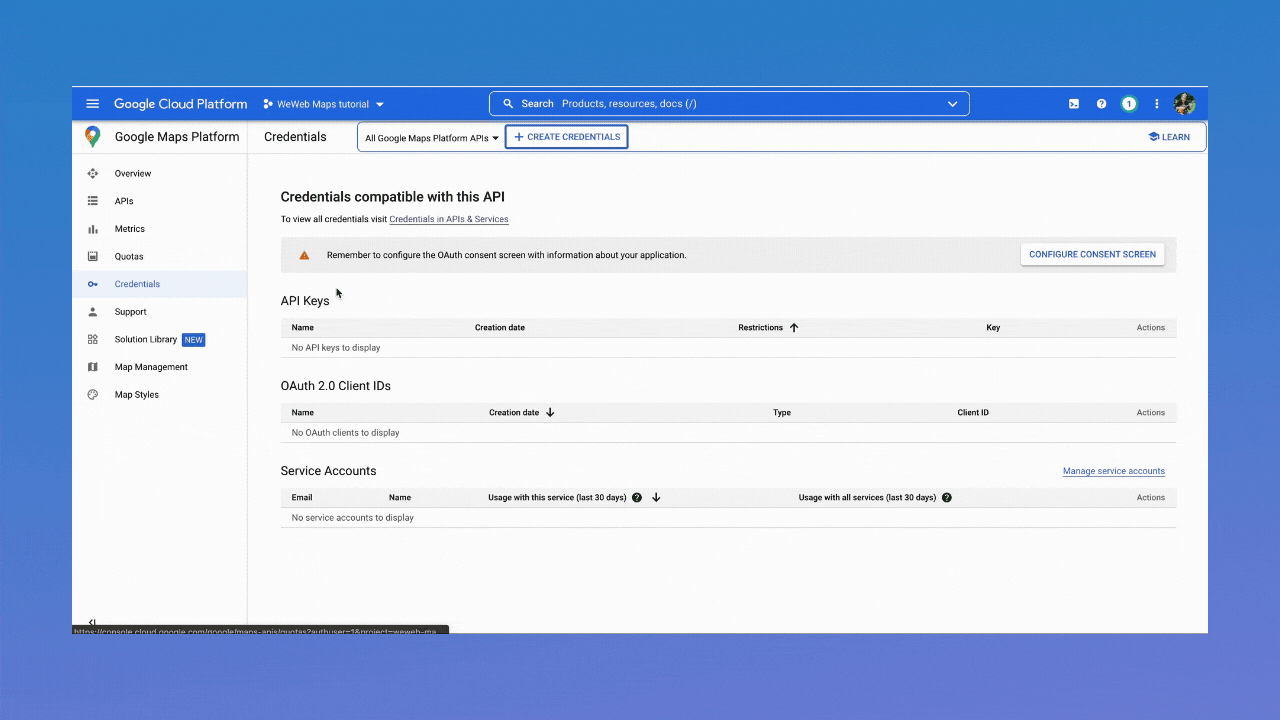
If you get stuck here, you can consult the Google developer documentation.
Update the Map Element Settings
In the specific settings of the map element, you will be able to:
- Paste the Google API key
- Bind your list of locations in the “Markers” field
- Map the column names of your location Collection
- Toggle settings on and off (e.g. zoom control, street view control)
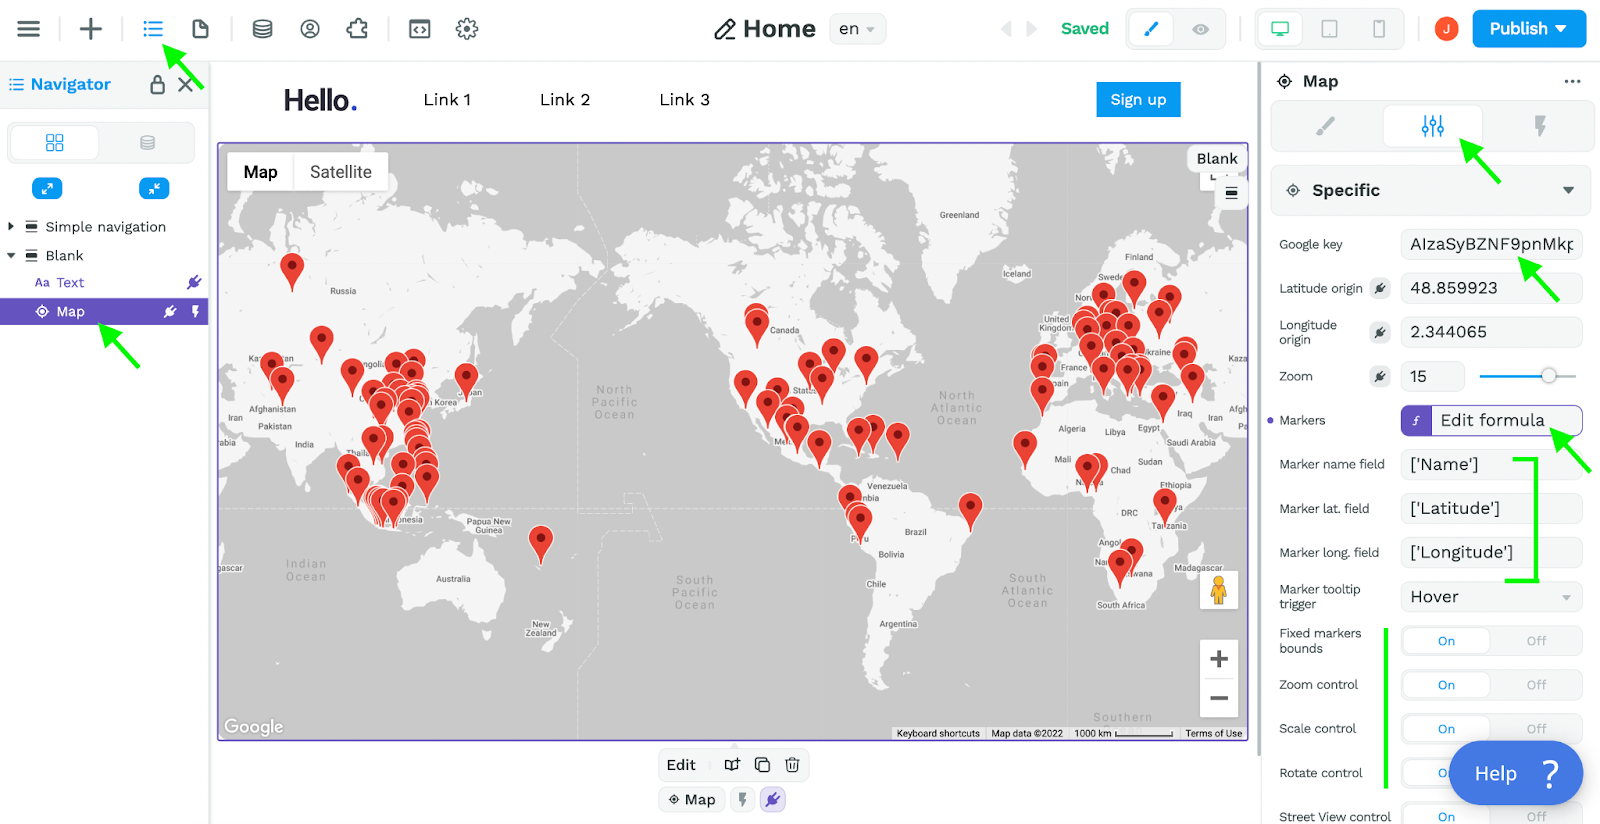
🚨 Warning 🚨
The "Markers" field expects a list of locations in an Array. You can bind it to a Collection, an Array Variable or use the createArray formula to define your list of locations.
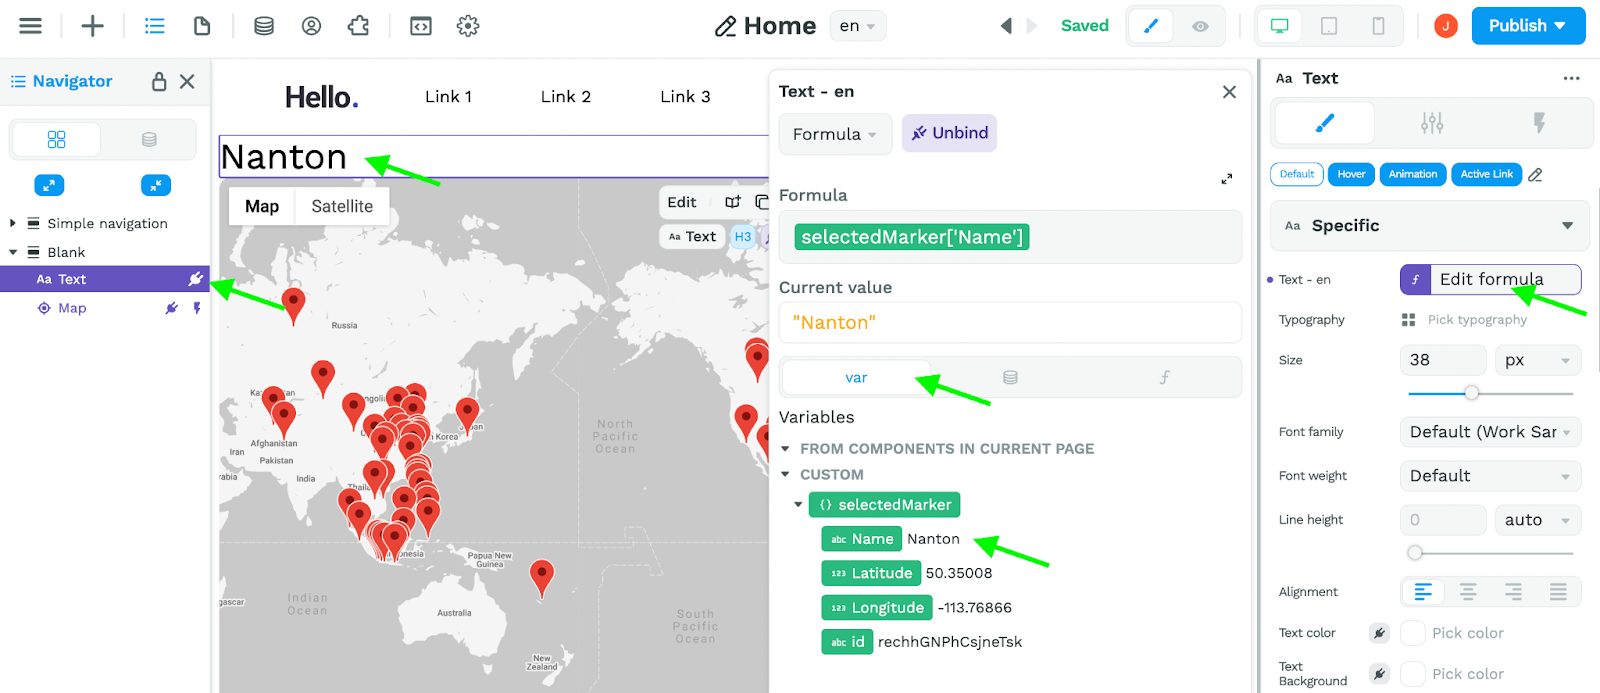
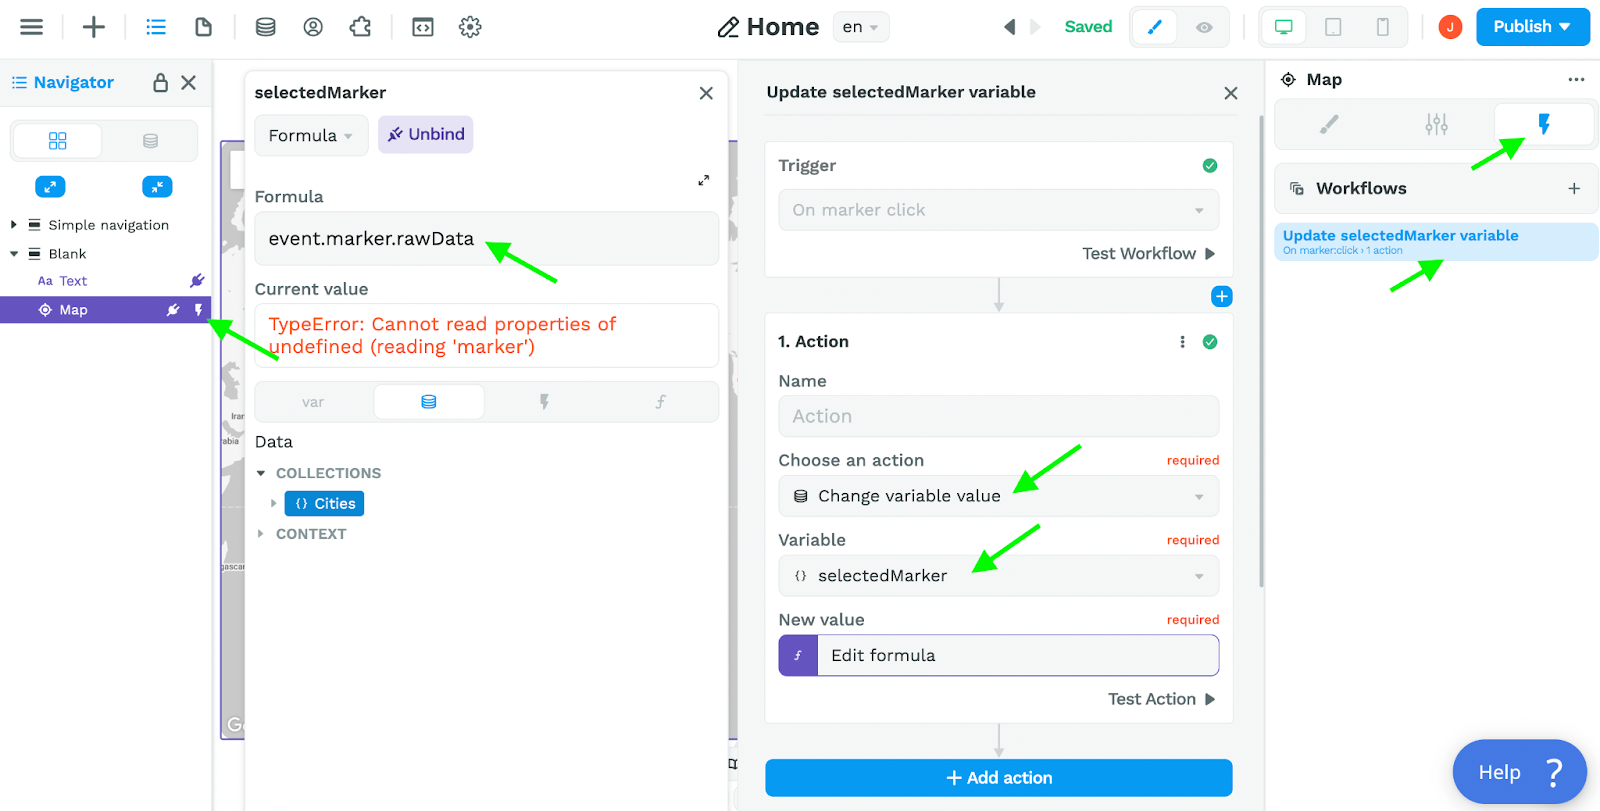
Display Data Based on Selected Marker
There are three steps to display data based on the marker that is selected by a user.
1- Create a variable of Object type
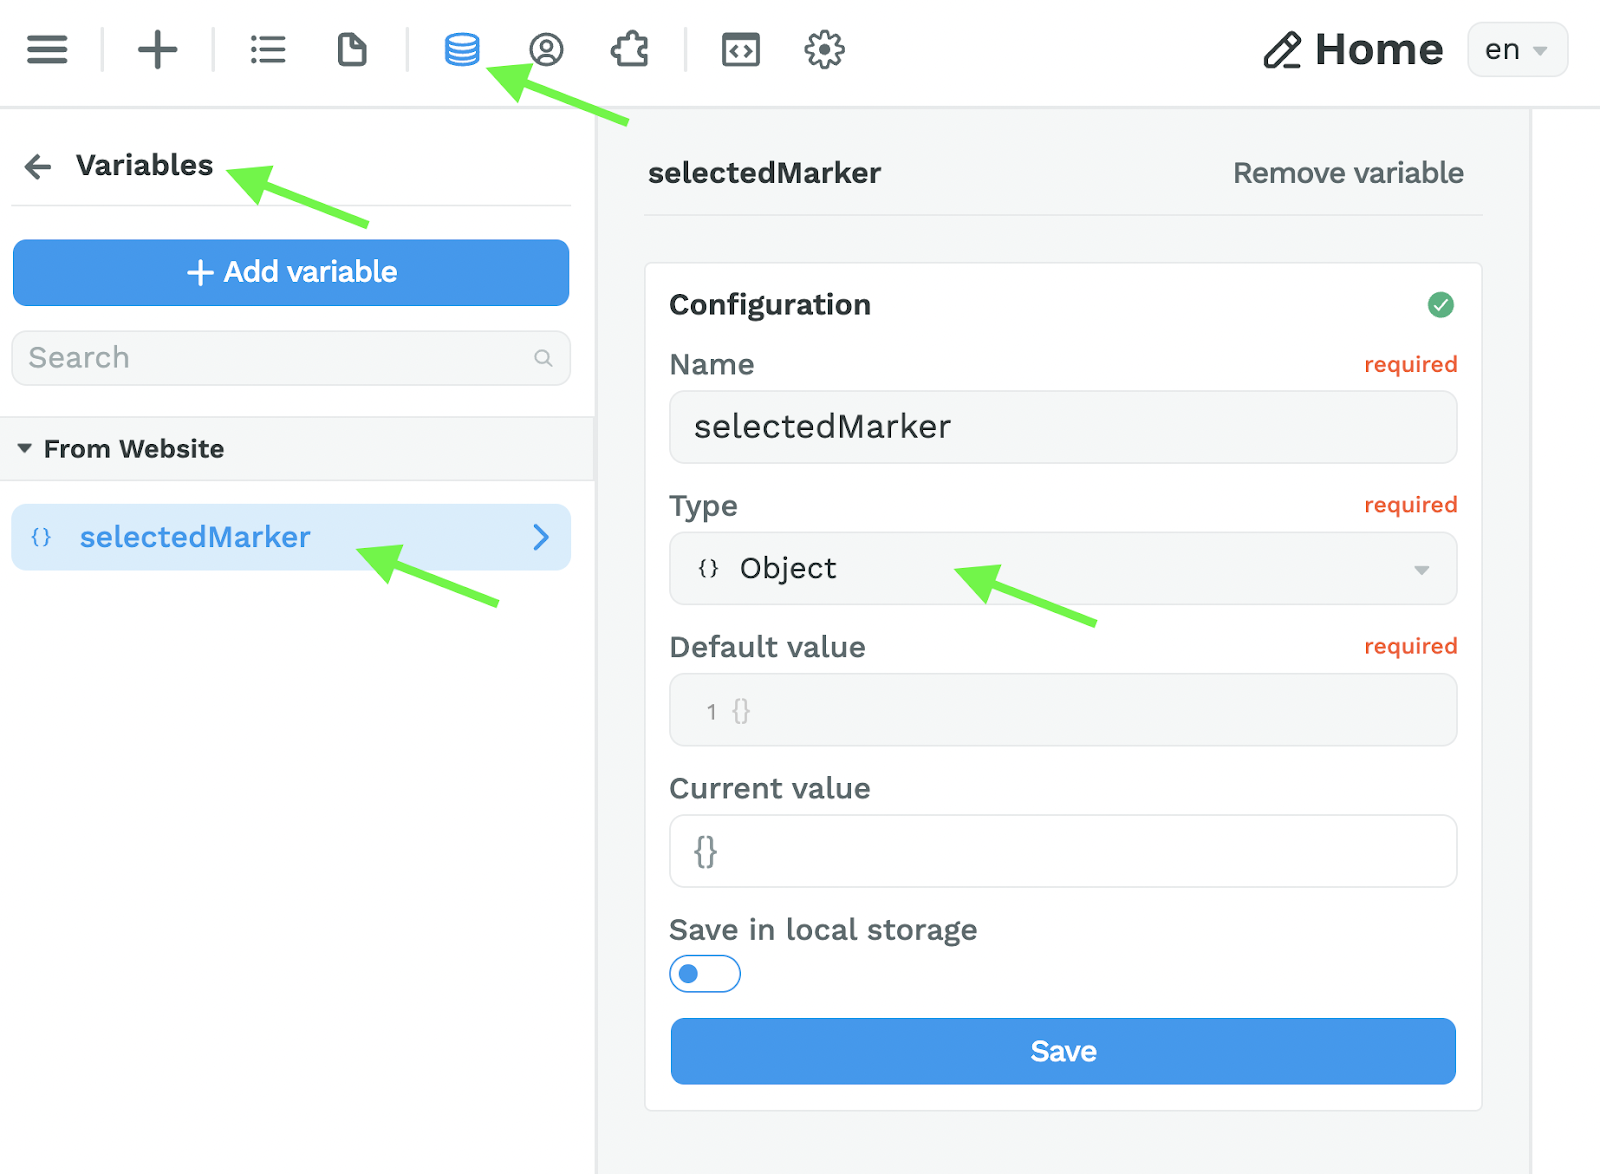
2- Create a Workflow on the Map Element that Initializes the Variable
In the workflow, add a “Change variable value” action that changes the selectedMarker variable you created in step 1.
In the future, you will be able to bind the input of the New value.
For now, type in event.marker.rawData in the Formula field.
You will see a TypeError warning but it will work just fine 🙂
3- Add a Text element on the page
It could be anywhere on the page and styled any way you want.
The point is that you will bind this element to information from the selectedMarker variable which will change every time a user clicks on a different marker in the map.
In the example below, we bound the text element to the “Name” field of the selectedMarker variable: