🏦 Stripe Payments
888
Let's see how you can setup Stripe in WeWeb so that your web-app users can make payments.
Installing the Plugin
To add the Stripe Plugin to your WeWeb project, go to the "Plugins" > "Extensions" menu:
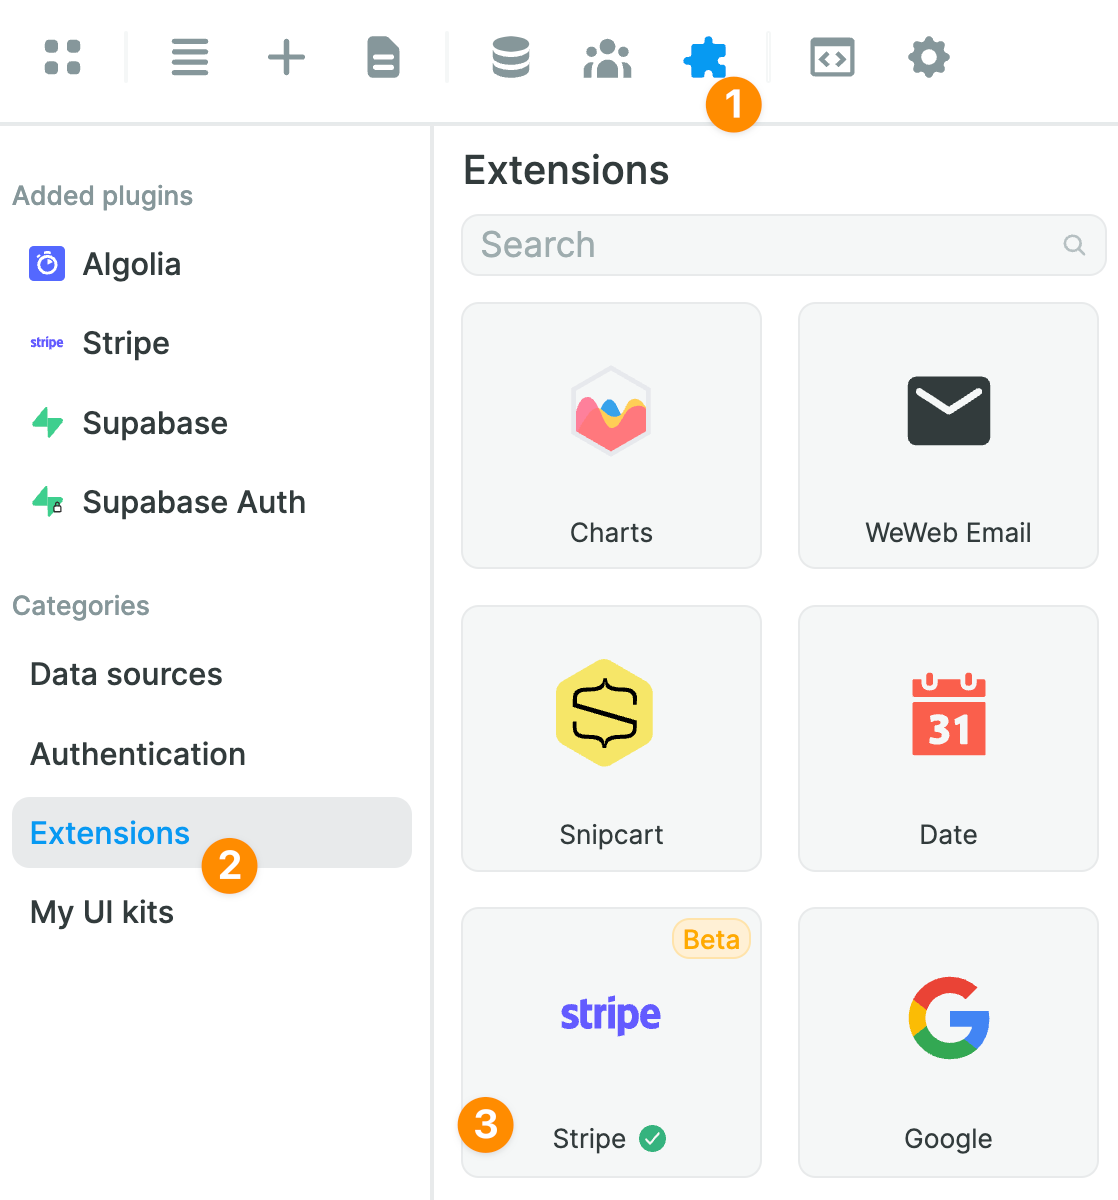
Once you have added the Stripe Extension, you will be invited to set it up with your production API keys:

🔥 Pro Tip 🔥
If you want to work with test data in Stripe, you can also add test API keys. Better be safe than sorry! 😅
Once you have set up the Extension, you will have access to the payment form Element.
The Payment Form
To display a Stripe payment form on your web app, you'll need to add a Form Container with a submit button on the Canvas:
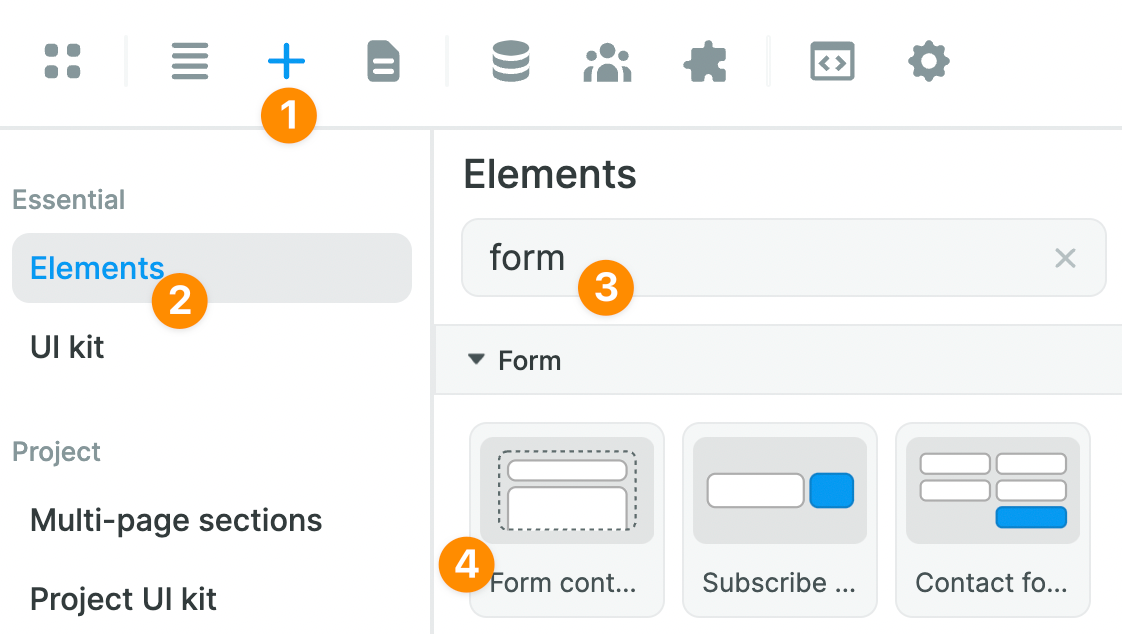
Then, you'll want to remove the Input so you're only left with the "Button" Element and add the "Stripe - Payment" Element inside the Form Container you added above:

In the Stripe payment element's "Settings", you'll need a client secret.
To get a client secret, we first need to create a client intent.
We do this by creating a Workflow that triggers on page load.
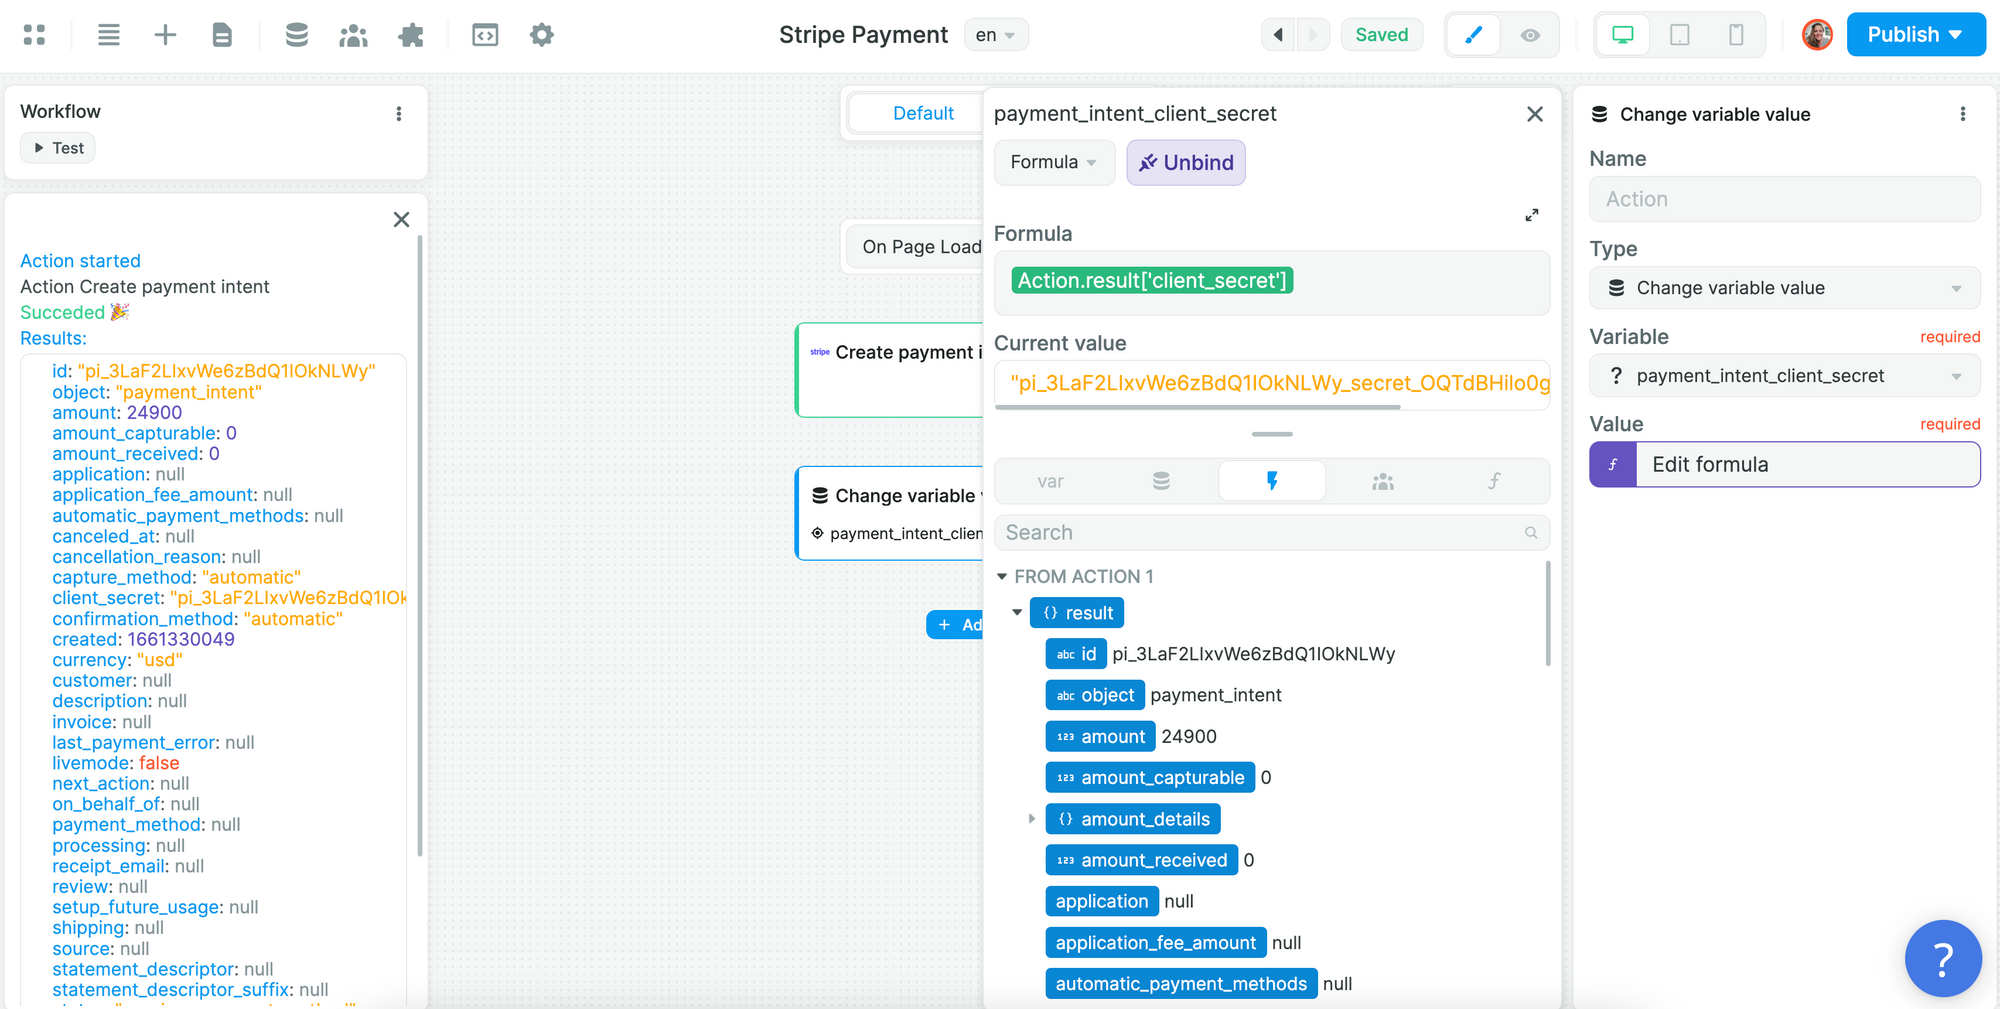
In the first step, we create a payment intent, decide which payment methods the client can use and which Stripe products they can purchase (the "Price ID" will come from your Stripe account):
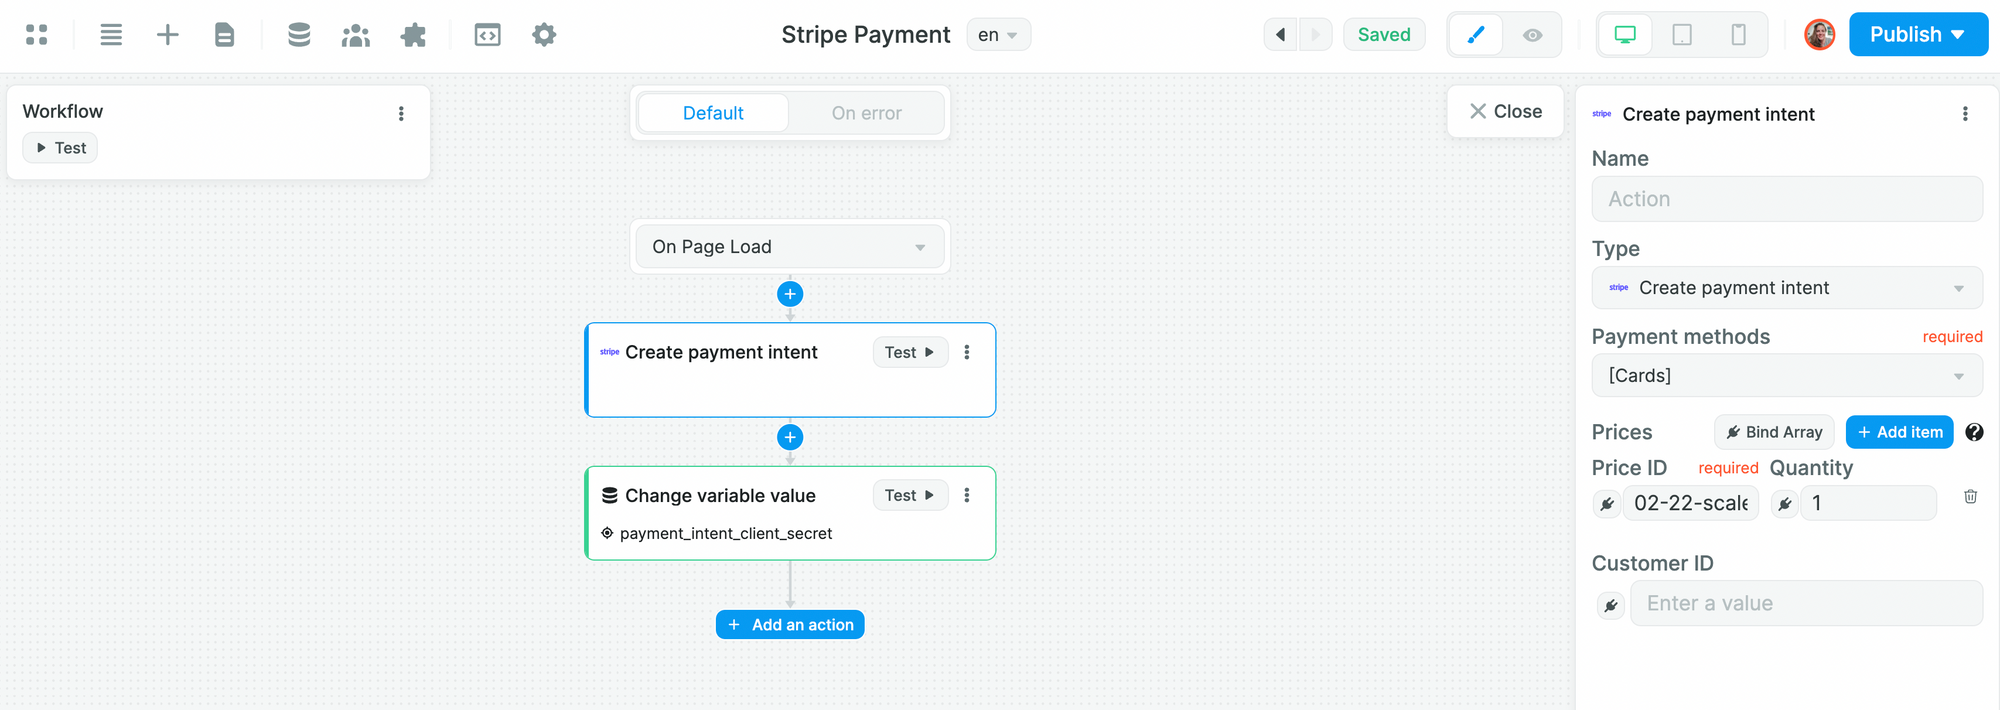
We will then test Action 1 because we need to bind its result in Action 2.
In step two, we setup a "Change variable value" Action to update a `payment_intent_client_secret` Variable (type Query) with the result of the previous Action:
🔥 Pro Tip 🔥
The query Variable must be named `payment_intent_client_secret` in WeWeb because that's the name of the query string Stripe will pass when creating the client secret. If you choose a different name in WeWeb, we want be able to recognize the query string provided by Stripe.
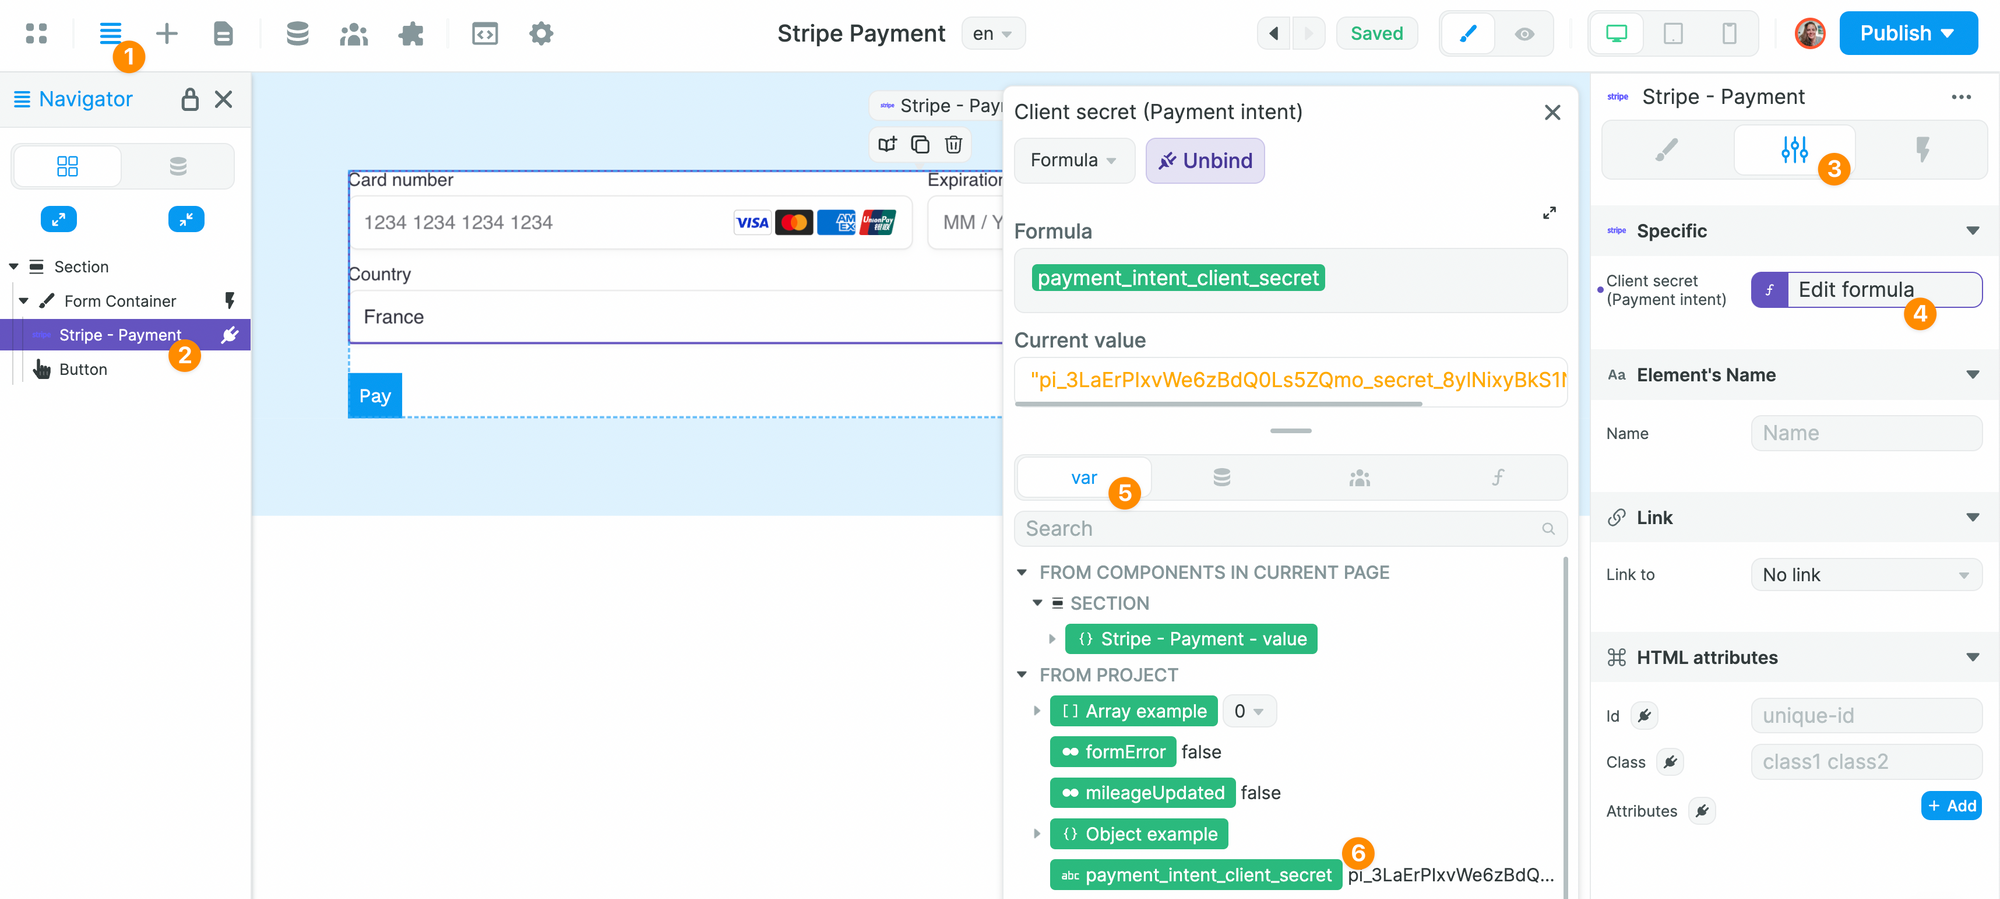
Once our Workflow on Page is complete, we will go back to our "Stripe - Payment" Element and bind the `payment_intent_client_secret` Variable to the Client secret Setting:
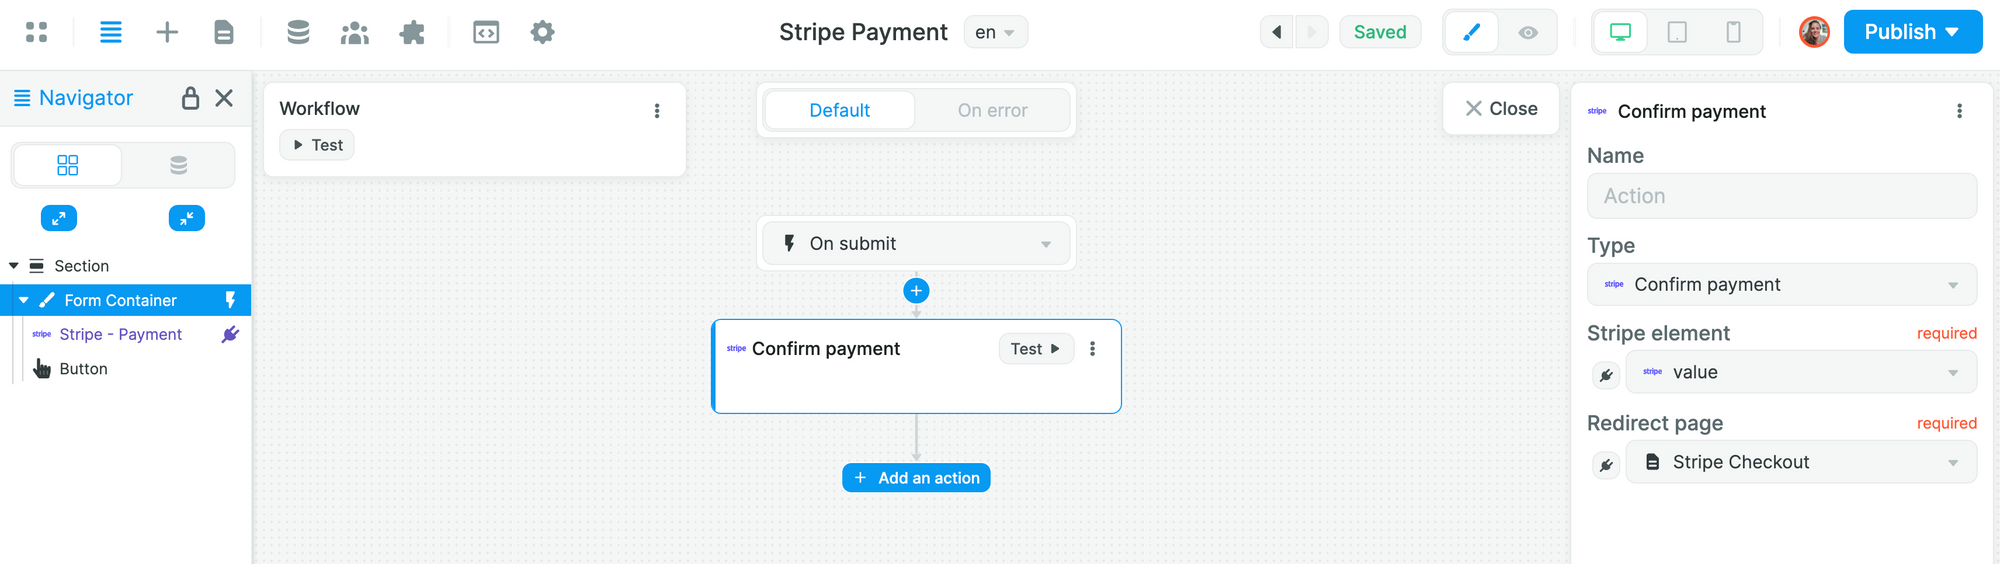
Finally, we will setup a Workflow to confirm the payment action and redirect the user to a Checkout page when they submit the payment form:
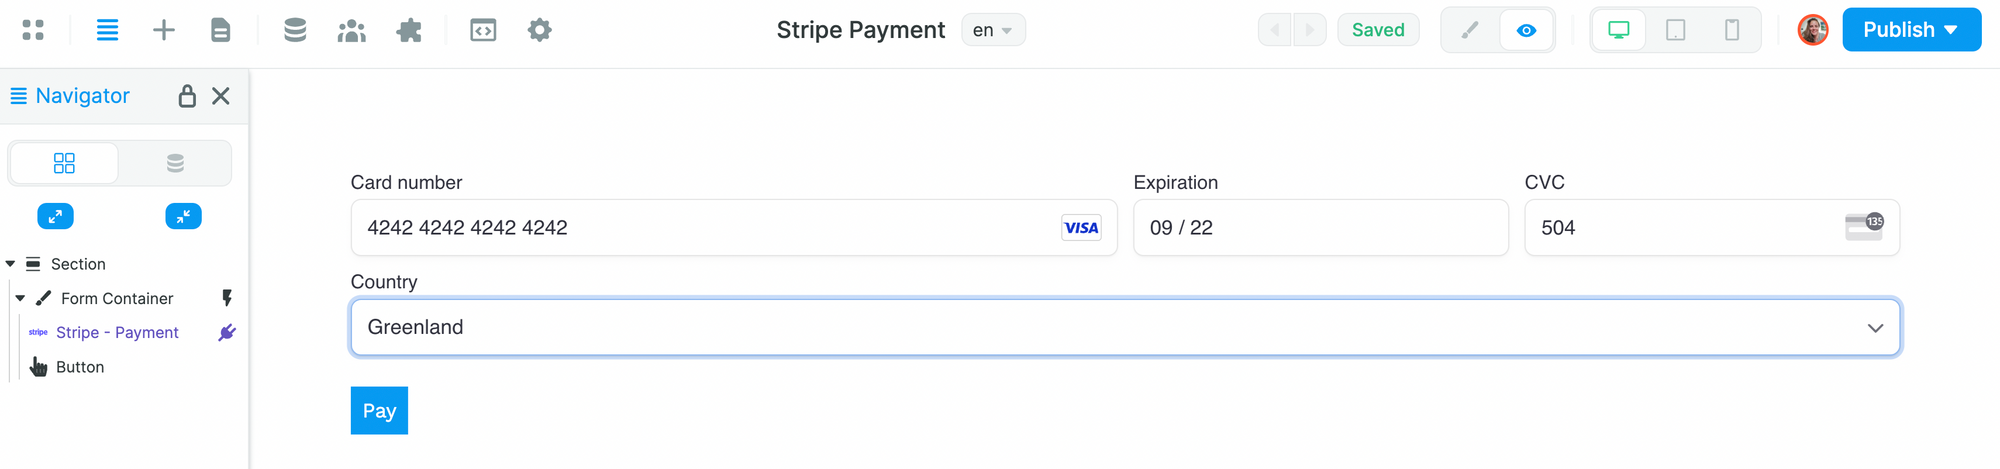
And fake a payment to trigger the Workflow and go to the checkout page:
🔥 Pro Tip 🔥
In order to move forward with the tutorial, you will need to fake a payment intent with a fake card. Read more about simulating payments in the Stripe documentation.
The Checkout Page
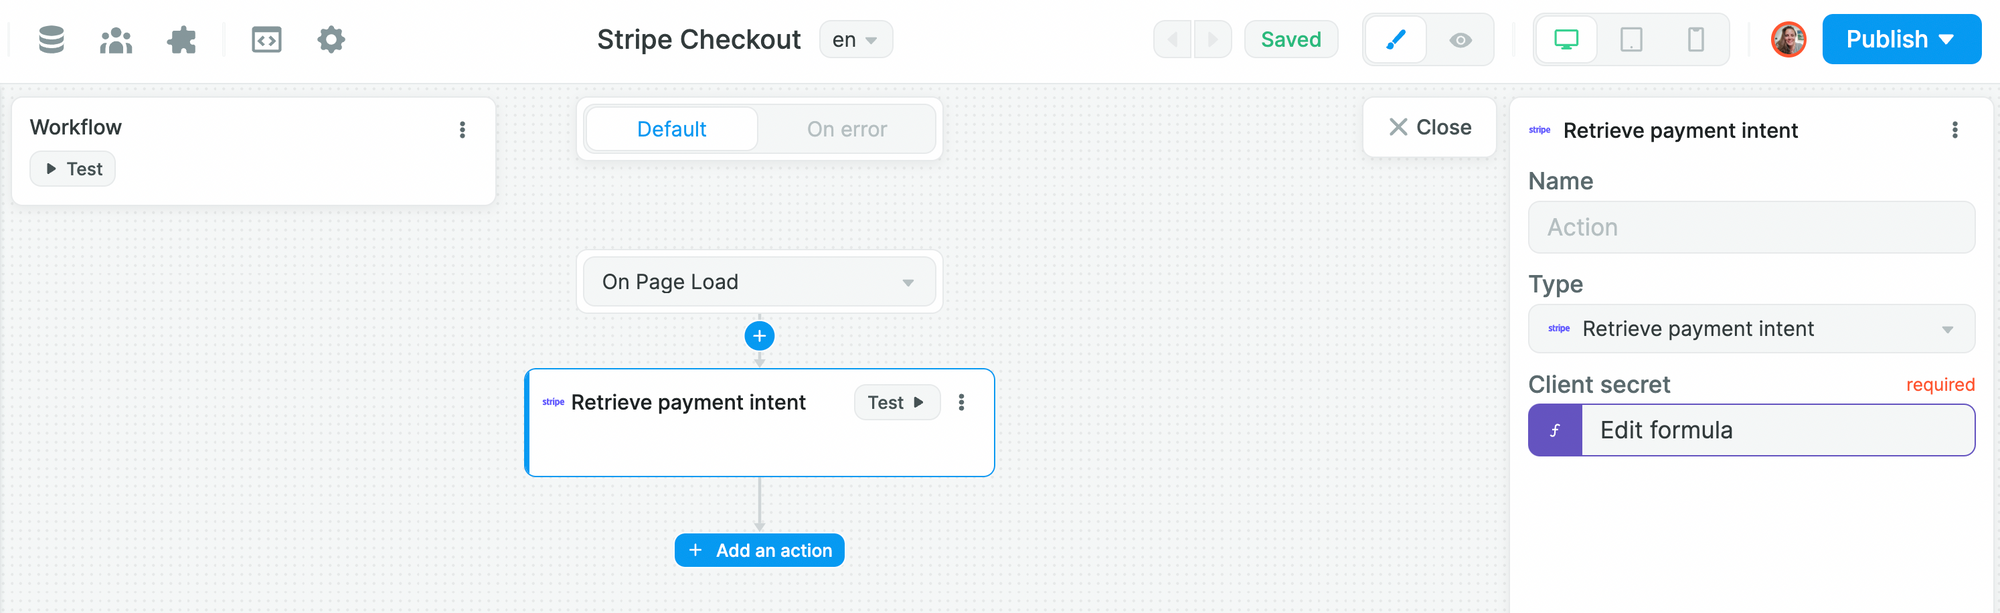
On the checkout page, we'll create a Workflow that triggers on page to retrieve the user's payment intent:
Action 1: Retrieve the payment intent
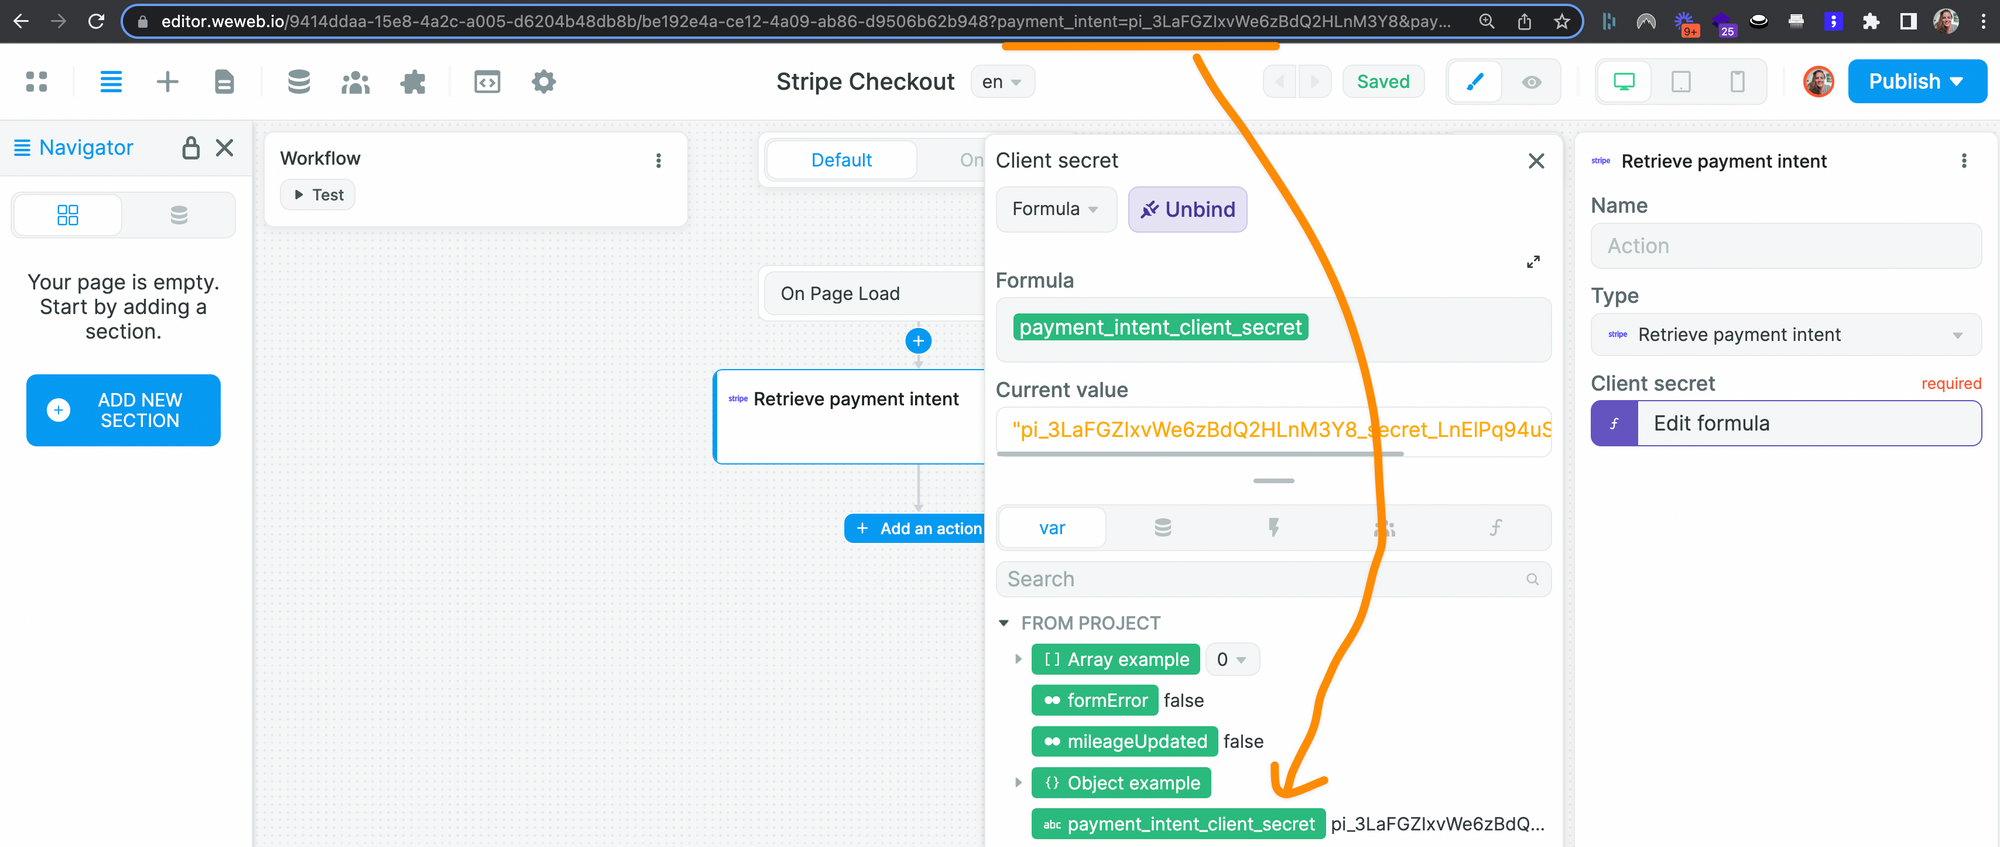
We will add the "Retrieve payment intent" Action and bind this to the `payment_intent_client_secret` Variable we created earlier
It will look something like this:
If you've named your Variable correctly and faked a payment with a fake Stripe card, you should be able to see the the `payment_intent_client_secret` query string in the URL, which is retrieved by WeWeb in the `payment_intent_client_secret` Variable:
Action 2: Store the payment intent
After testing Action 1, we will create an Action 2 to store the payment intent in a Variable of type Object.
We will choose a "Change variable value" Action and bind it to the result of the previous Action in the Workflow:
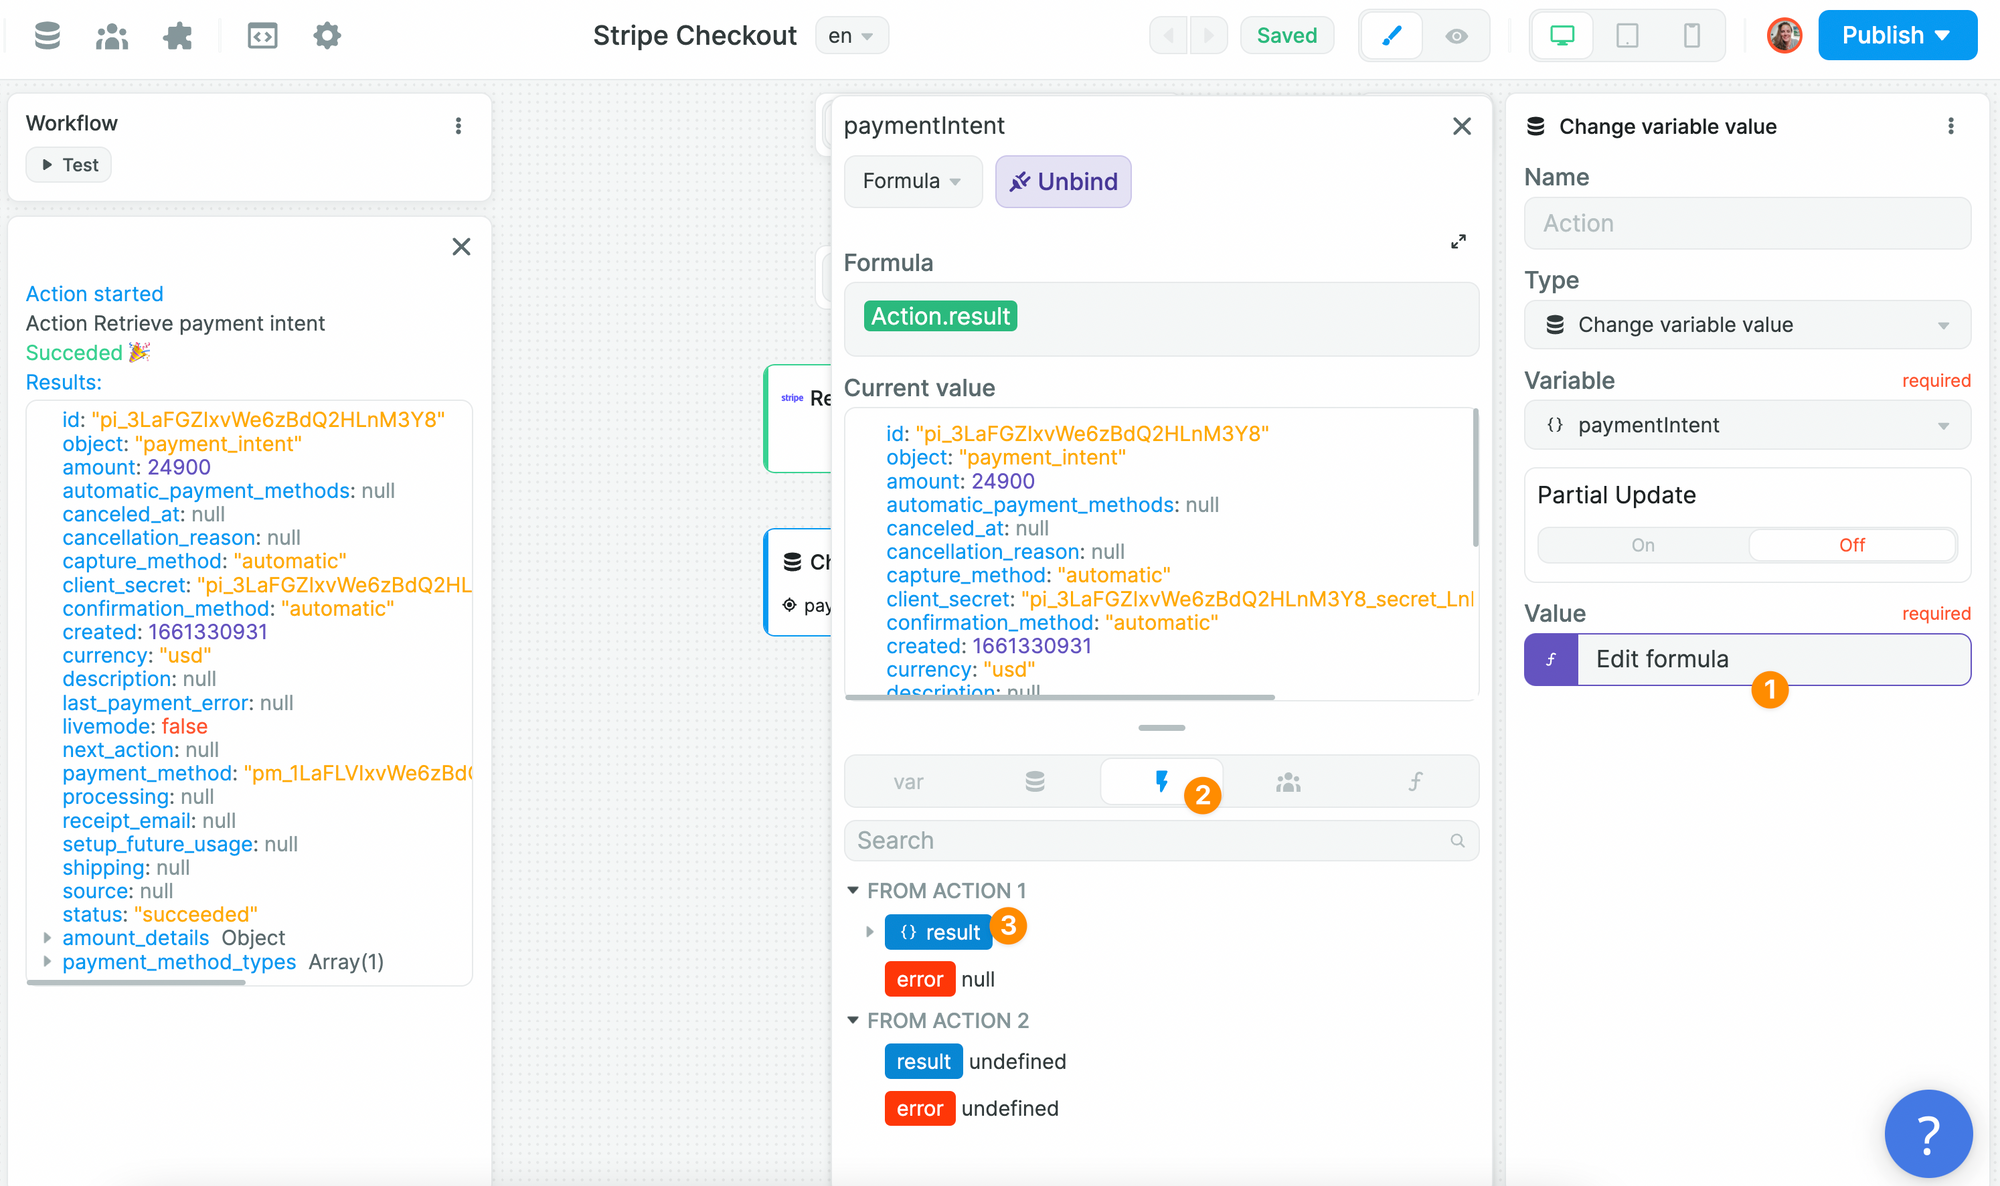
Again, we need to test this Action if we want to update the Variable.
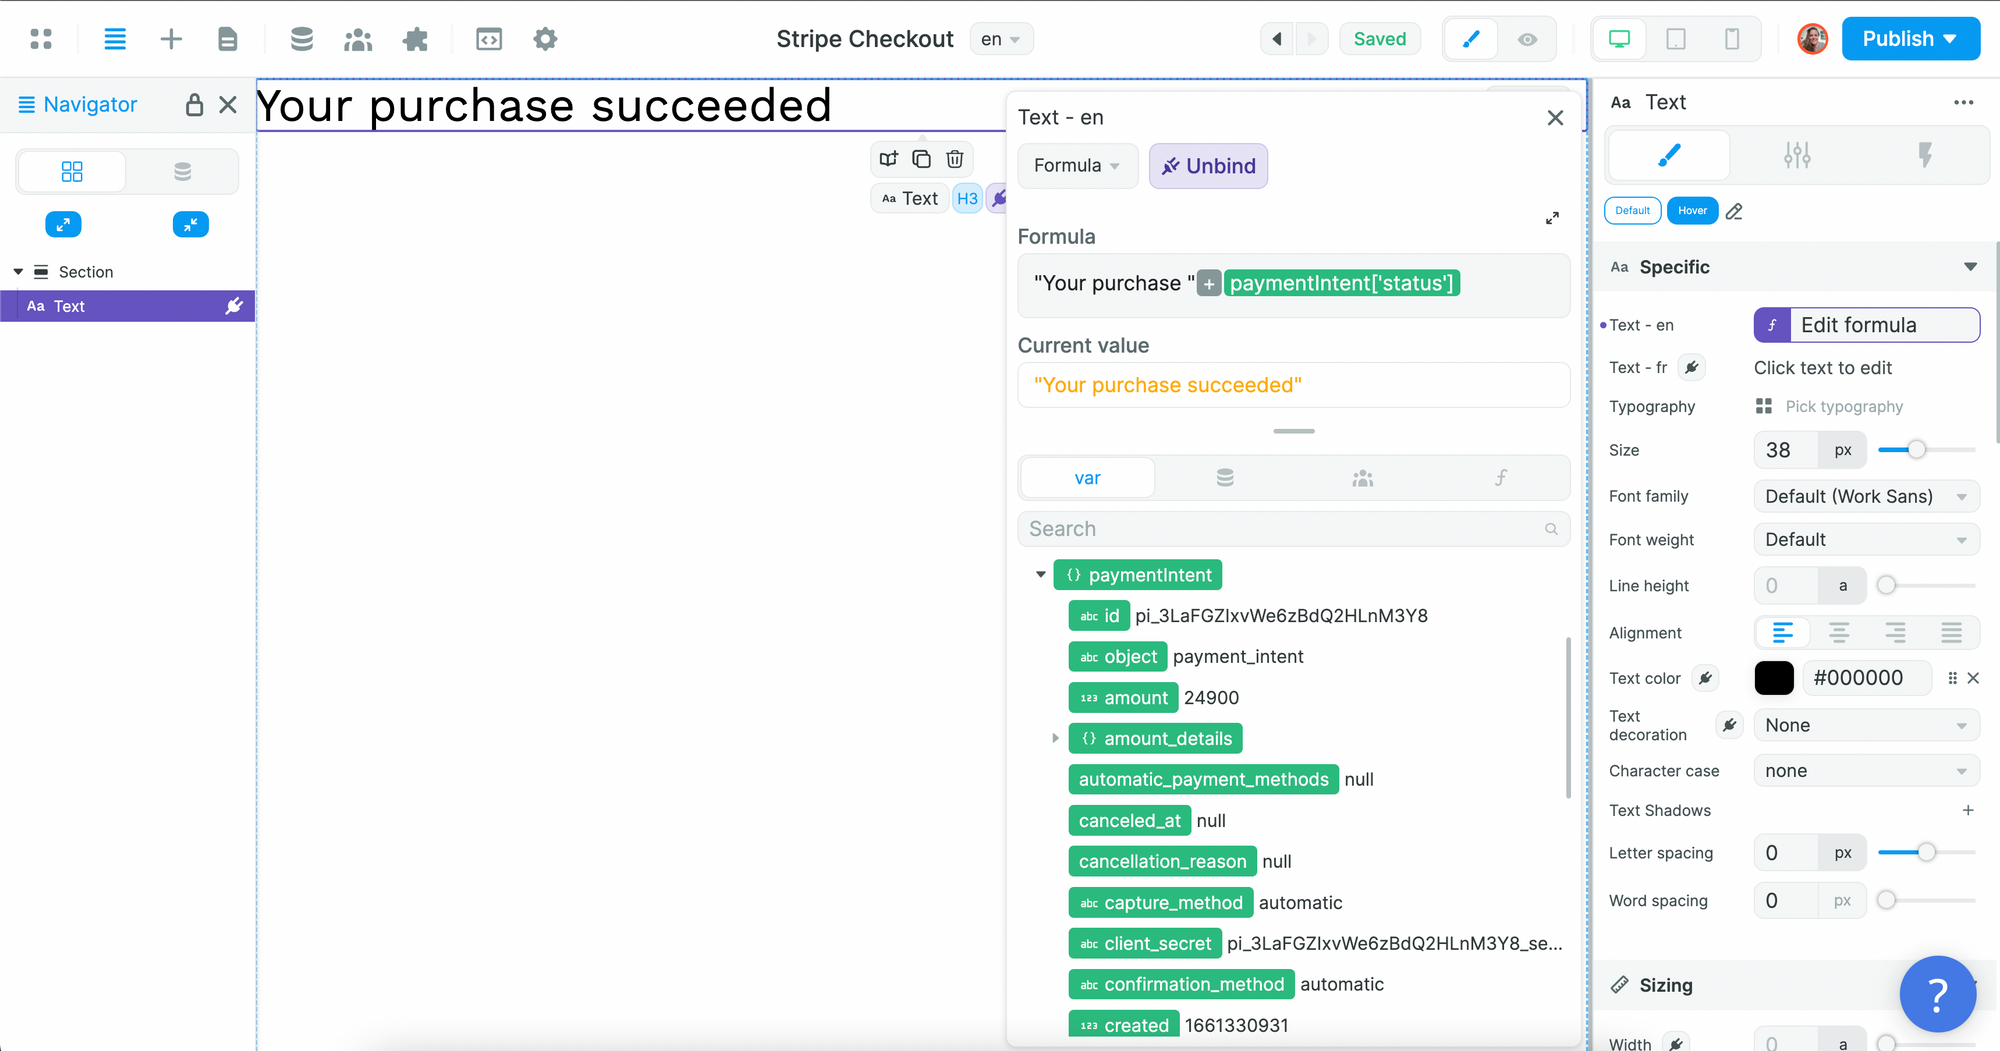
Then, we could use the information from the Variable to style the Checkout page.
For example: