Supabase Authentication
602
In this article, we will explain:
- how to add the Supabase Auth plugin
- how to create a sign up or sign in workflow
- how to add user roles in Supabase and WeWeb
- how to display current user information in WeWeb
How to Add Supabase Authentication in WeWeb
Supabase comes with an in-built authentication system which you can use in WeWeb.
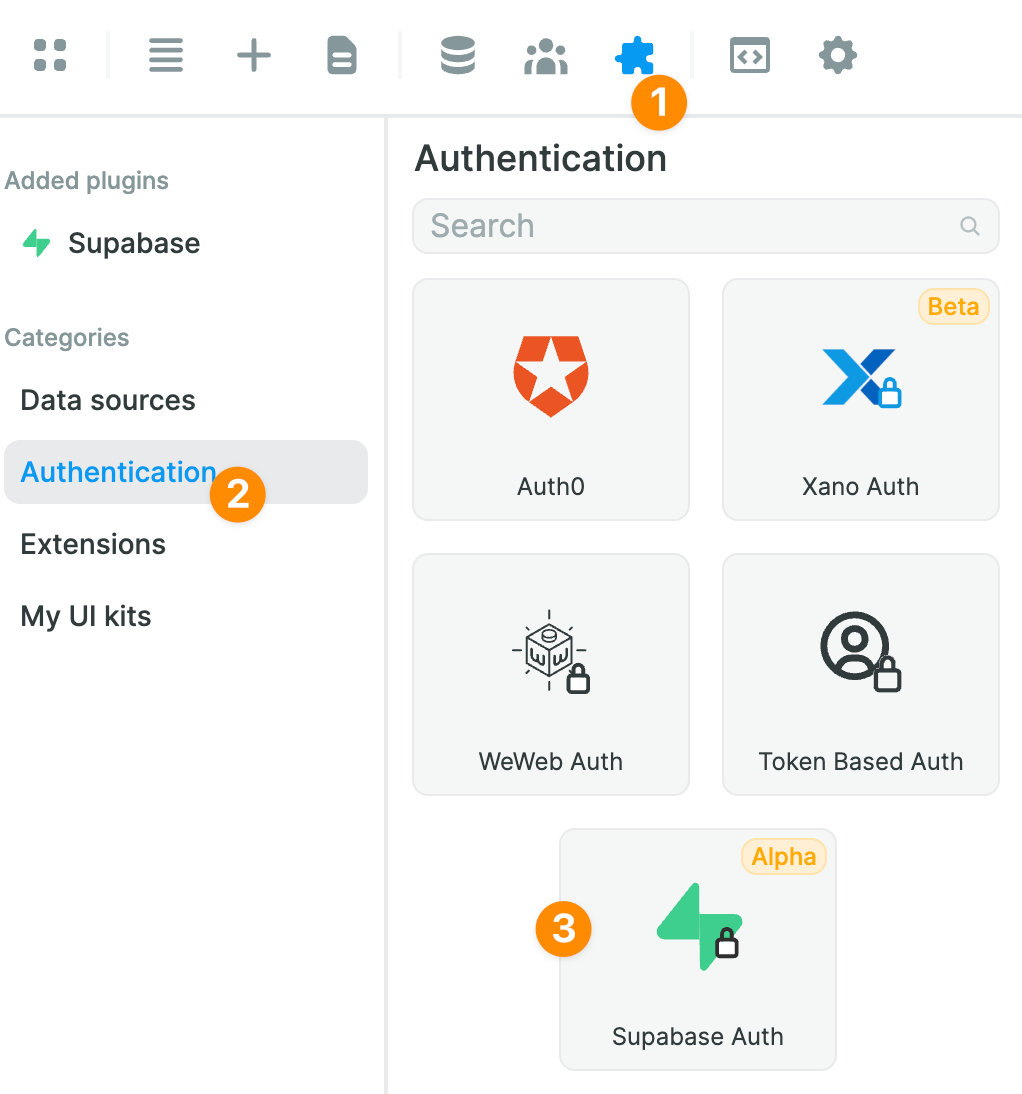
To add the Supabase Auth Plugin in WeWeb, go to "Plugins" > "Authentication":
Assuming you have already provided your Supabase project URL and public API key when setting up the Supabase Data source, the only thing left to do will be to add your private API key:
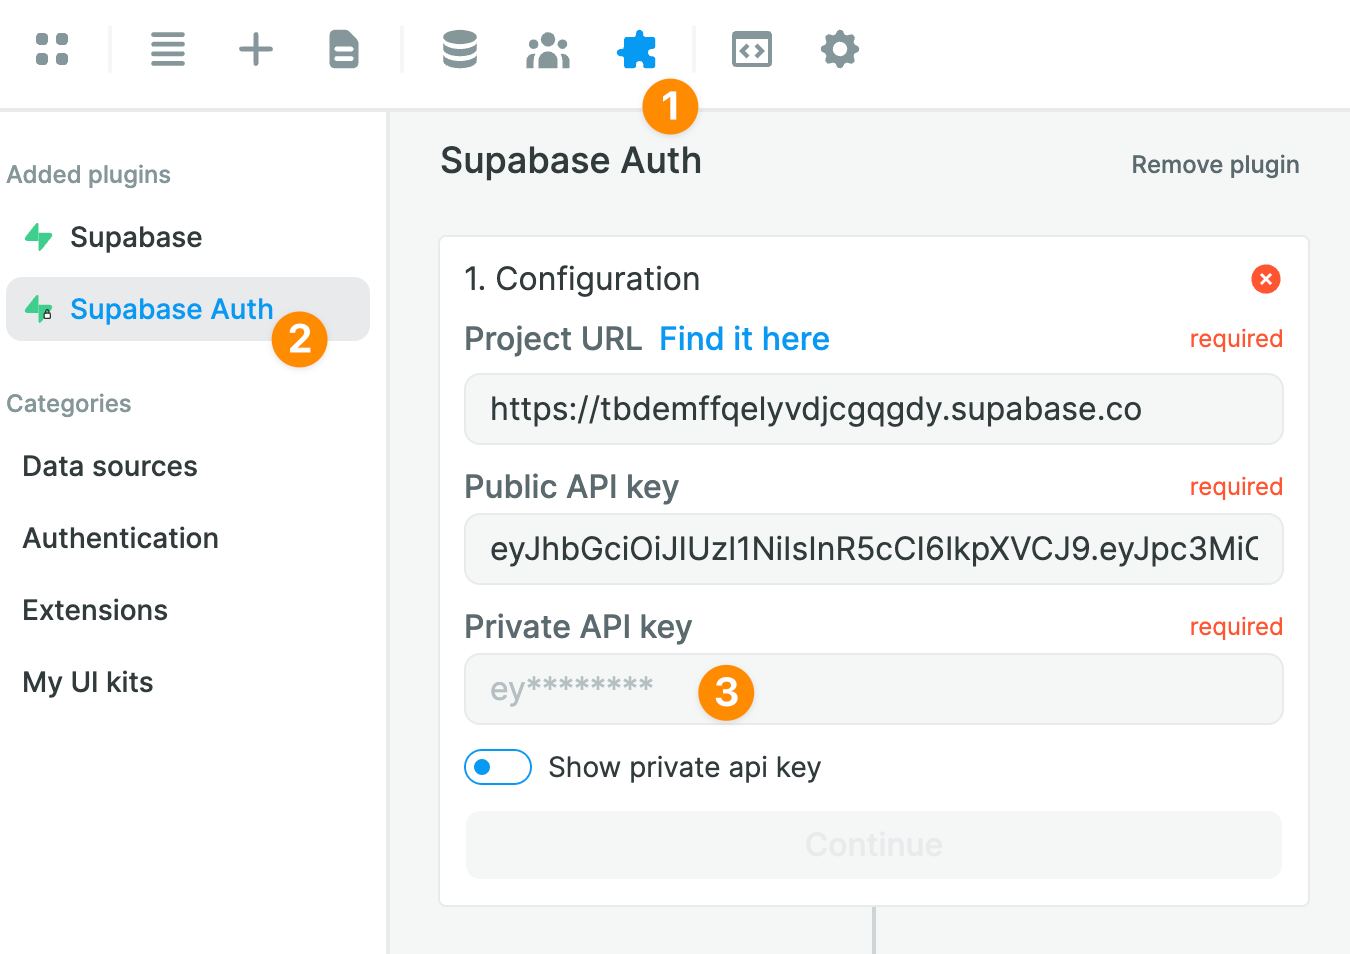
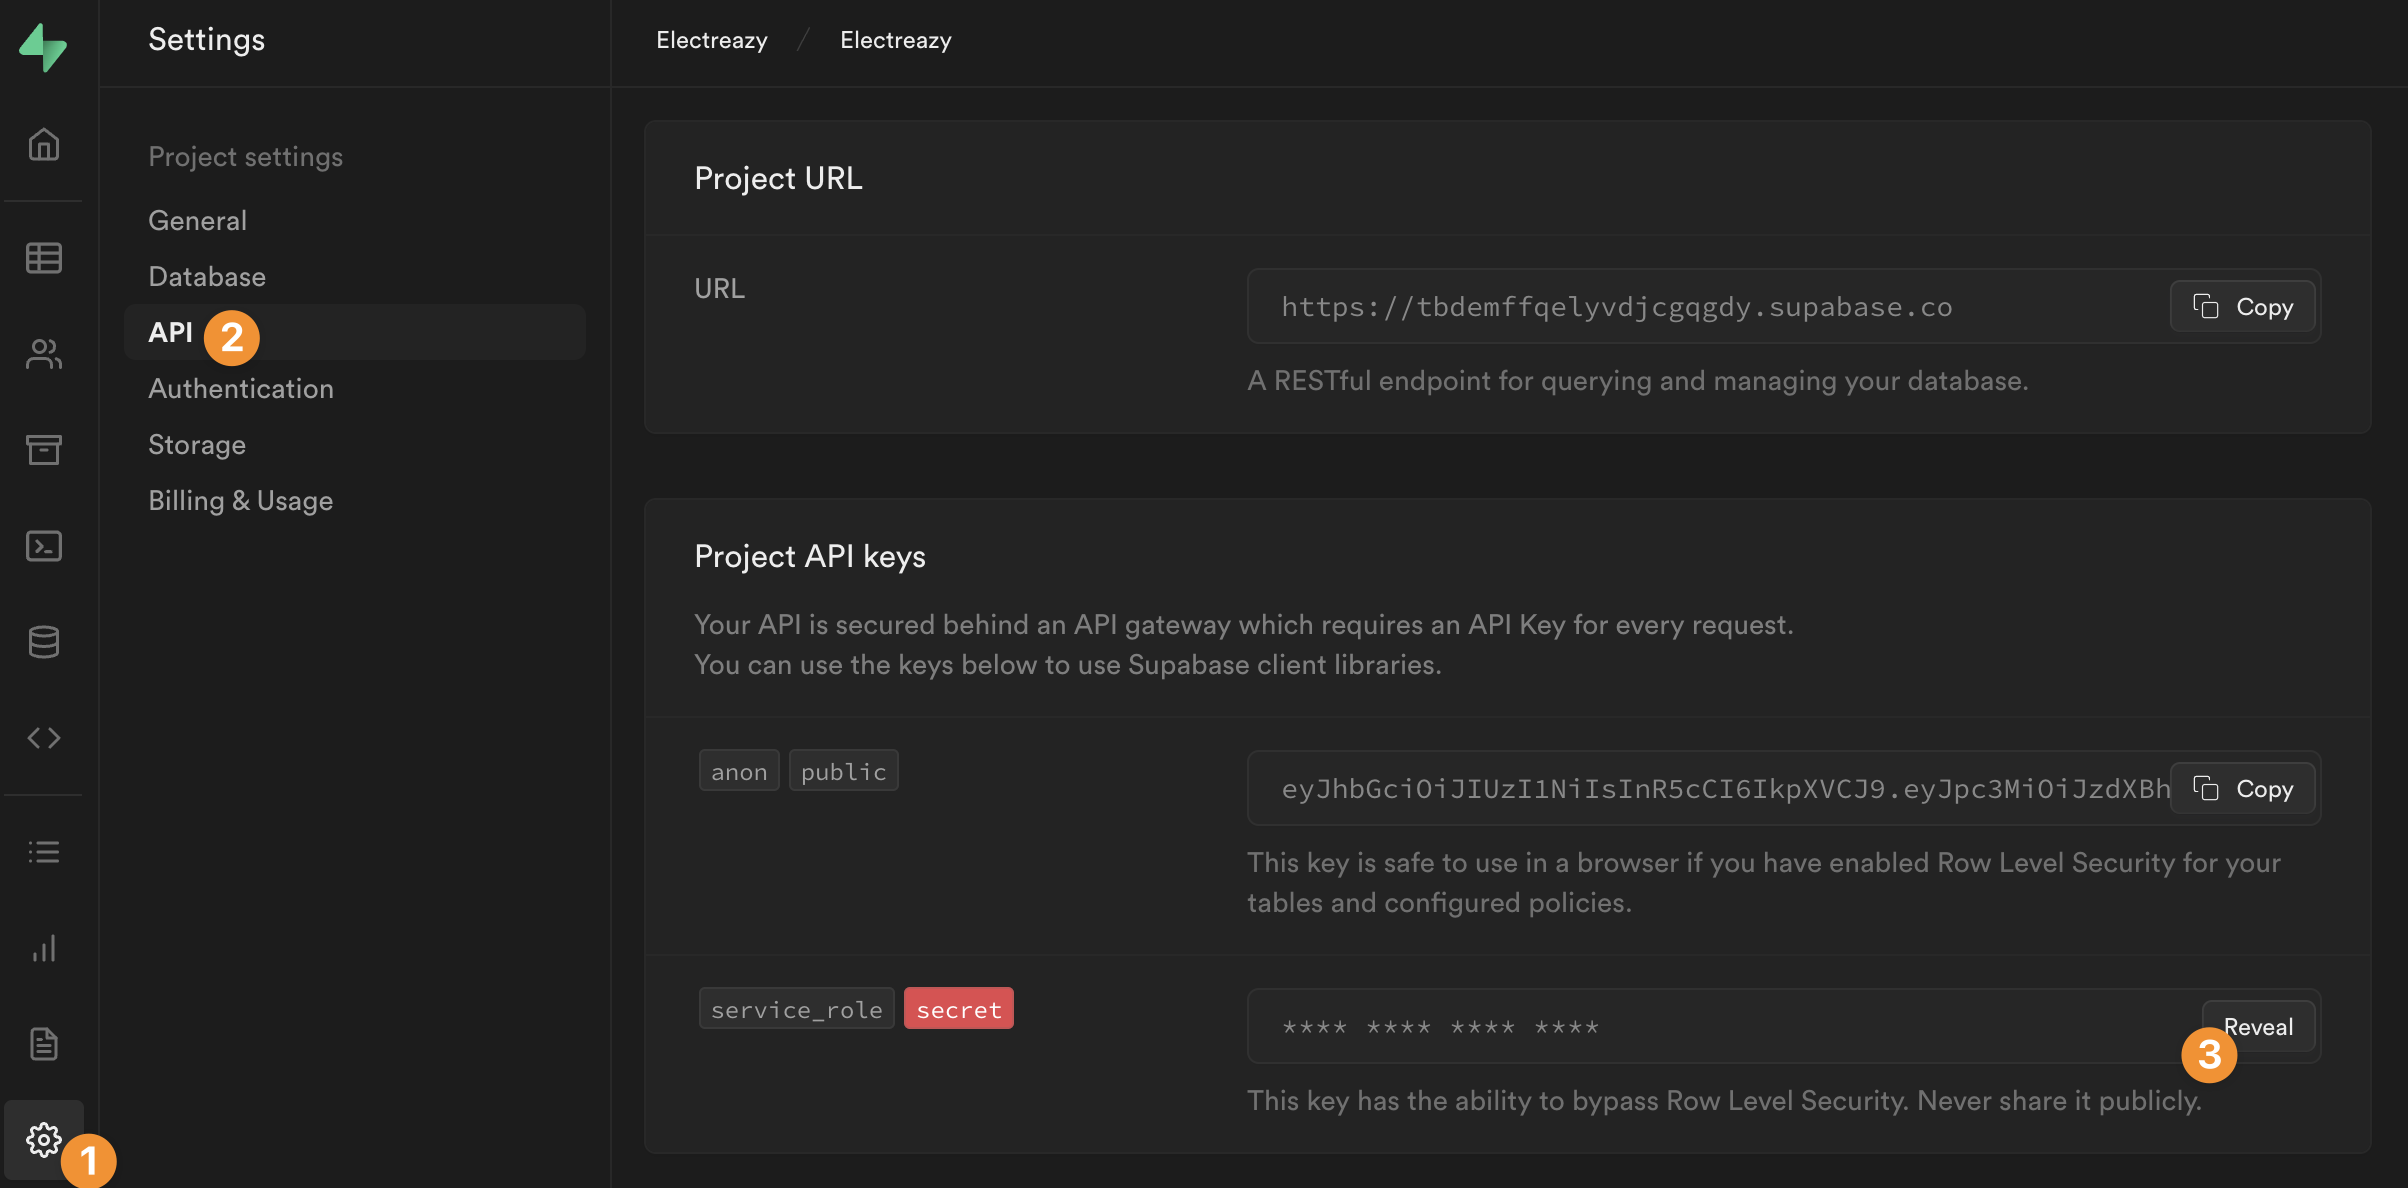
In Supabase, you can find your private API key in "Settings" > "API":
🚨 Warning 🚨
As the name suggests, you'll want to keep this API key secret! Assuming you copy it properly in the "Private API key" field of the Supabase Auth Plugin and don't use it anywhere else in your Weweb project, Weweb will never make it public.
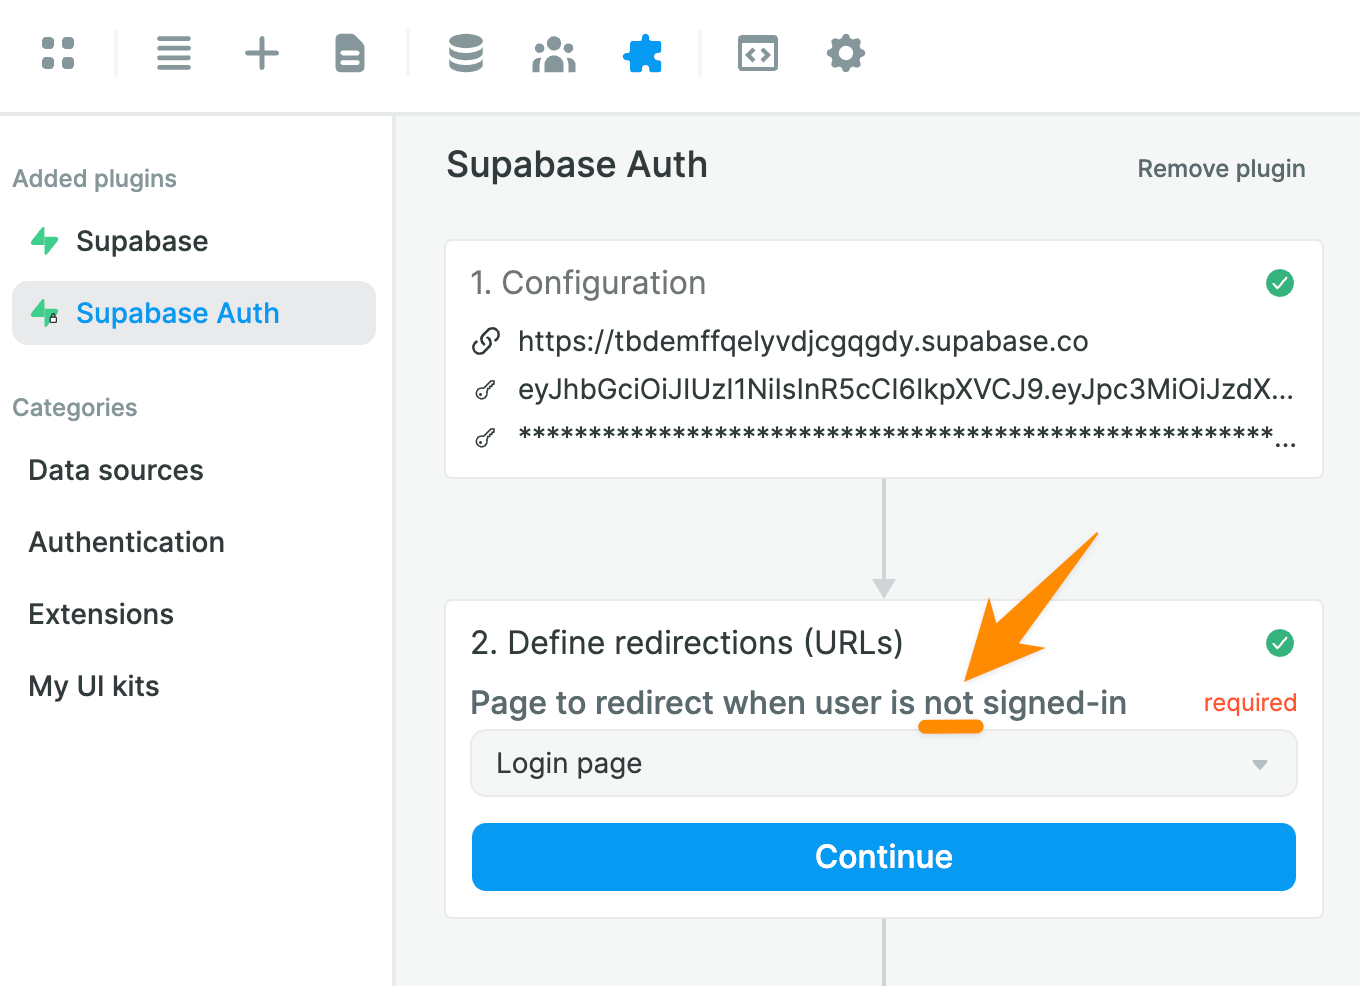
You will then be invited to choose a page to redirect unauthenticated users, i.e. users who are NOT signed-in:
🚨 Warning 🚨
When you setup your Login Workflow, make sure you don't redirect authenticated users to the same page. Otherwise, you'll be creating an infinite loop and your app will crash. This can easily happen when you forget you've redirected unauthenticated users to your home page instead of a dedicated Login page for example.
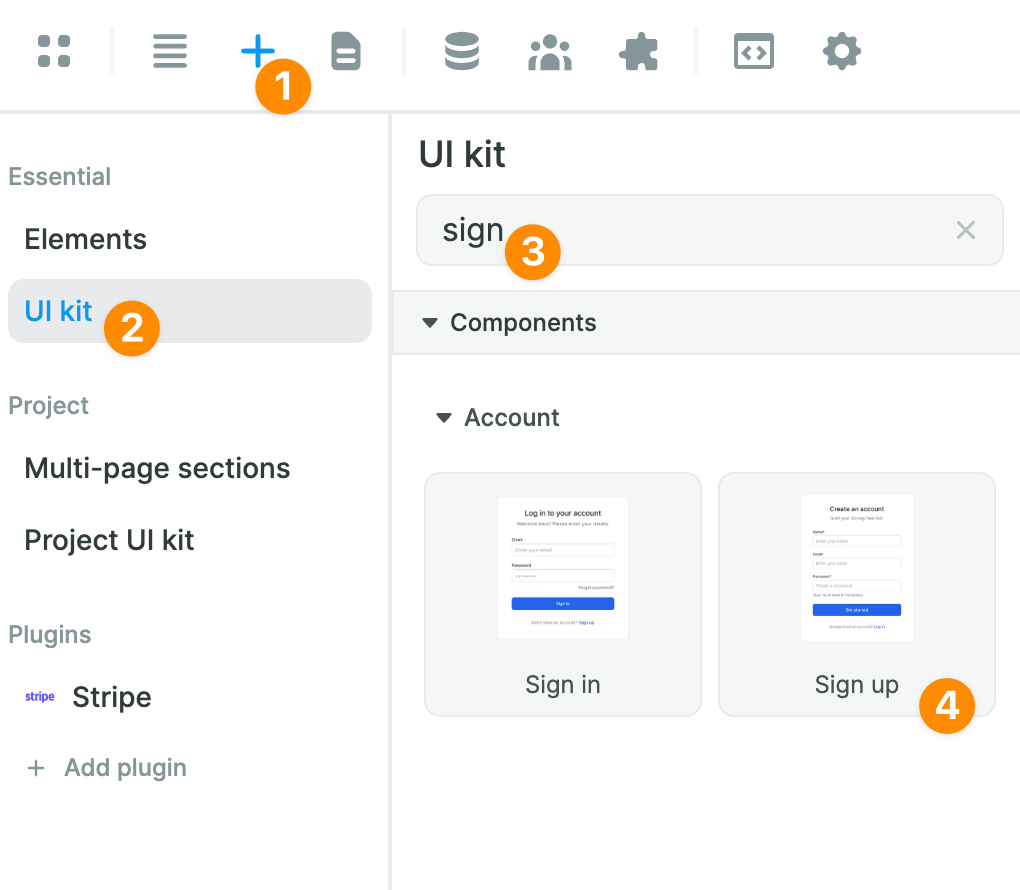
Allowing Users to Sign Up and Sign In
In the "Add" > "UI kit" menu, you can find read-made Sign in and Sign up Forms:
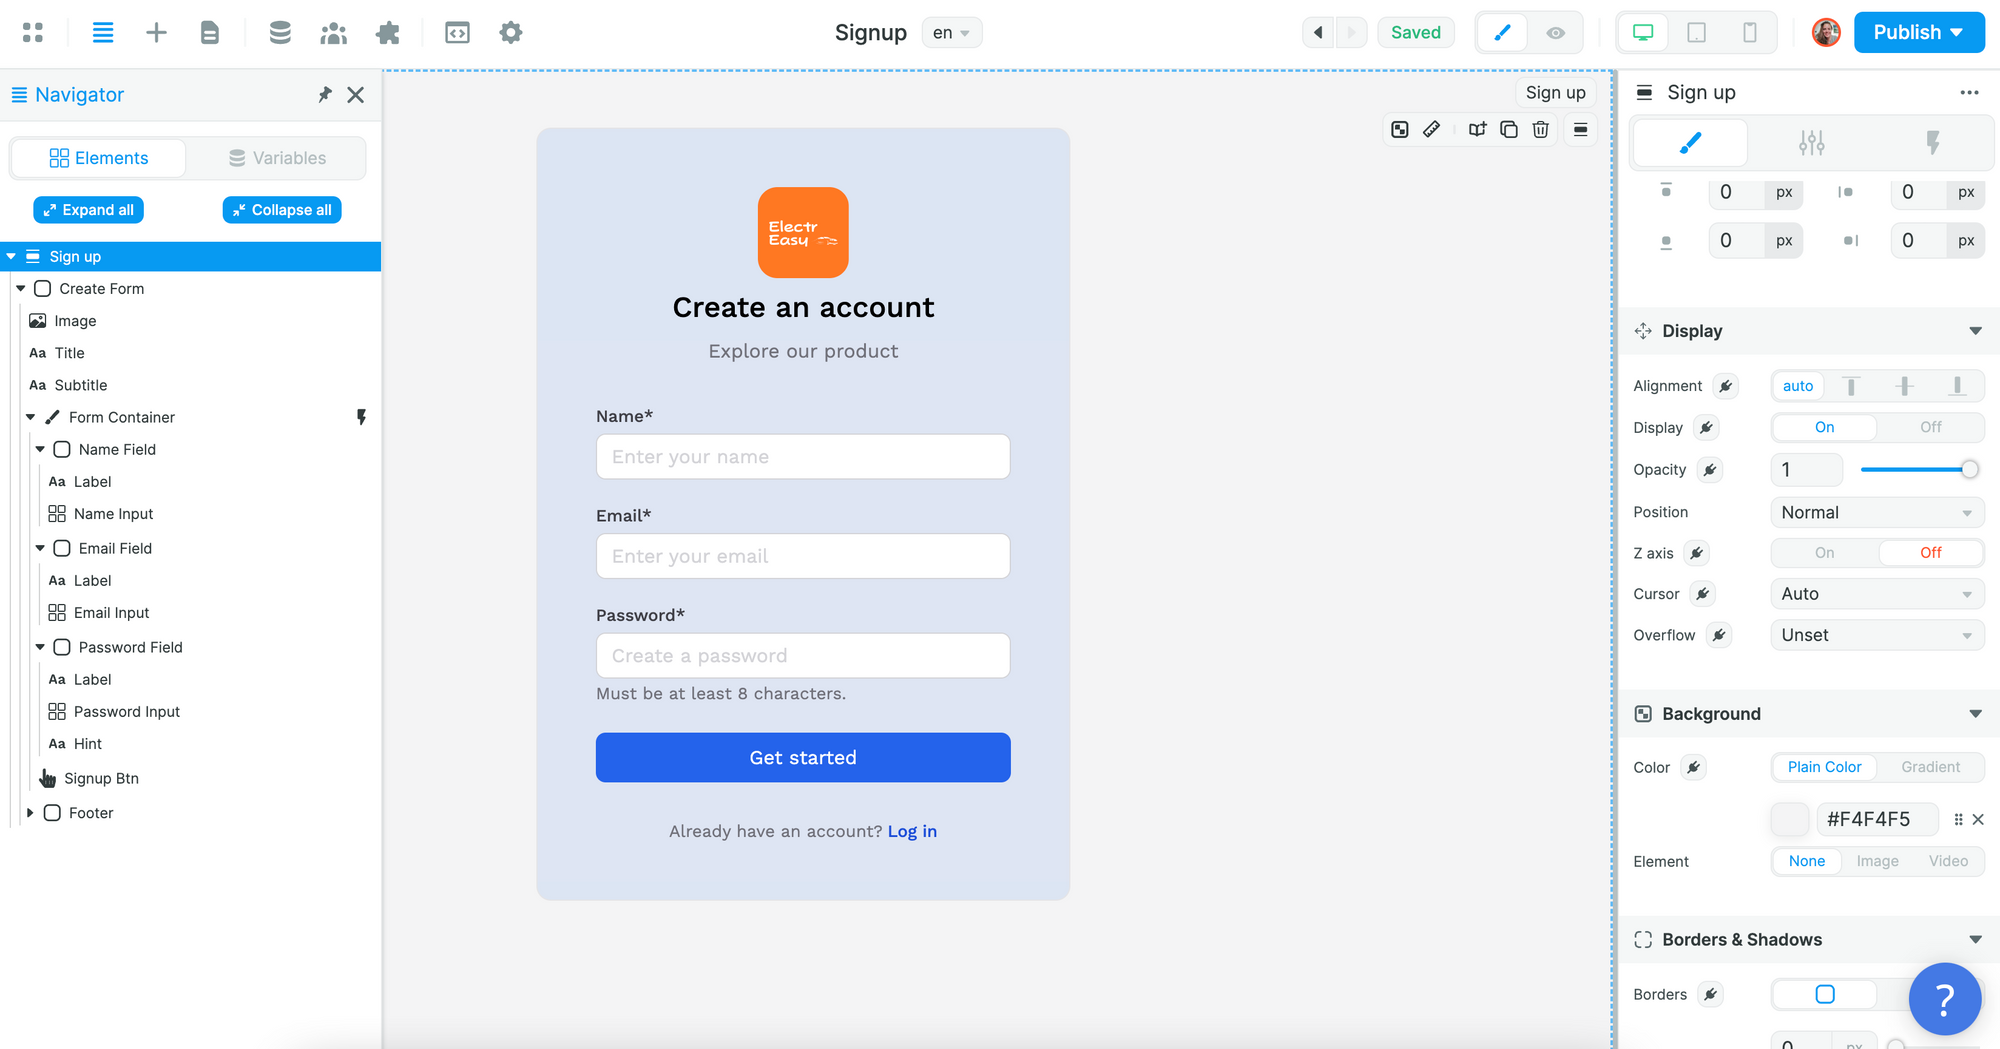
Once you've added a Form to the Canvas, you'll be able to style it whichever way you want.
In the example below, we added an image with the logo of our project to a Sign up Form and changed the background color of the "Create Form" Container:
To allow users to sign up, you'll need to create a Sign up Workflow on the Form Container:
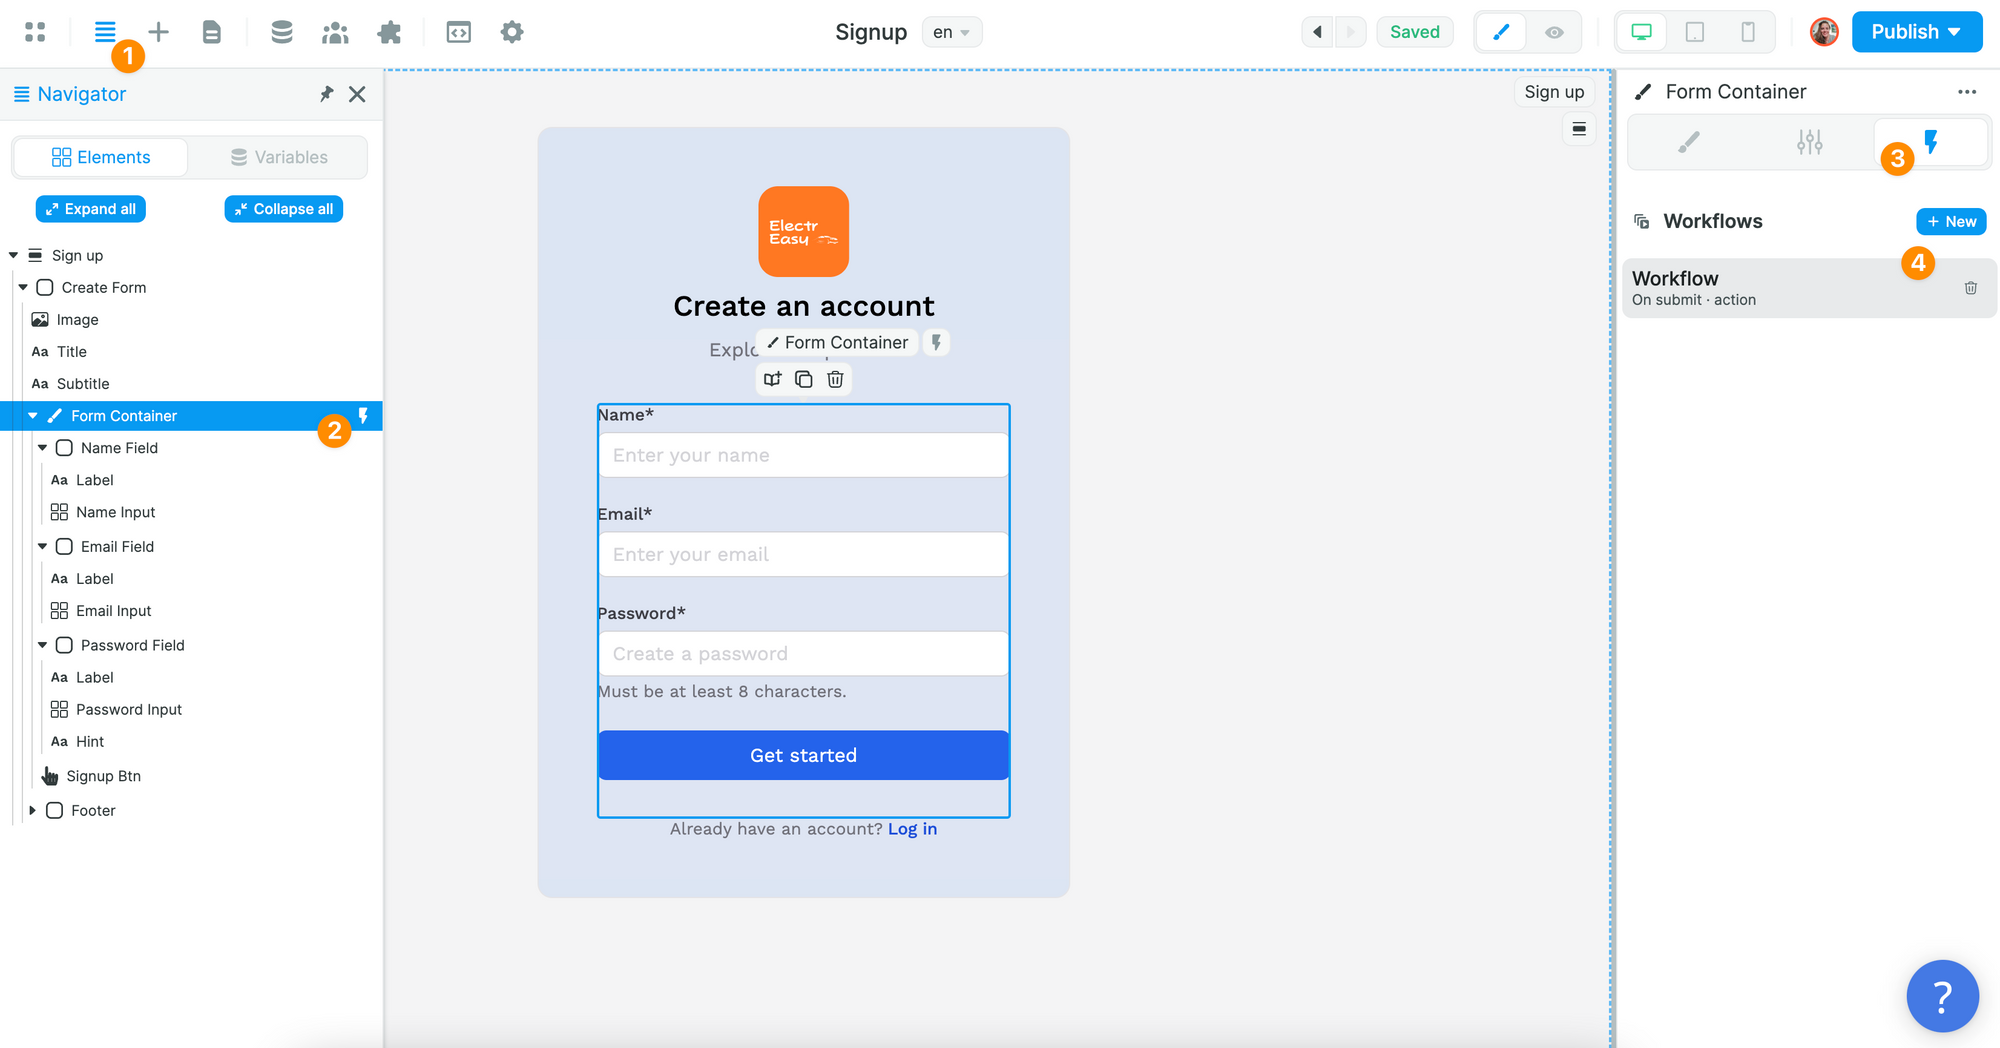
🔥 Pro Tip 🔥
It's important that the Workflow is on the Form Container and not the Sign up Button because we want to validate the fields of the Form when users submit it.
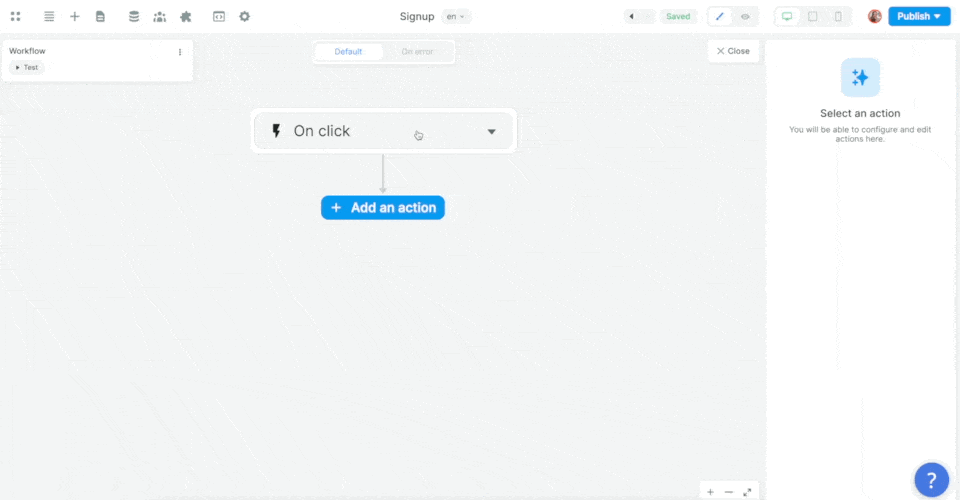
In the Workflow, you will choose the "On submit" trigger and add the Supabase "Sign up" Action:
Then, you'll want to map the email, password, and metadata information in the Form to the email, password, and metadata in Supabase before choosing what page the new user should be redirected to:
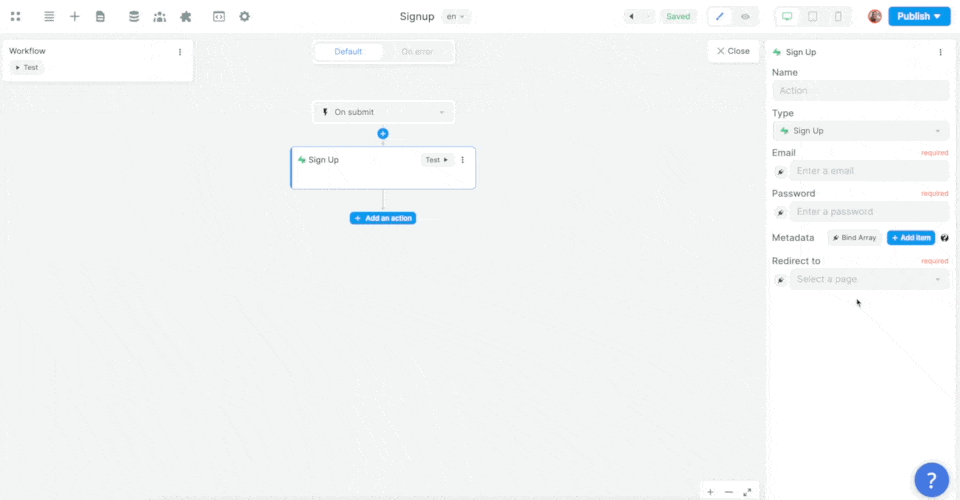
In the example above, we made sure to add the user's name as an item in that user's metadata.
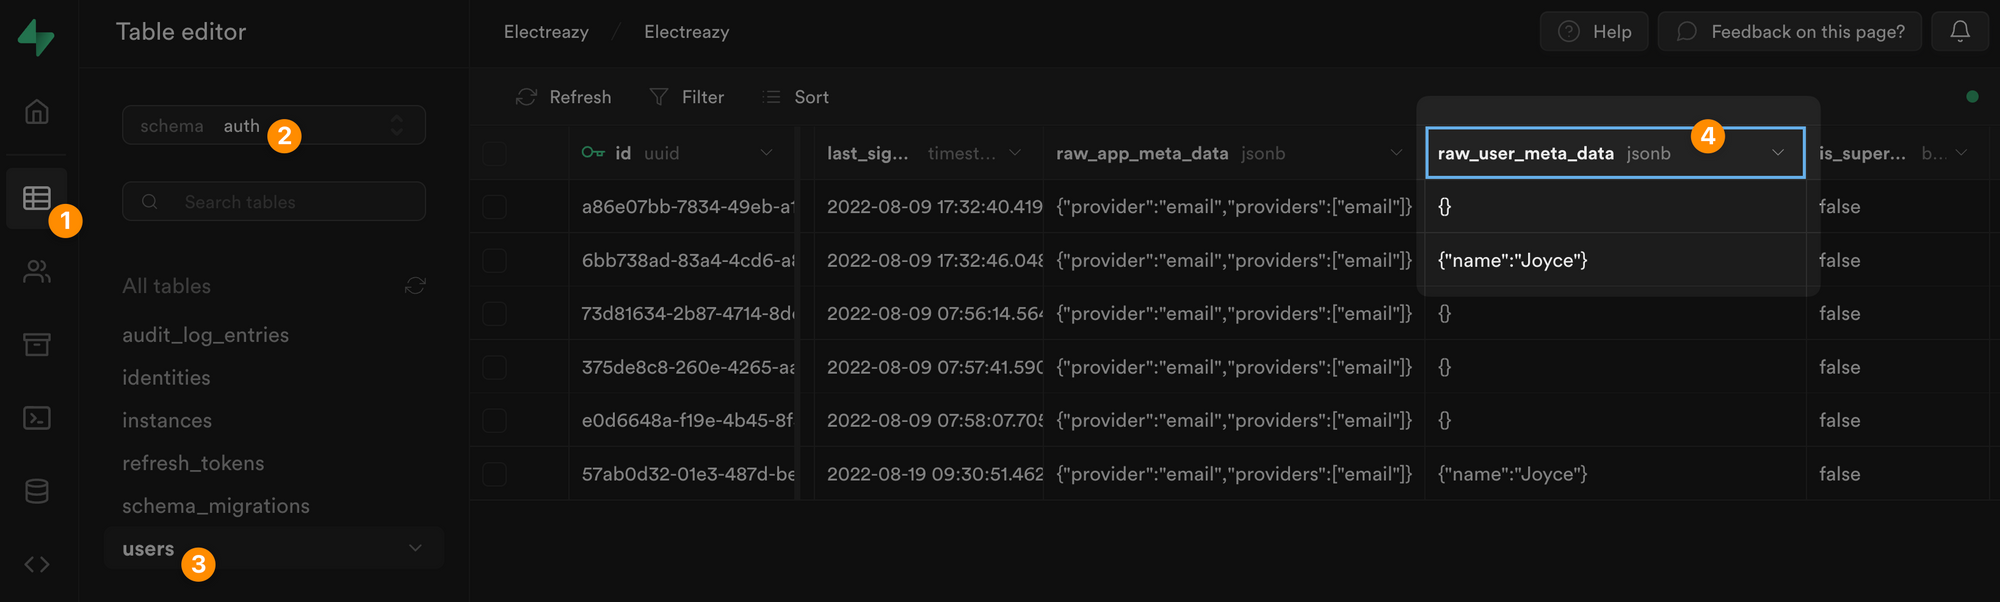
In Supabase, you can find the user's metadata in JSON format in a dedicated field of the "users" table, named "raw_user_meta_data":
The same logic will apply to any Supabase Action you want to trigger.
Adding User Roles & Permissions
Now let's say we want to gate content and set different permissions based on a user's role.
Adding Roles in Supabase
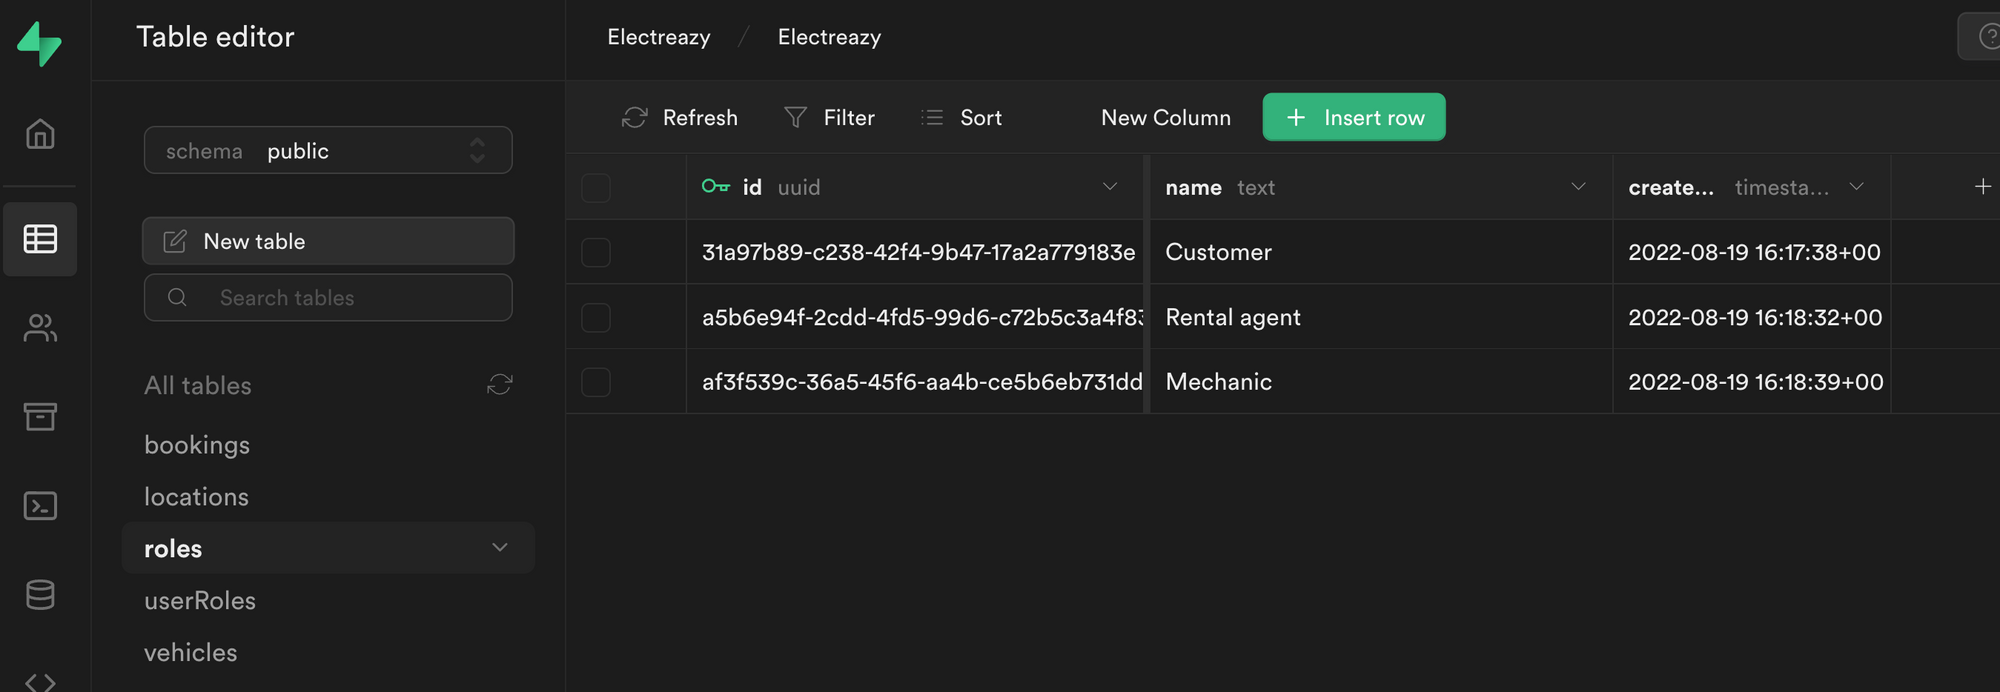
In Supabase, we'll need to create a "roles" table with a list of roles and a join table that links the "roles" table with our "users" table.
First, let's create a "roles" table with three roles and make sure that each role had a UUID and a "name":
🚨 Warning 🚨
In order for the integration to work with the Users tab in WeWeb, it is crucial that the role title is a text field named "name".
Joining Roles and Users in Supabase
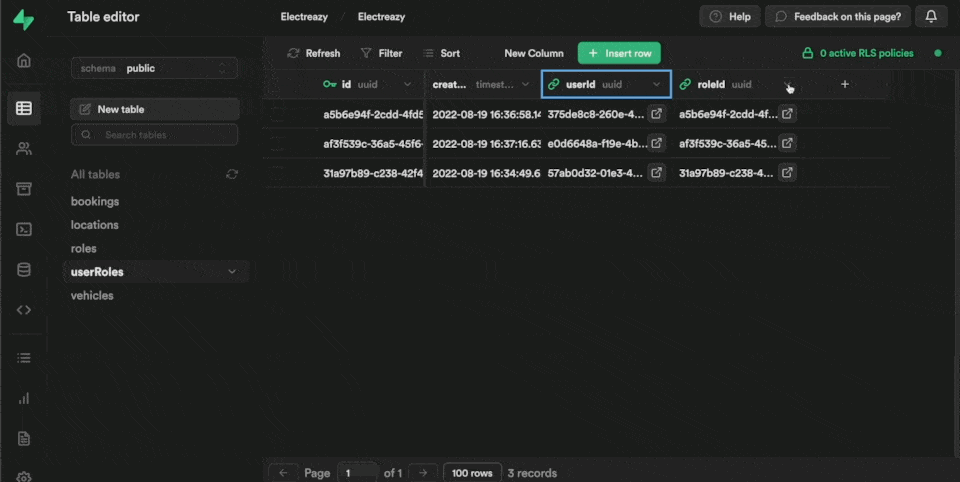
Second, let's create a "userRoles" join table:
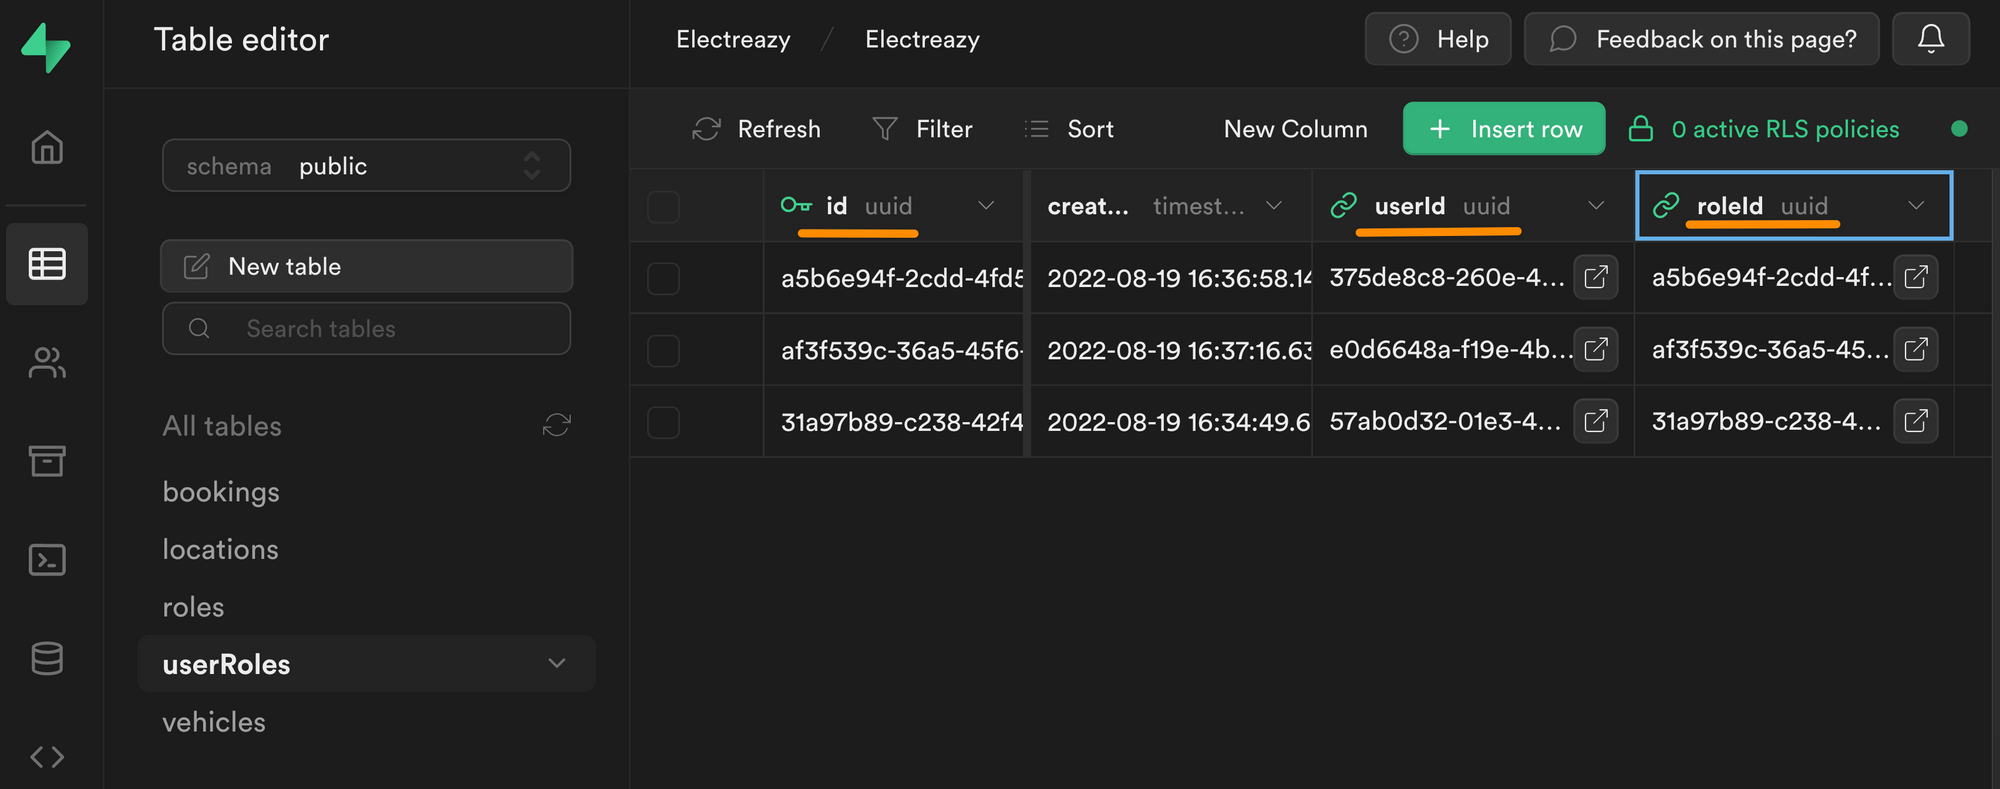
In the join table above, you can see we have an "id" field that is uniquely identifiable thanks to a UUID.
This unique "id" is linked to a "userId", which is also a UUID, more specifically, it is the UUID we find in the "id" field of the "users" table in the "auth" schema:
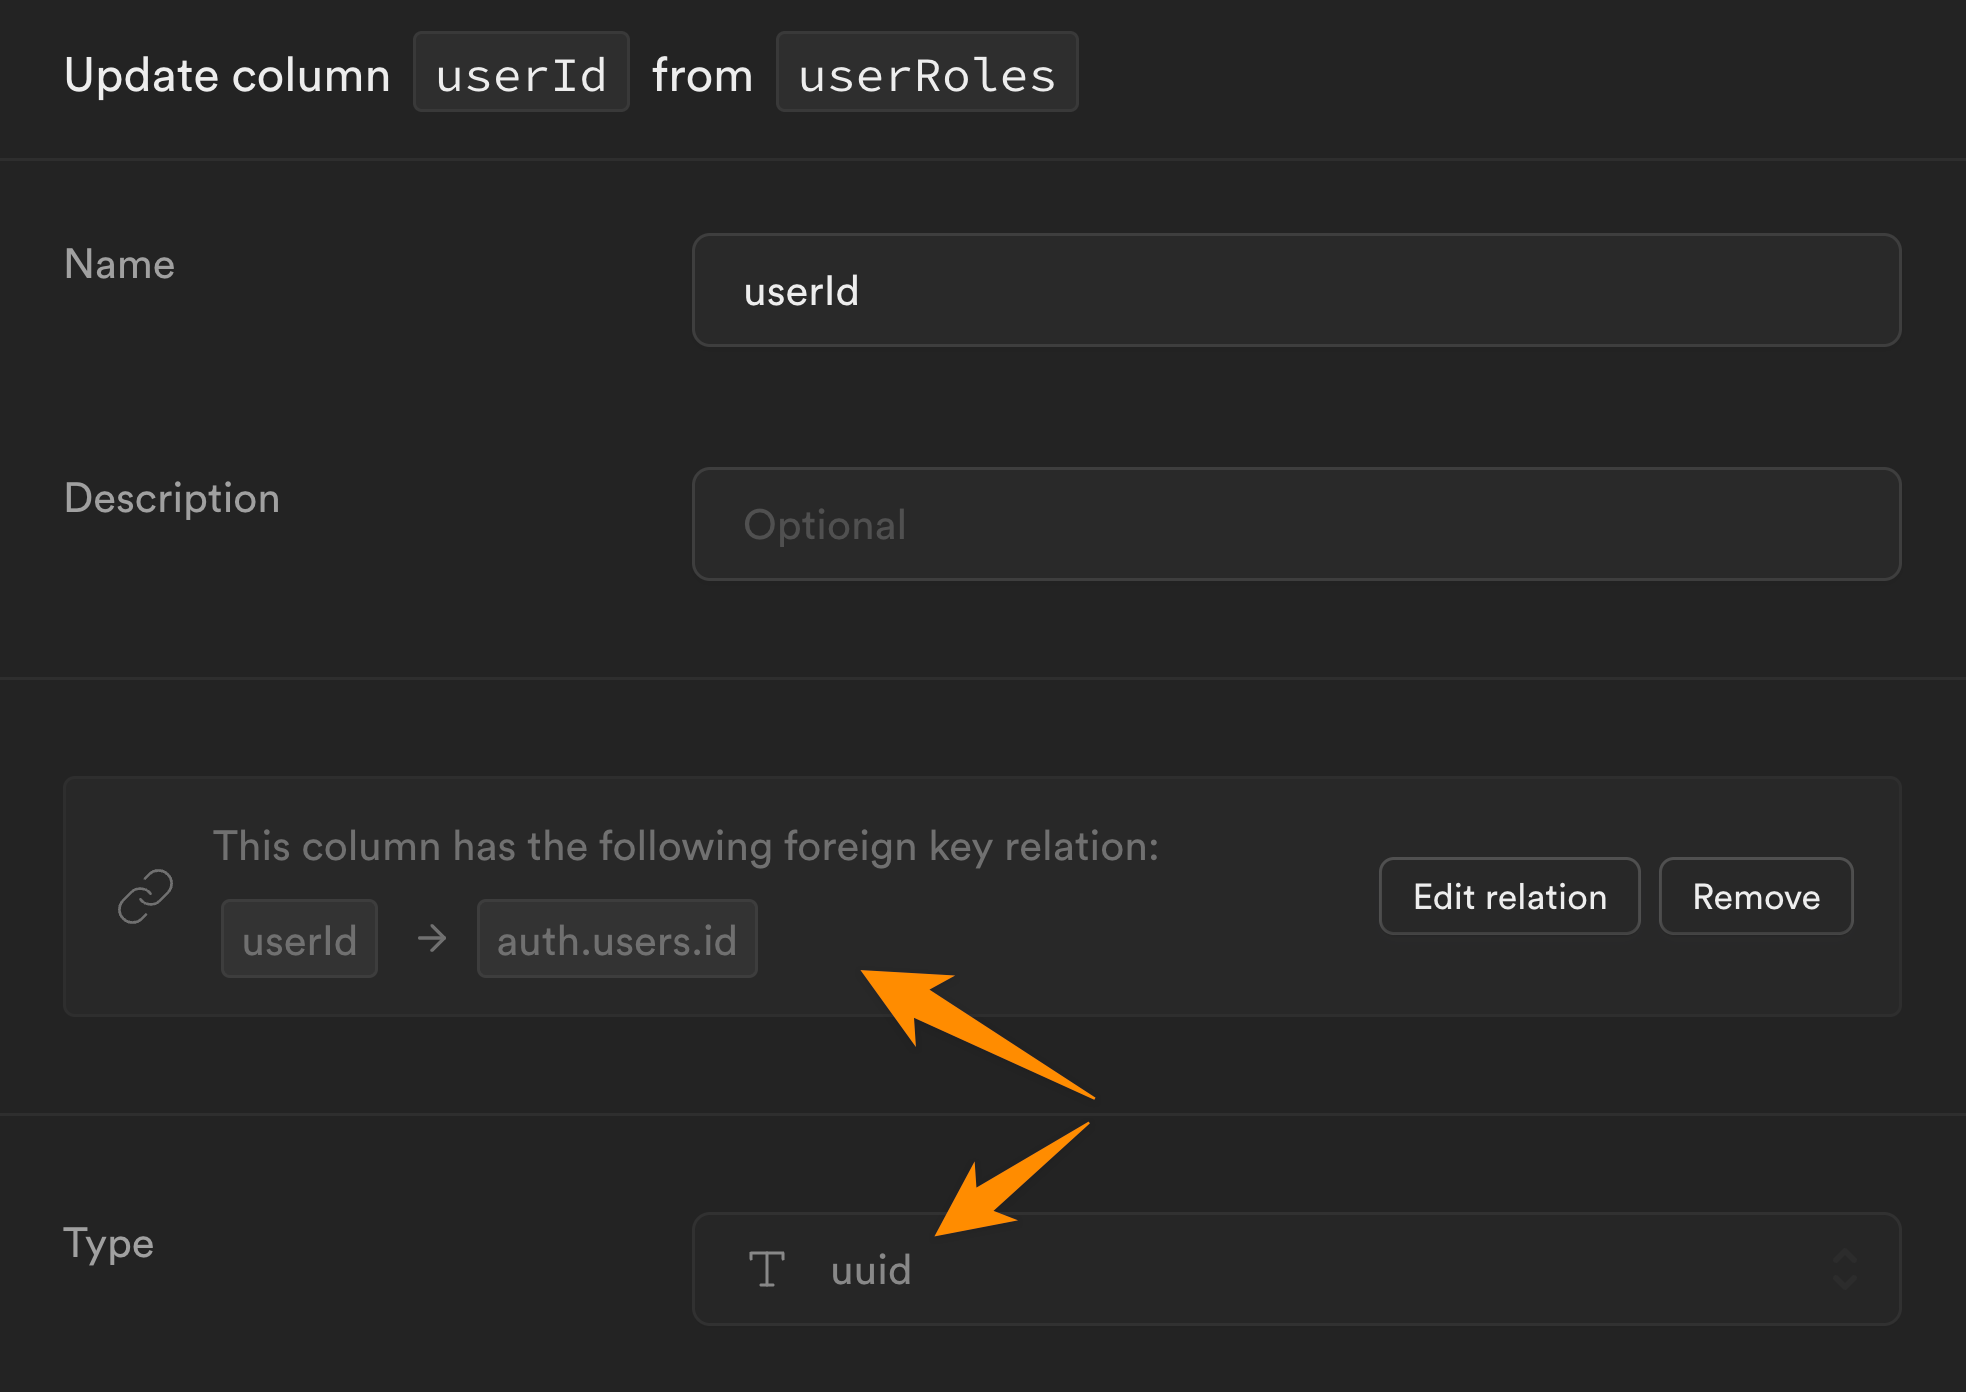
Each row in our "userRoles" table is also linked to a "roleId" which is the UUID we find in the "id" field of the "roles" table in the "public" schema:
Linking Users in WeWeb to Roles and Users in Supabase
Once we've added our list of roles in Supabase and created an empty join table to link our roles with users, it's time to go to WeWeb.
In "Plugins" > "Supabase Auth" > "3. Roles table", we'll click "refresh" and select the relevant Supabase tables we just created:
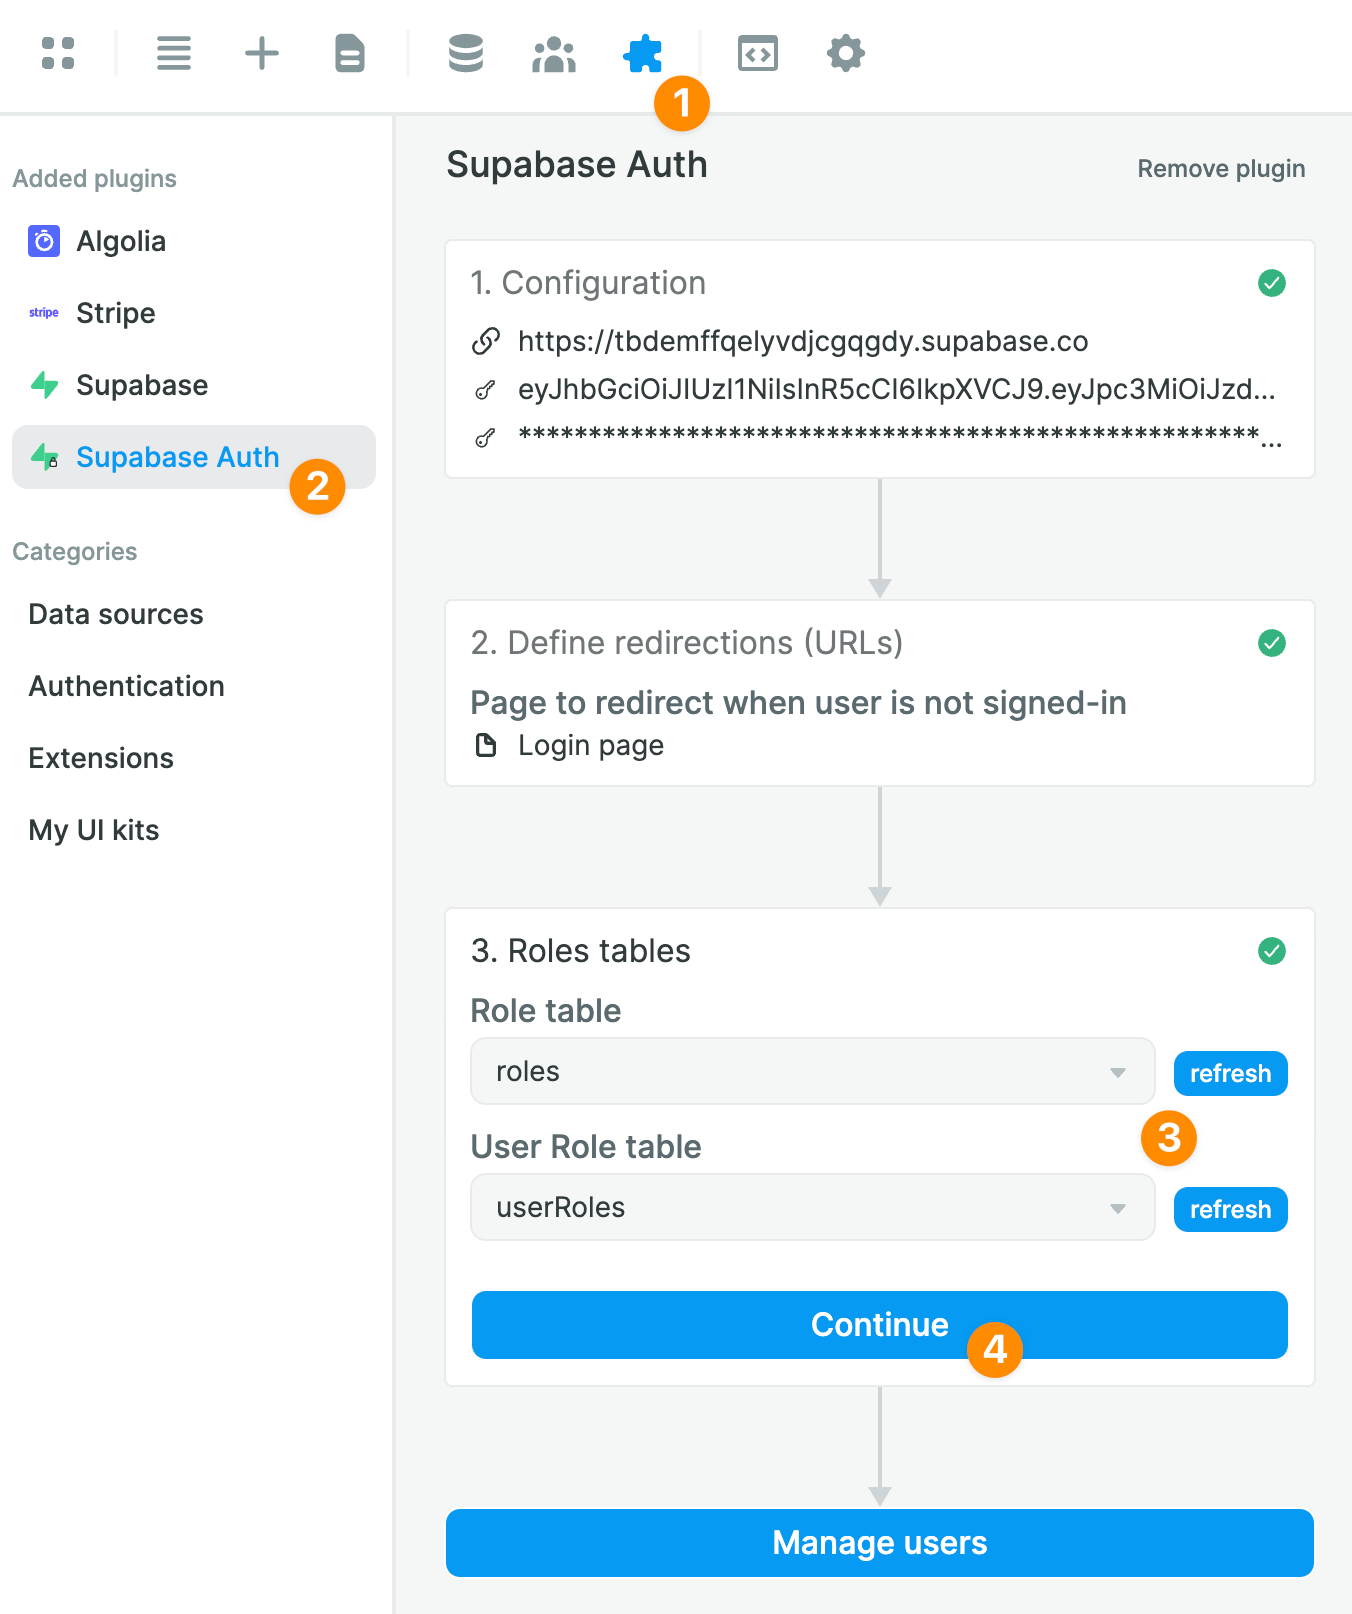
Once you've told WeWeb where to find the "roles" and the join table in Supabase, you'll be able to easily view and maintain user roles in the "Users" tab in WeWeb:
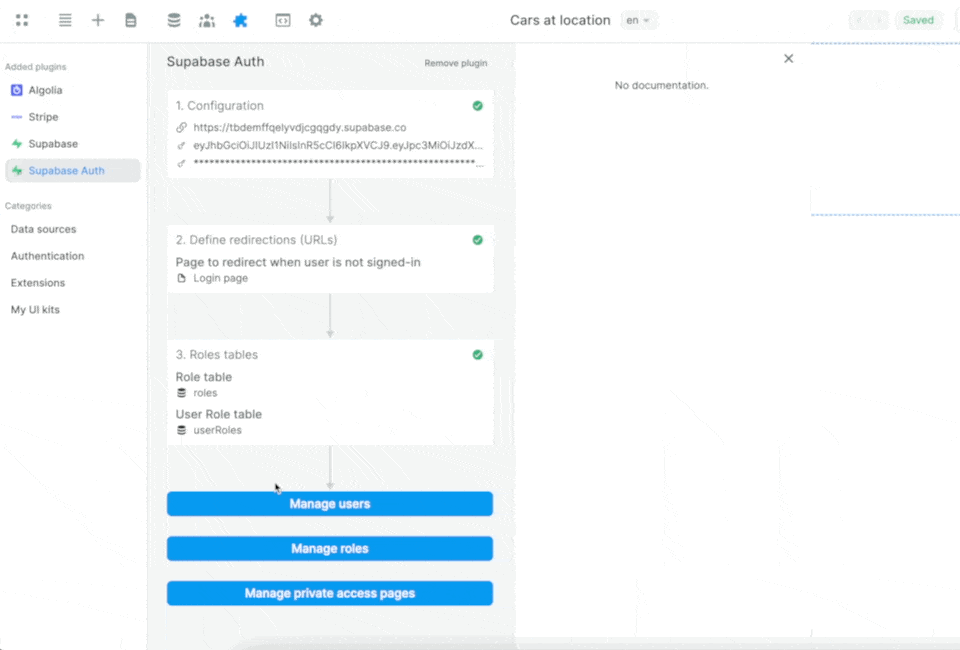
When you make a change to a User in WeWeb, it will automatically be updated in Supabase.
Users vs Profiles
So far, we've showed you how to work with the default "users" table that Supabase generates in the "auth" schema when you create a new project.
Note that, for security purposes, the information in that "users" table is not exposed on the auto-generated API.
How does this affect your project in WeWeb?
Let users update their information
Let's say you want to let authenticated users update their information, then you don't need to set up anything else in Supabase.
You could simply create a user profile page in WeWeb and display their information when they sign in, based on the data you have in the "user" Variable:

Display other users' information
In some use cases, you might want to display other users' information.
For example, if you're building an HR portal in WeWeb, you might want HR employees to have access to a list of applicants and their user profiles.
You wouldn't be able to do that with the "users" table in the "auth" schema because each user's information is only available to them.
For such a use case, Supabase recommends creating a "profiles" table in the "public" schema to store user data that you want to access via the API.
In WeWeb, you would then be able to create a Collection to get data from the "profiles" table.
Learn more about managing user data in the Supabase documentation.