🗝 Token-Based Authentication
603
In WeWeb, you can connect to third-party authentication like Xano, Auth0, or WeWeb's native authentication system.
Or you can use any token-based authentication system.
- Add the plugin
- Configure the plugin
- Define the page to redirect users who are not signed-in
- Manage who has access to individual pages
- Add Signup and Login Workflows
Add Plugin
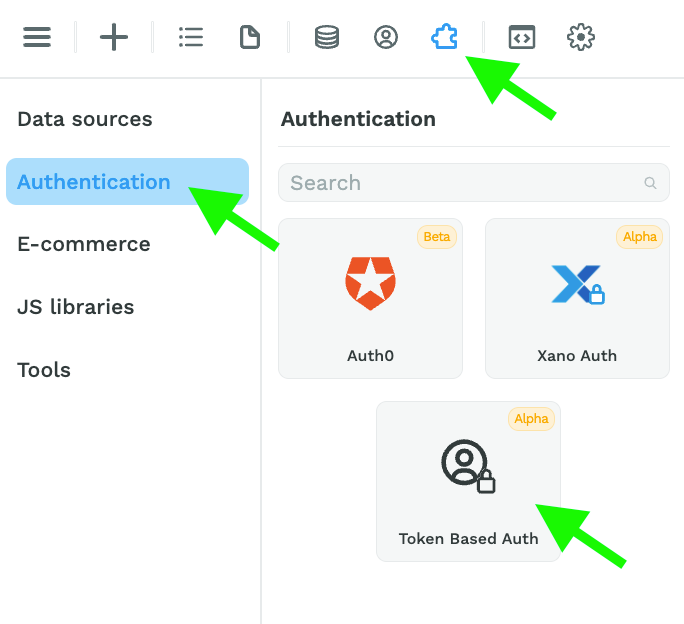
👉 Go to "Plugins" > "Authentication" > "Token Based Auth"
Configure Plugin
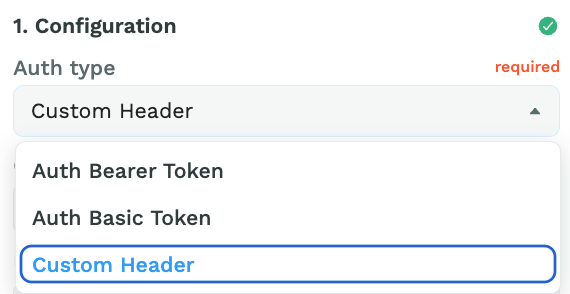
When you add the Plugin, you will be invited to choose the authentication type:
- Auth Bearer Token,
- Auth Basic Token, or
- Custom Header
Depending on the authentication type you choose, you will be invited to add further information.
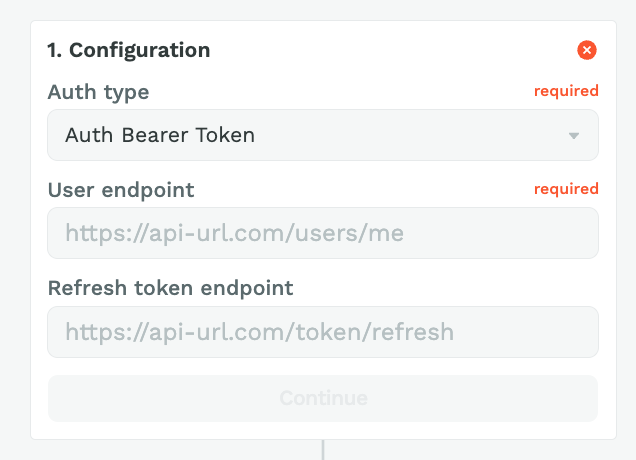
For Auth Bearer Token and Auth Basic Token authentication, you will be invited to provide a user endpoint and refresh token endpoint:
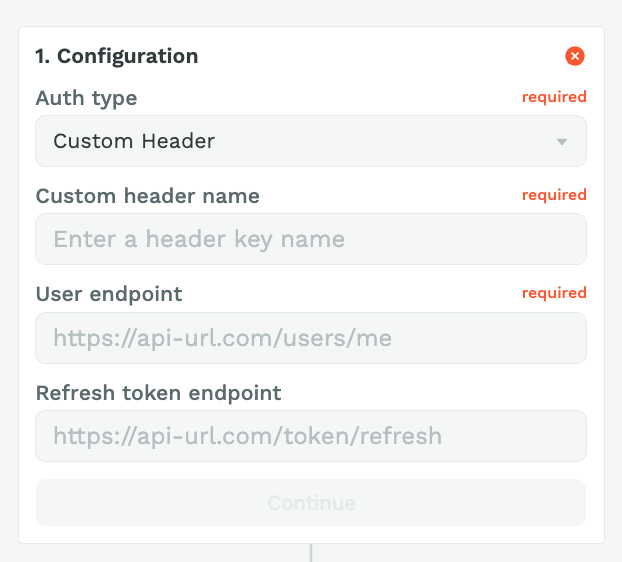
For Custom Header authentication, you will also be invited to fill out the custom header name:
🚨 Warning 🚨
If you're unsure how to complete this step, please contact the provider of the authentication system you are attempting to set up.
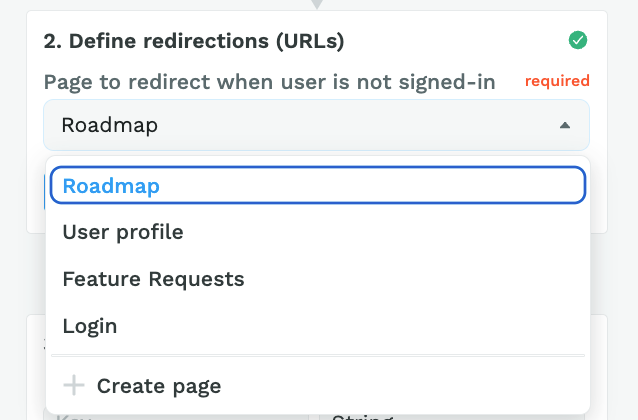
Define Redirection
Choose the page where you want to redirect users who are not signed in:
Add User Groups
If you have setup User Roles in your authentication system, you can add User Groups in WeWeb that refer to those User Roles:
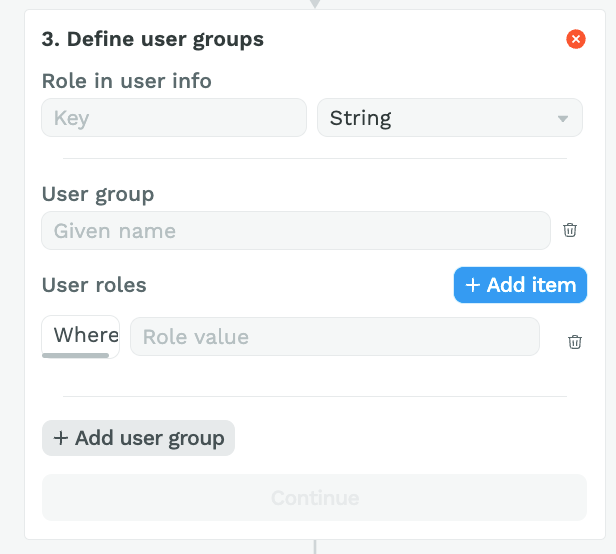
When you setup the "Token Based Auth" Plugin, an "Authenticated users" User Group will be created by default even if you don't define additional User Groups in step 3 of the Plugin configuration.
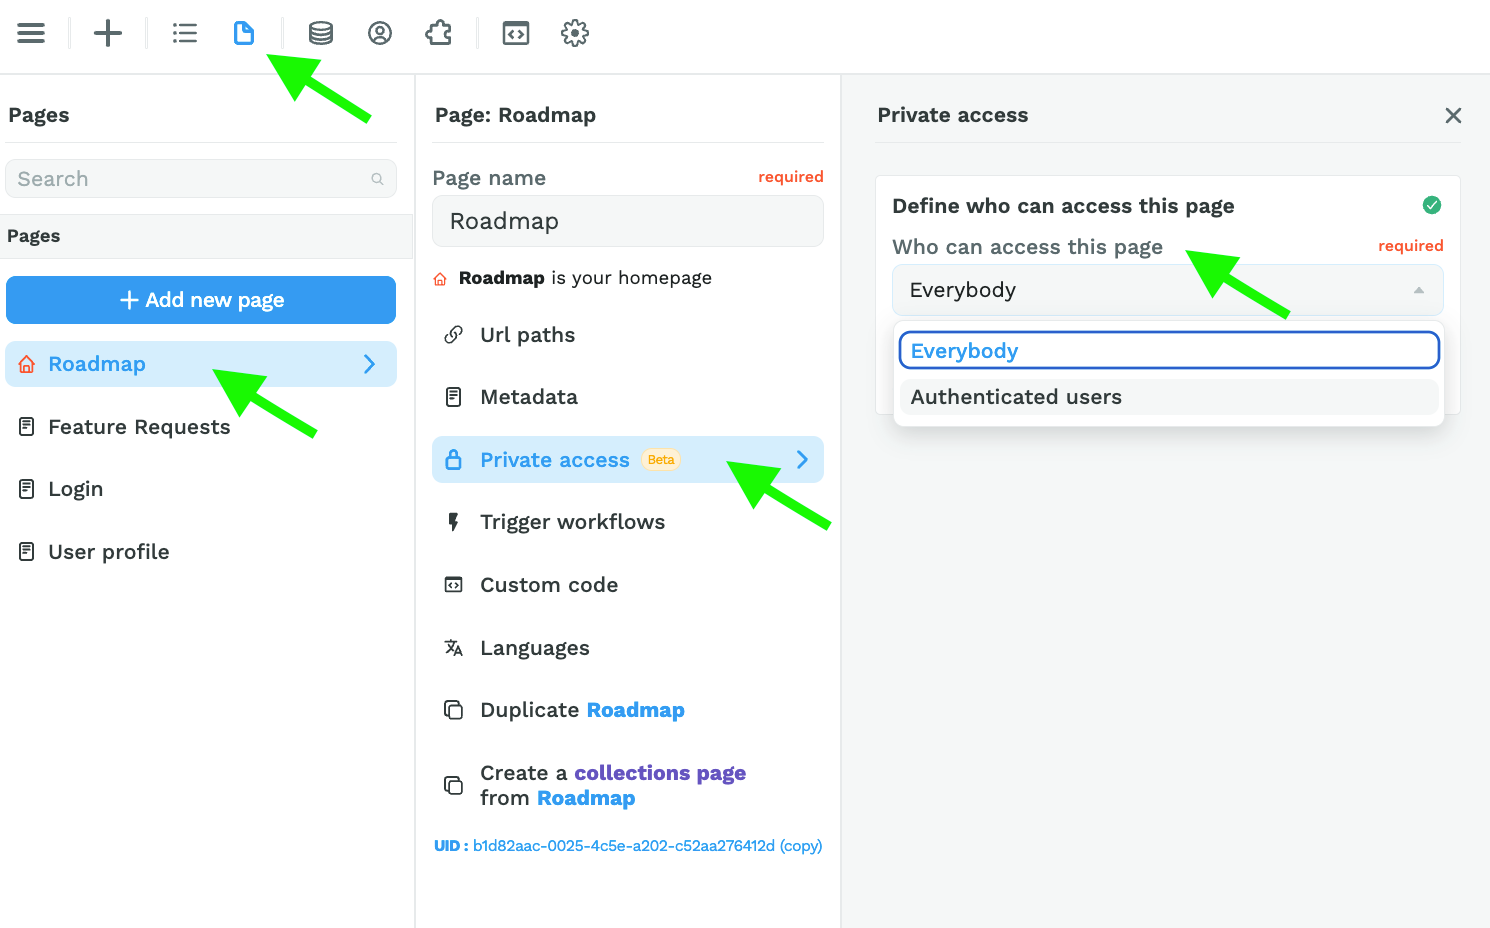
Manage Access to Pages
Once you have setup the authentication plugin, you will be able to define which User groups have access to individual pages:
Add Signup and Login Workflows
When you add the "Token Based Auth" Plugin to a WeWeb project, 3 new elements will appear in the "Add" menu:
- a signup form,
- a login form, and
- a user profile form.
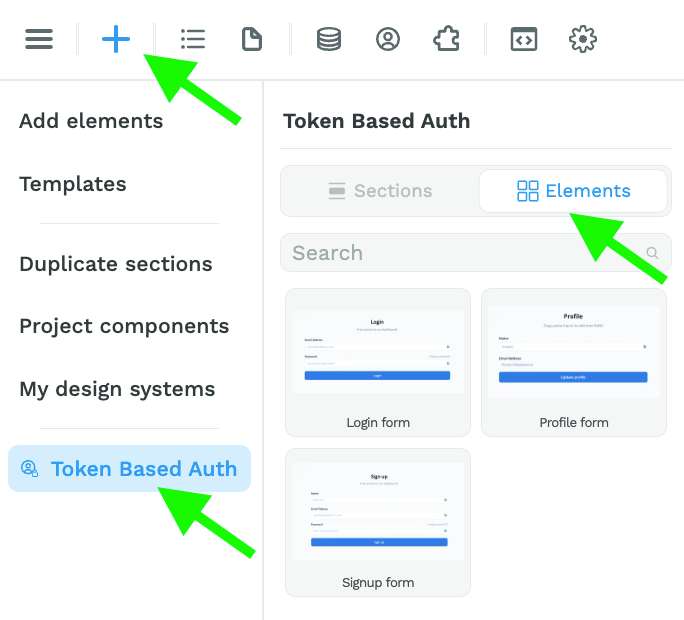
You can add an authentication form by drag-and-dropping it in a Section on the Canvas.
In order for these forms to work, you'll need to setup Workflows on the Form Containers.
In the example below, we are using a Custom Header authentication type:
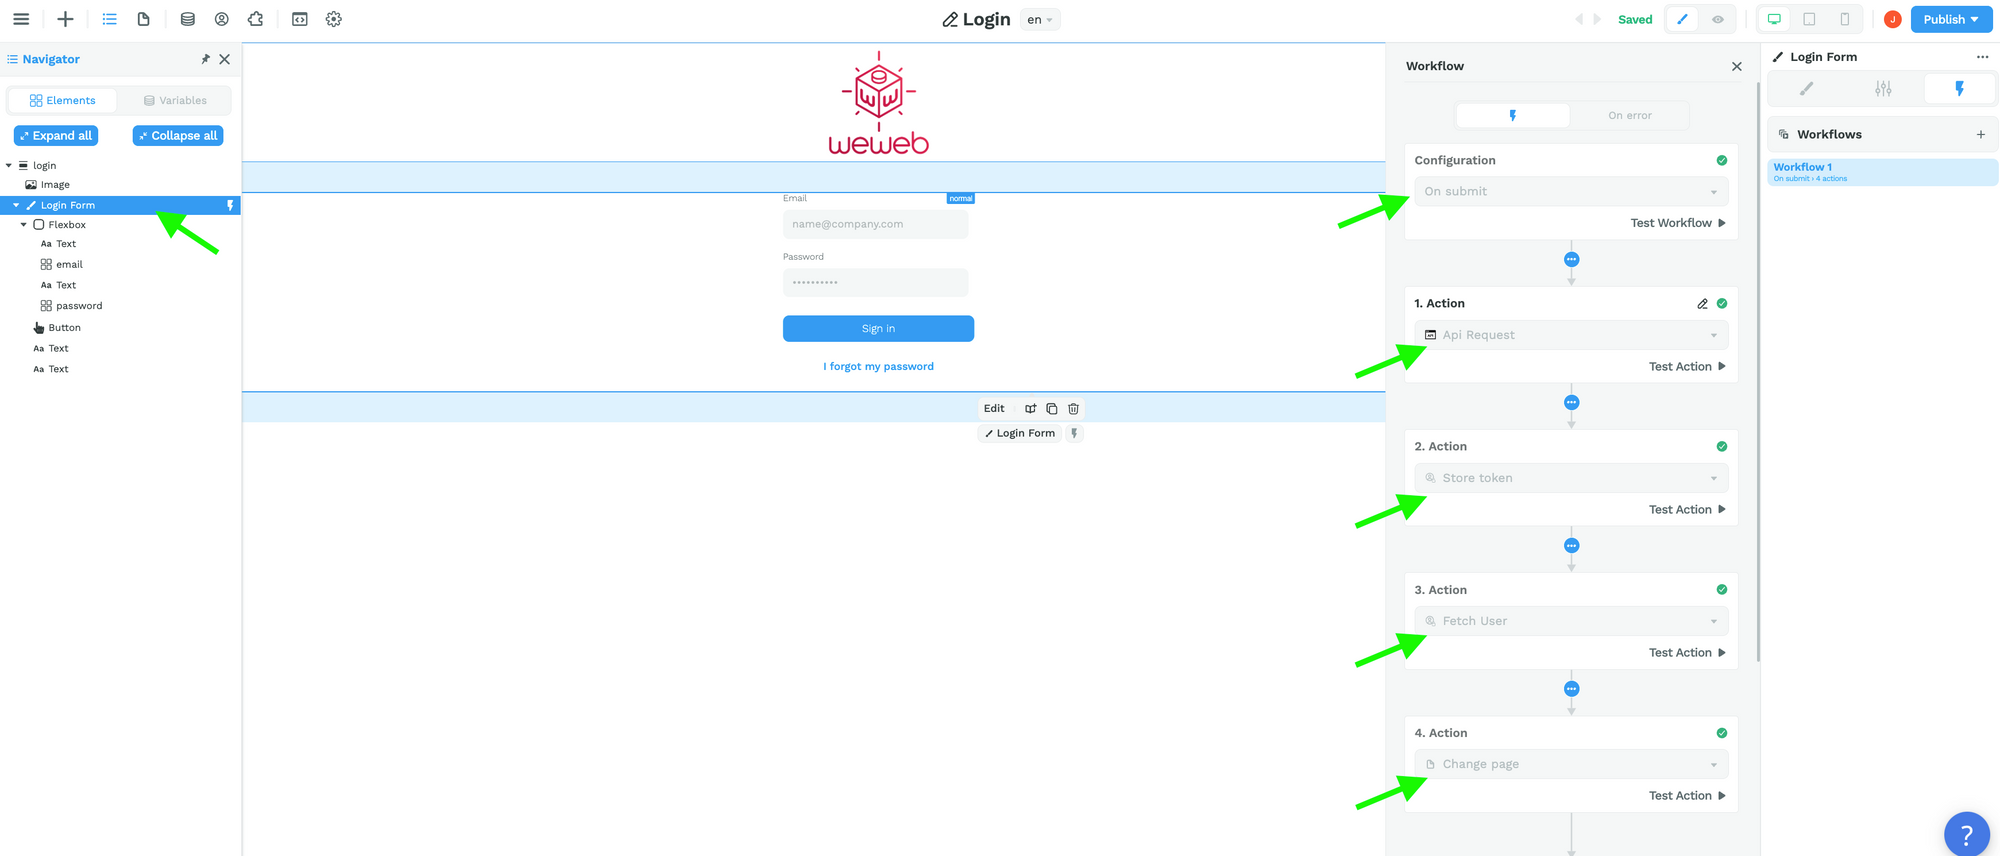
In step 1, we make an API request to POST the user's email and password to our auth provider. The URL endpoint and requested information will depend on your auth provider.
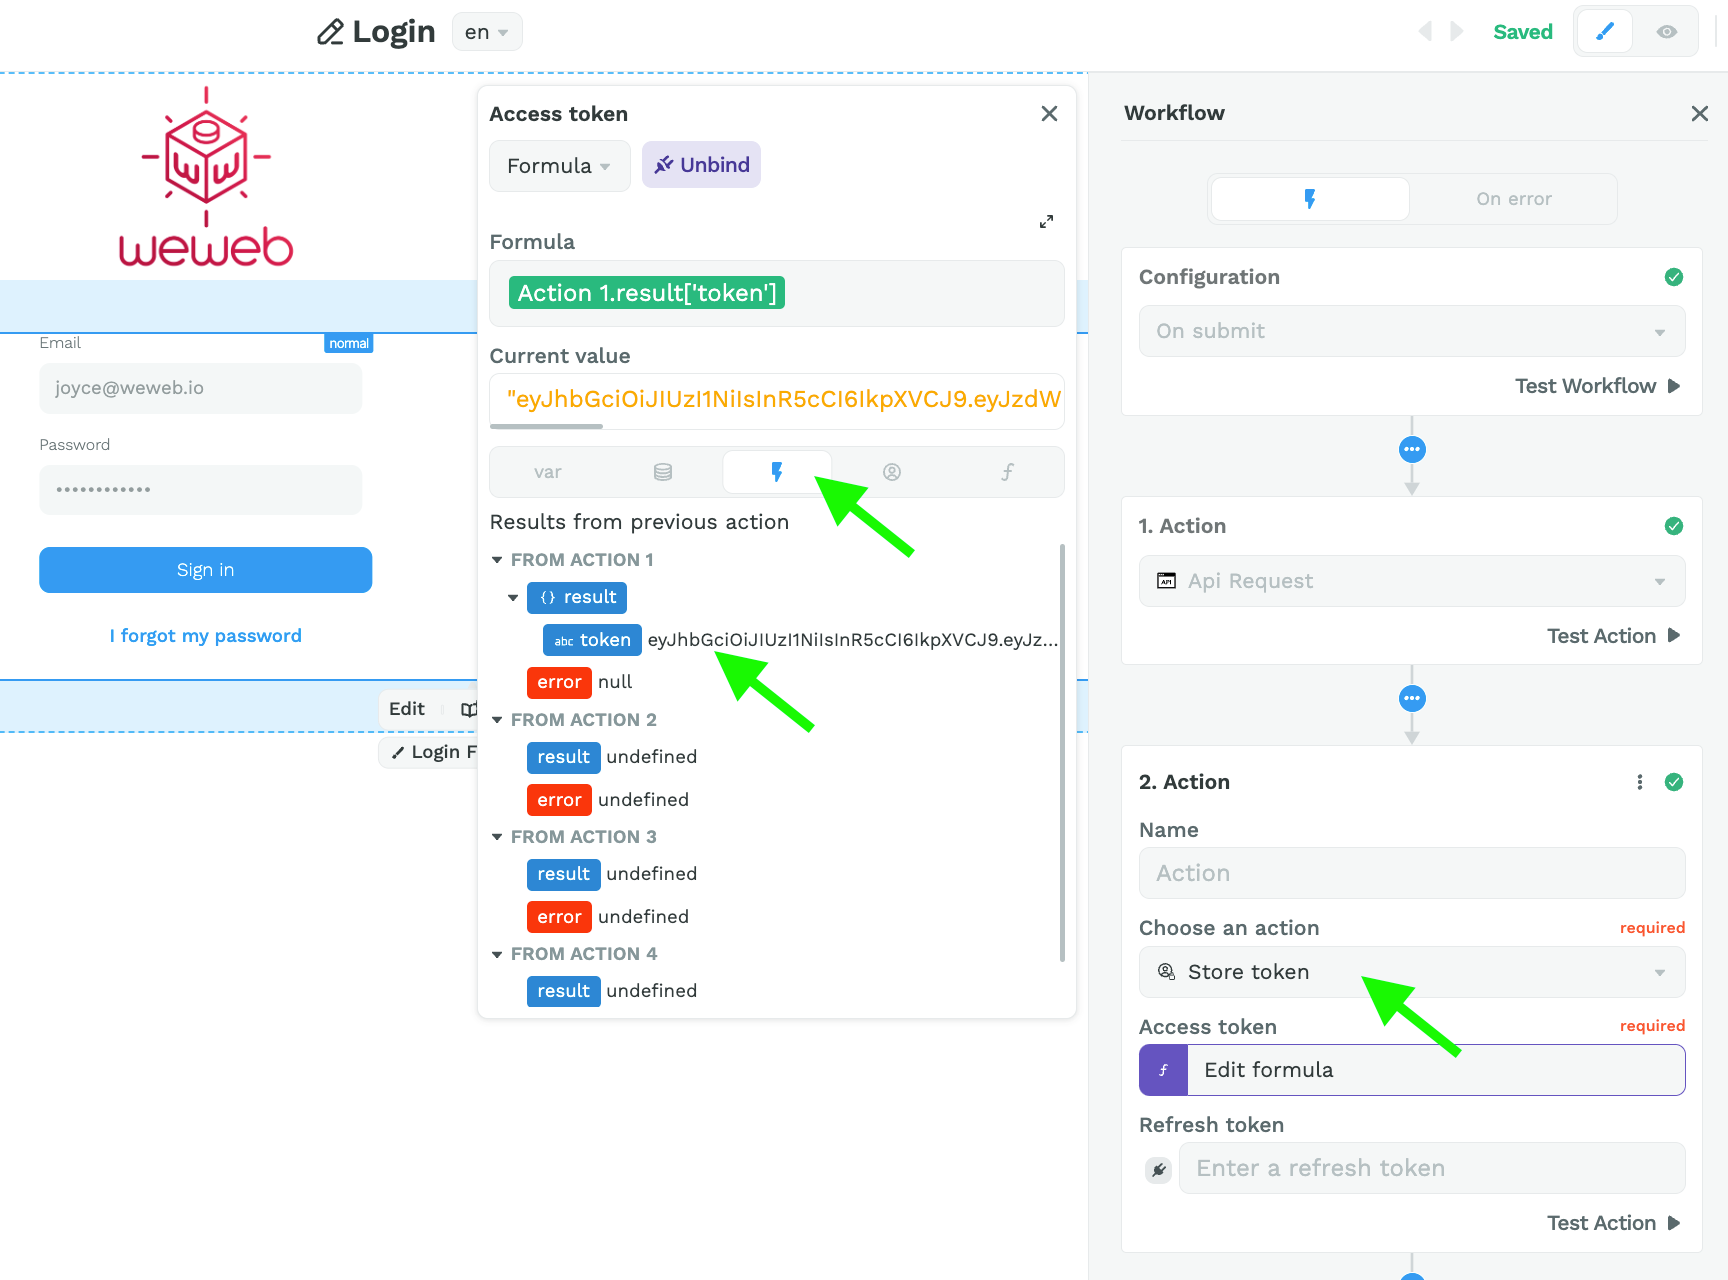
In step 2, we store the user token from the result of the previous action:
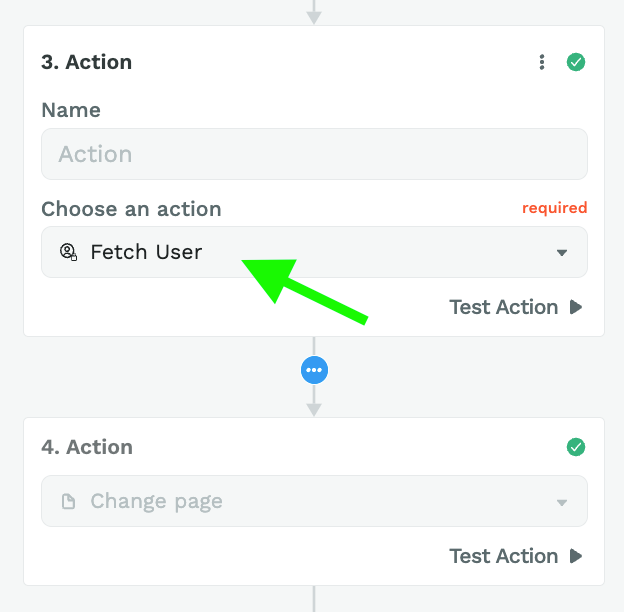
In step 3, we fetch the user before redirecting the user to another page in step 4:
🔥 Pro Tip 🔥
The logic remains the same for signup, login, custom header, auth bearer, and auth basic.
Based on the information provided by the user in the Form, i.e. the Component Variables in the Form Container, you:
- make an API call to your auth provider with the "API request" action,
- store the user token with the "Store token" action,
- fetch the user with the "Fetch user" action, based on the token stored in action 2, and
- redirect the user to the appropriate page with the "Change page" action.