🔁 Update a Record in Airtable
564
Use case: when a customer returns a rental car, you want employees at the rental location to update the mileage of that car.
Pre-requisites
- you have a database with the list of cars, a table in Airtable for example,
- you added a Collection with that list of cars in WeWeb, and
- you displayed this list on a page in WeWeb, using a table element for example.
What next?
- How to setup a form users can fill out with data Airtable will understand
- How to pre-fill a form with the information from the item selected by the user
- How to update the record in Airtable and on the page when the user submits the form
1 – How to Setup a Form
On your WeWeb page, you will want to add a form container so that users can type in the updated mileage.
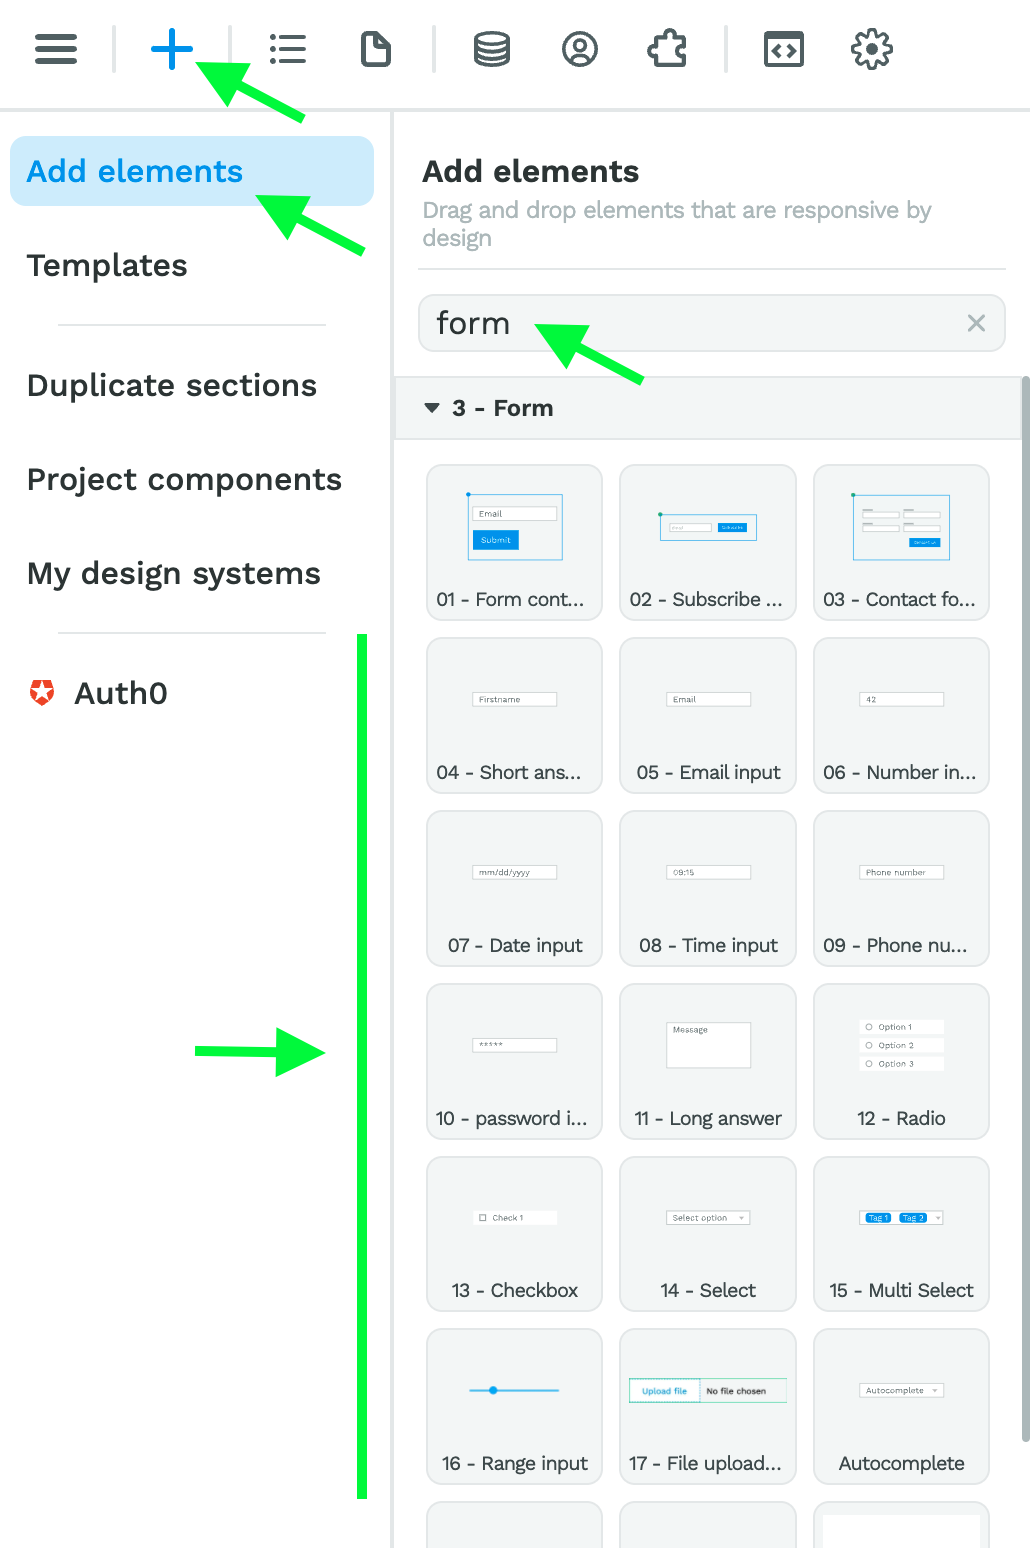
Add a Form Container
To add a Form Container in WeWeb, go to the “Add” menu:

Add Form Inputs
Once you have a Form Container on the Canvas, you can add all sorts of Form Inputs inside that Form Container:
- Radio buttons,
- Multi-selects,
- File upload,
- Time input,
- Toggle, etc.
To add a Form Input in WeWeb, go to the “Add” menu:
🔥 Pro tip 🔥
To save time, you can also copy / paste Form Inputs in the Navigator or on the Canvas and change the Input type in the Form Input’s specific settings (more on this two sections below).
Rename Form Container Variables
When you add a Form Container on the Canvas, it will automatically create Component Variables which you can access in the Navigator:
It’s best practice to give explicit names to variables. The more complex your project becomes, the more you will waste time debugging your app if you don’t.
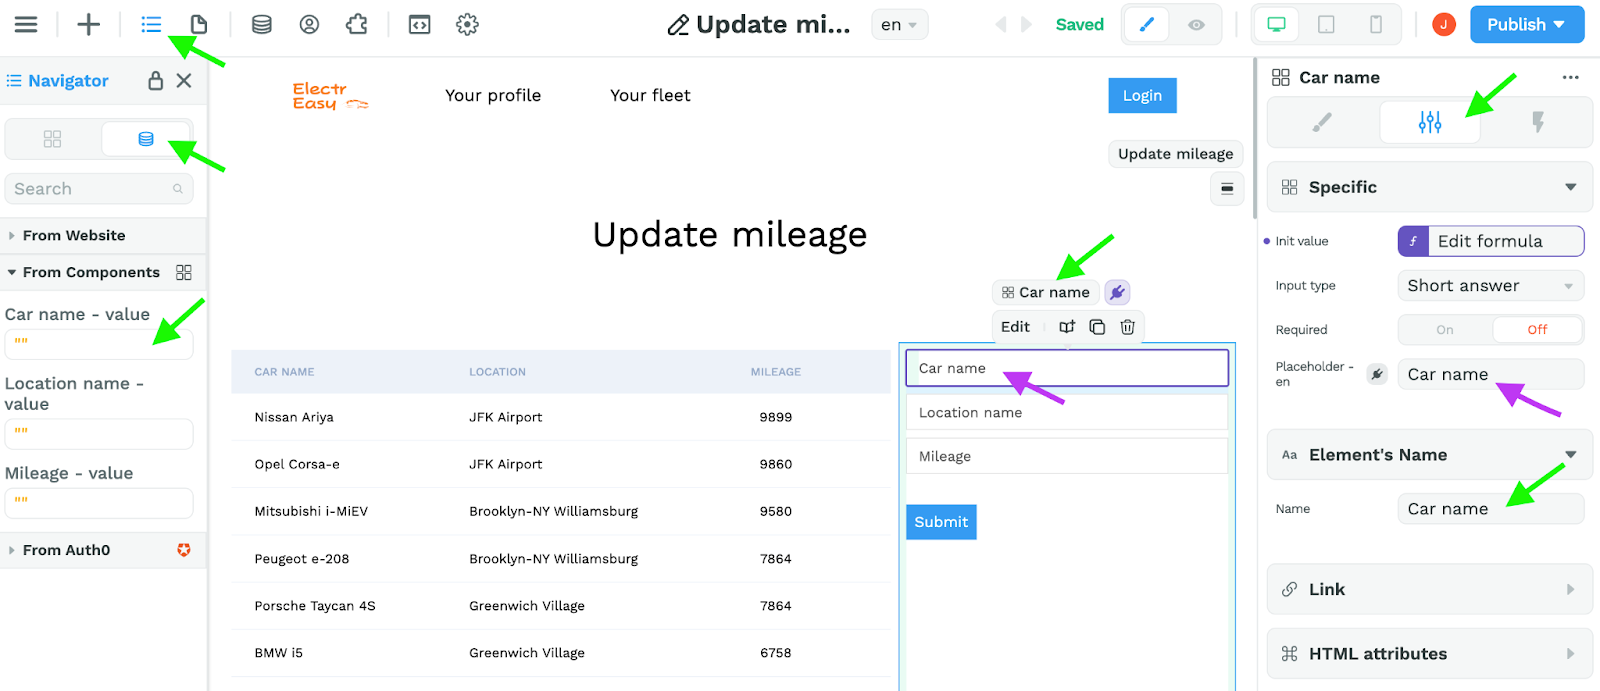
Choose the Correct Input Types for Each Form Input
When you send data to your backend, it expects certain data types.
In our example, our Airtable base expects to receive:
- The car and location names in text format
- The mileage of the car as an integer, i.e. a number without decimals

Therefore, we need to make sure that in WeWeb, we have the corresponding input types:
- "Short answer" for the car and location input fields
- "Number" for the mileage input field
2 – How to Pre-Fill the Form with the Information from the Selected Item
Before we can send data to our Airtable base, we need to be able to tell Airtable which record is being updated.
There are a number of ways we could do this.
Our preferred solution here is to create a variable that will contain all of the information of the item selected by the user so that:
- we can pass the record id to Airtable when the time comes, and
- we can pre-fill the form when the user selects an item instead of asking the user to fill out all the fields and risk typos.
Store the Data from the Selected Item in an Object Variable
The first step to pre-fill the form with information from the item selected by the user is to create a workflow on the selected line:

A few things to watch out for:
- The workflow should be at Line level, not on the table or on the text of an item in the table. You can see this most clearly in the Navigator on the left
- The workflow should trigger On click, i.e. when the user clicks on a line of the table
- You can name the variable whatever you want – although we recommend you give it an explicit name like Selected line – but it must be of Object type because you want to pass it the entire item.data object
🔥 Pro tip 🔥
The item.data object is detected automatically by WeWeb when you are on a Collection List Item, i.e. a repeated item inside a Collection List.
You can check if your workflow works correctly by going into Preview mode, clicking on a line in the table, and making sure that the variable you created is updated correctly in the Navigator:

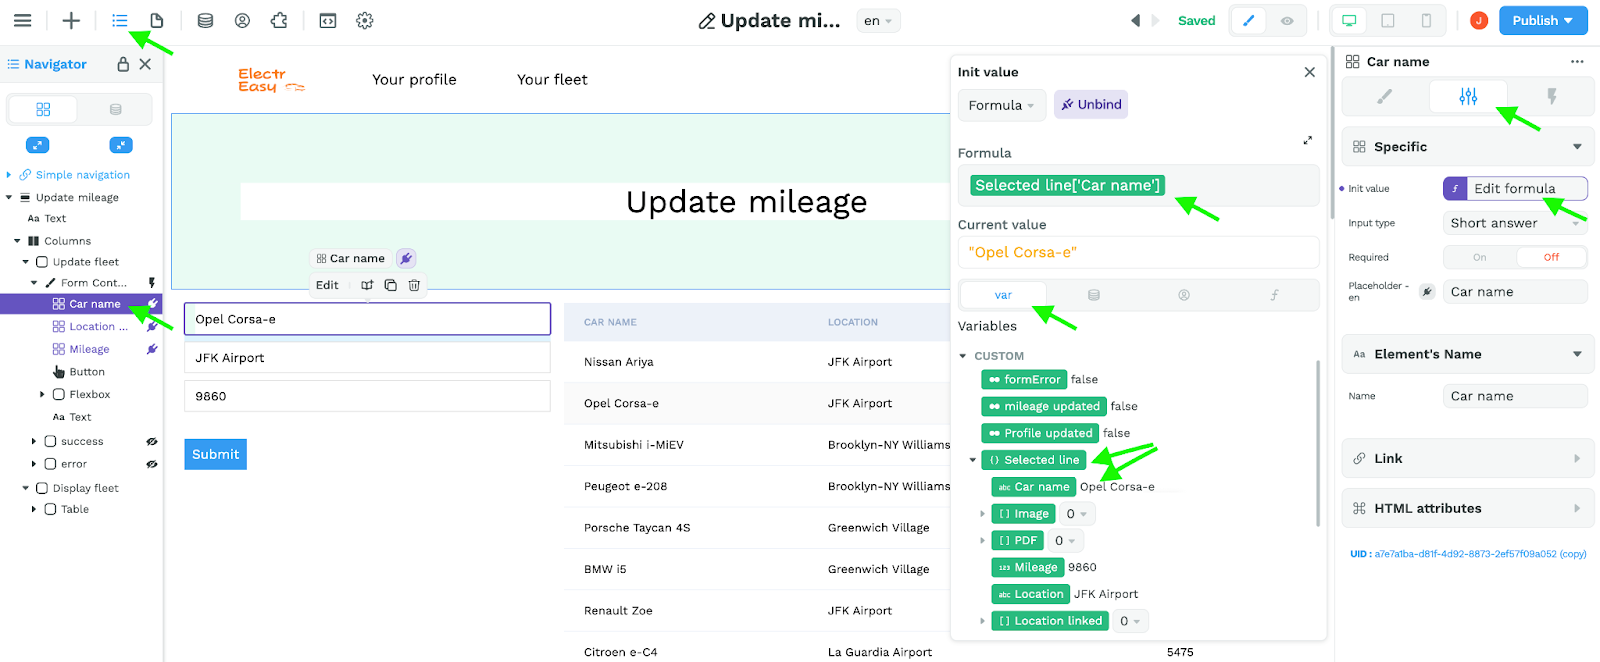
Bind the Initial Value of Form Inputs to the Selected Item Variable
Once you are sure that the Workflow triggers correctly and your Object Variable is updated with the right information when the user clicks on a line in the table (see above), you can bind the initial value of your Form Inputs to the Object Variable you created:
Back in Preview mode, when you click on a line in the table, two things should happen:
- the Object Variable you created in the previous step should continue to be updated correctly, and
- the Form Inputs in your Form Container should now also be updated with the information from the Object Variable.
3 – How to Update the Record in Airtable and on the Page
The final step to update the record in Airtable is to create a Workflow on the Form Container:

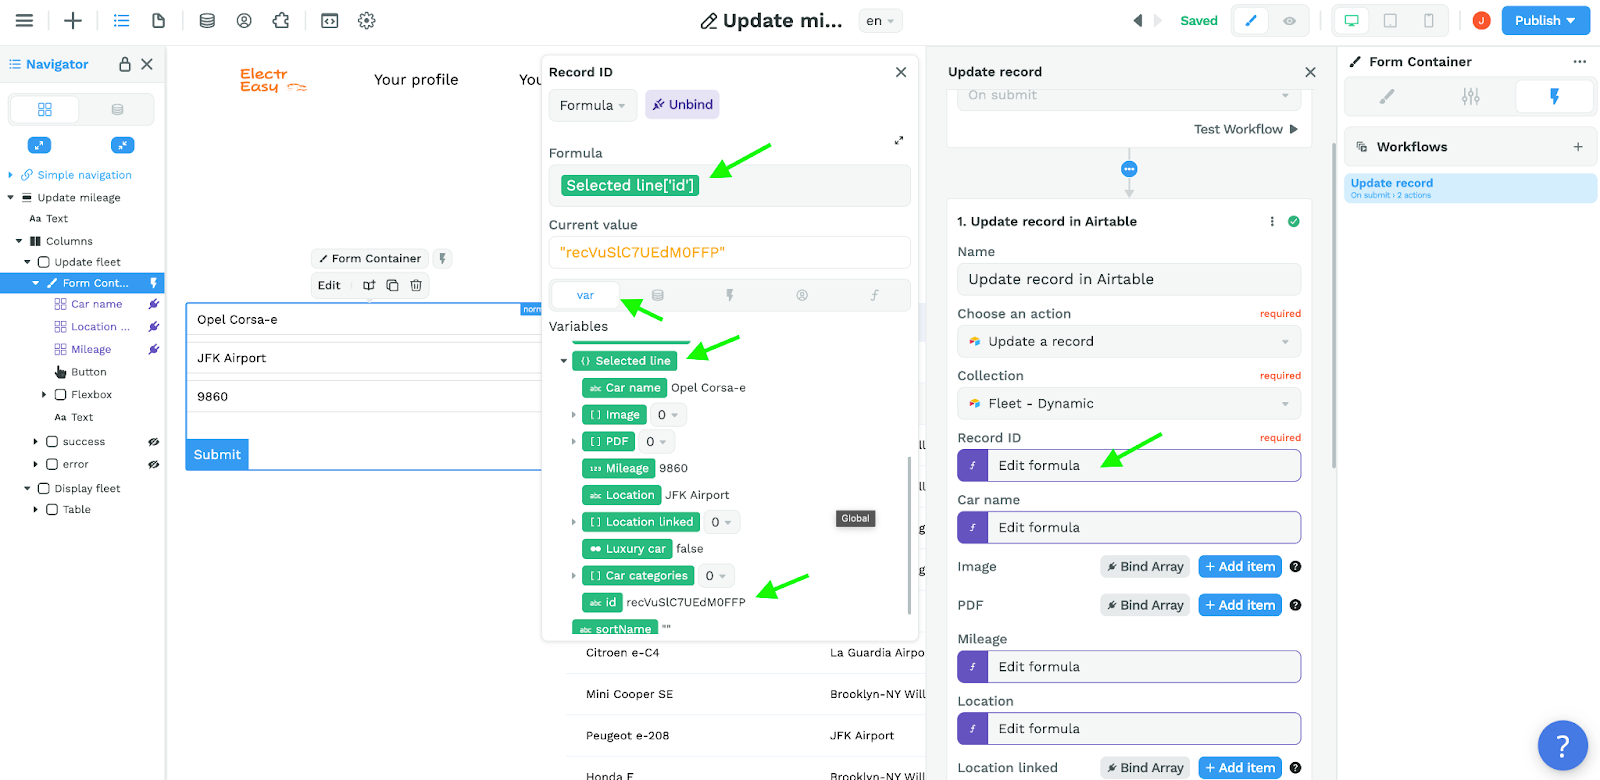
Bind the Record ID to the id in the Selected Object Variable
The first piece of information that Airtable needs to update a record is the id of that record. Otherwise, Airtable would have no clue what record you want to update.
In step 2, when you created an Object variable with the information from the line selected by the user, you were already preparing to update the data in Airtable:
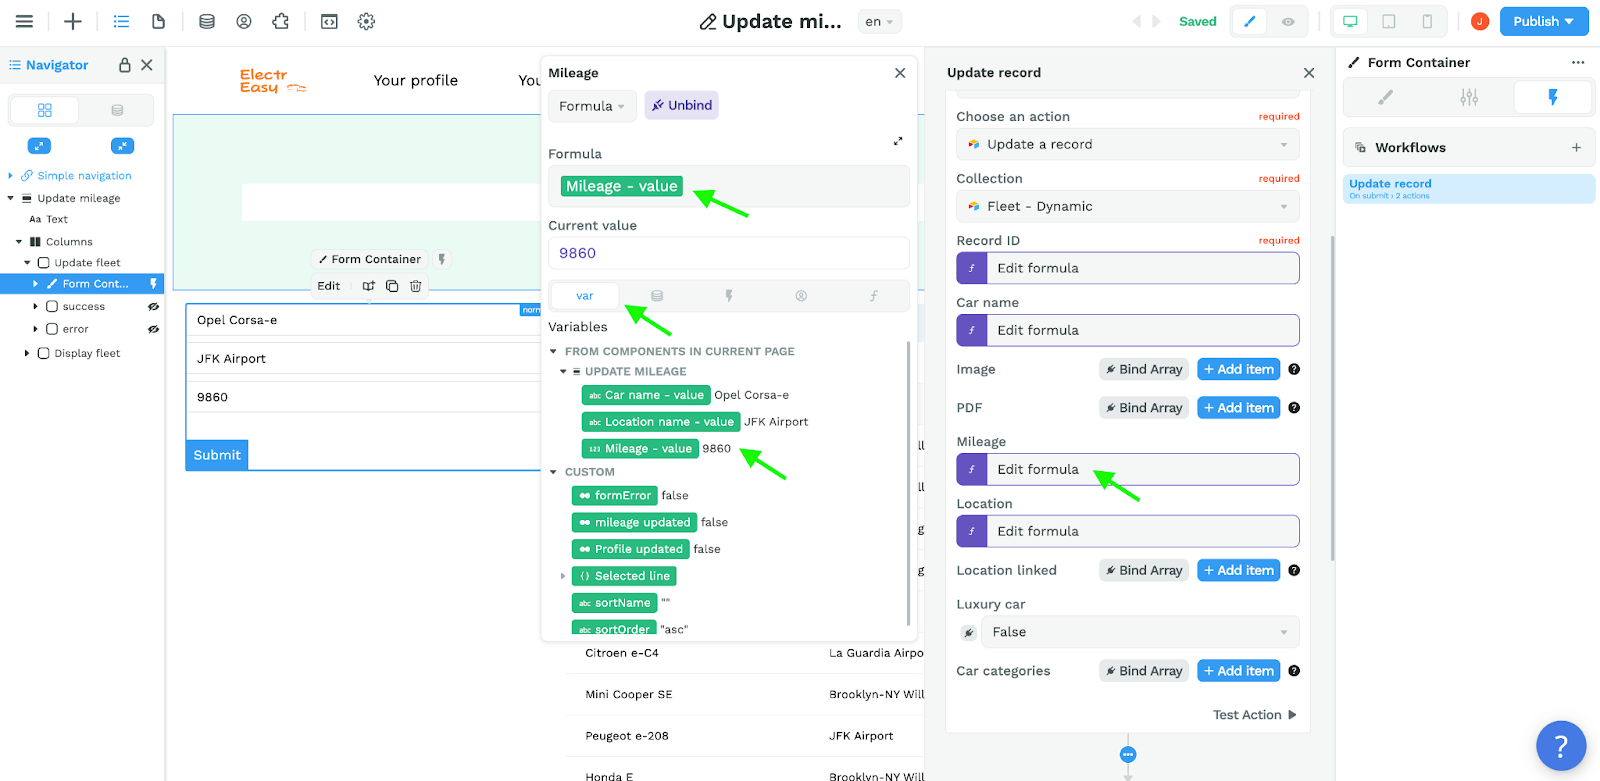
Bind the Airtable fields you want to update to the Form Input fields
Now, you’ll want to send Airtable the most up to date information, i.e. the information that the user just confirmed by submitting the form.
To do that, you therefore need to bind the fields you want to update in Airtable to the input fields that are in your Form Container:
A few things to watch out for:
- For the form to be validated properly, the workflow should be on the Form Container, not on the submit Button.
- The workflow should be triggered On submit, when the user submits the form, not On click when the user clicks on the submit button.
- Make sure the input type of your Form Input matches the data type in Airtable. For example, if the mileage input field in your form is “short answer” but Airtable expects a “number”, the workflow will fail.