🆔 WeWeb Authentication
601
In WeWeb, you can connect to third-party authentication like Xano, Auth0, or any token-based authentication system.
Or you can use WeWeb's native authentication system.
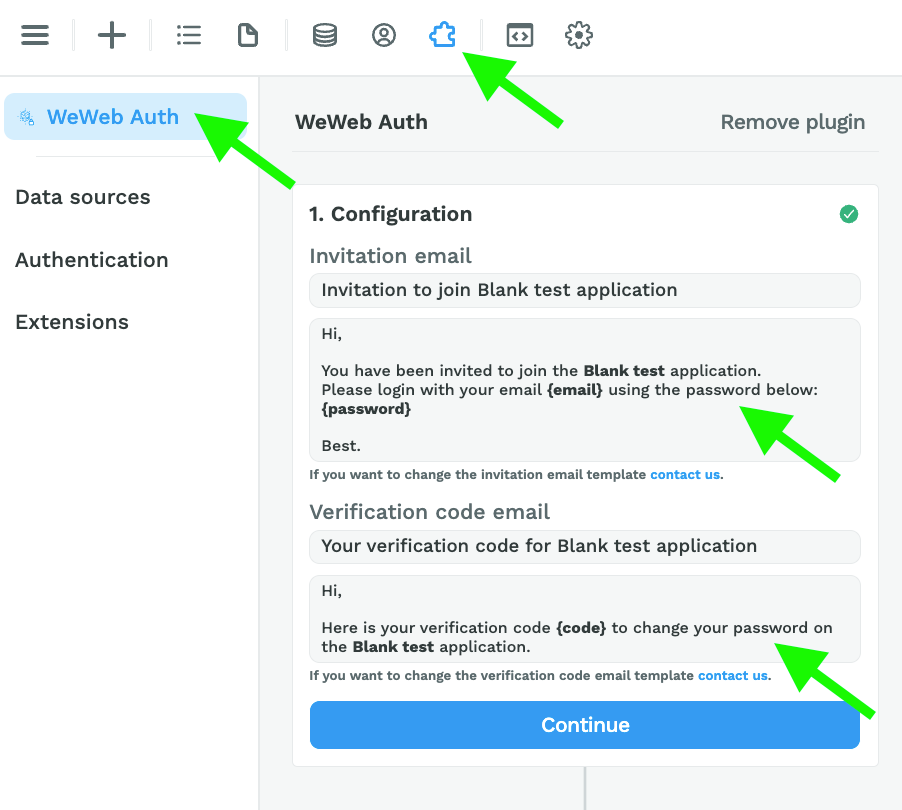
👉 Go to "Plugins" > "Authentication" > "WeWeb Auth"
Step 1 – Configuration
👉 Leave the Configuration options by default in step 1.
If you double click on the configuration options, you'll see the template emails we send out when you invite new users to join.
If you'd like to change those template emails, please use the "contact us" link to let us know.
Step 2 – Define Redirections (URLs)
👉 In step 2, select the page you want users to be redirected to when they are not signed in.
For example, a sign in page.
Step 3 – Add Users
In the "Users" sub-menu, you can add users one by one manually or import a CSV file with a list of users:
🚨 Warning 🚨
If you remove the WeWeb Auth Plugin from your project, it will delete all users, roles, and groups from WeWeb. You will not be able to retrieve this information after removing the Plugin.
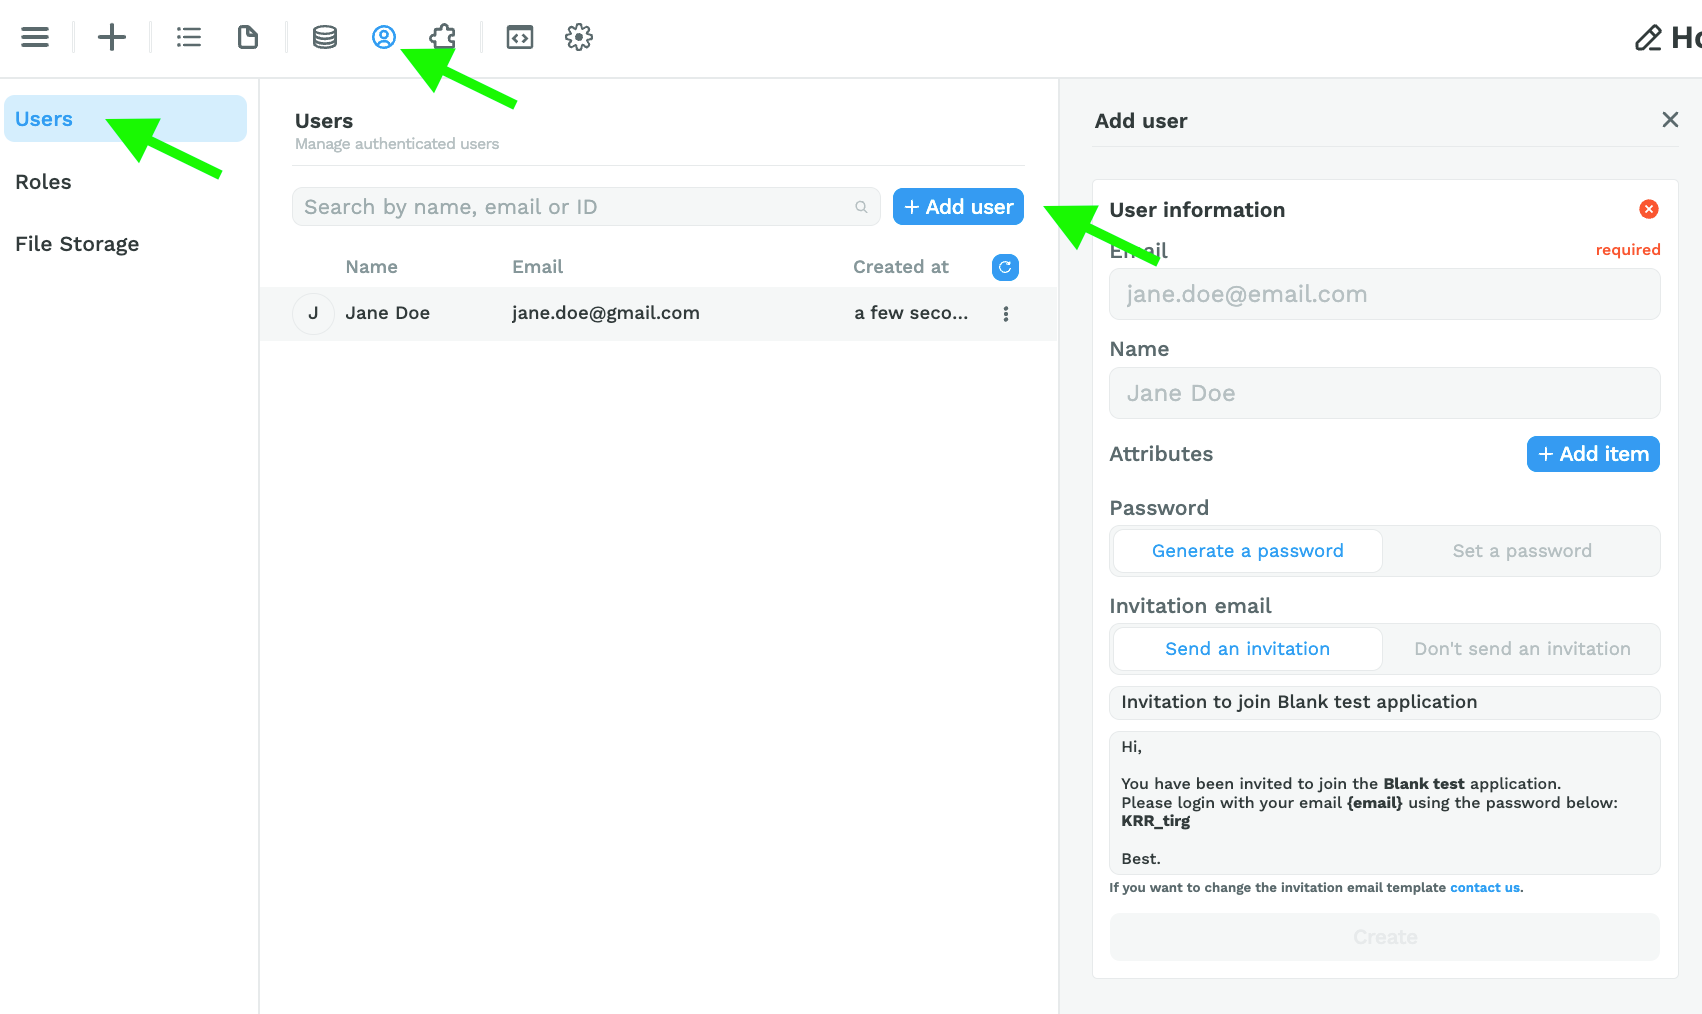
Adding Users
Attributes
The email address is required.
All other attributes are optional.
Note that, for now, you can only add string attributes. So if you select the "image" attribute, you will need to pass it a URL in string format.
Password
For each user, you can generate a password or set one manually.
If you set one manually, it will need to be at least 6 characters long.
Invitation email
Here you decide if you want to send an invitation email to the user or not.
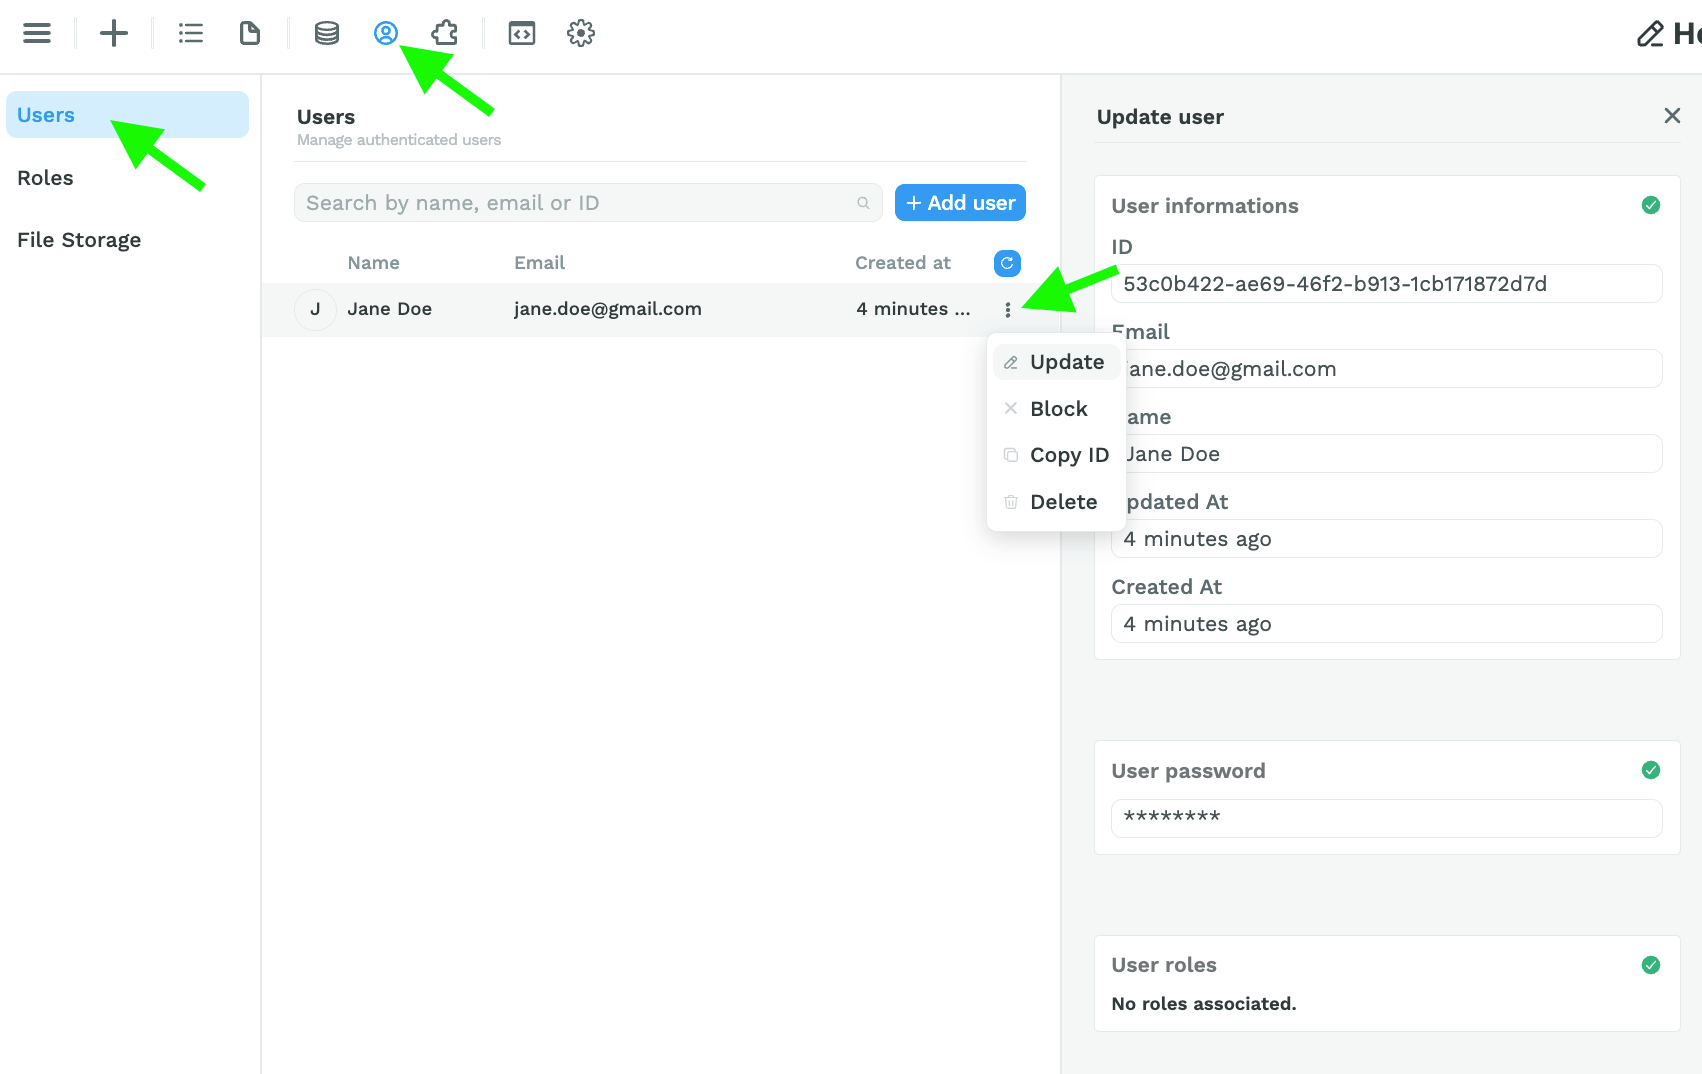
Update User
In the "Users" top bar > "Users" sub-menu, you can select a user to edit their info, attributes, password, and user roles.
Note that, while you can update a user's password, you cannot see their current password for obvious security and privacy reasons.
You can also:
- Block a user. Blocked users will not be able to authenticate to your WeWeb app.
- Unblock a blocked user.
- Copy a user's ID.
- Delete a user. Deleted users will not be able to authenticate to your WeWeb app.
Step 4 – Add User Roles & User Groups
You can access the user role window by clicking on "Add role" at user level or on the "Users" menu in the top bar > "Roles" sub-menu.
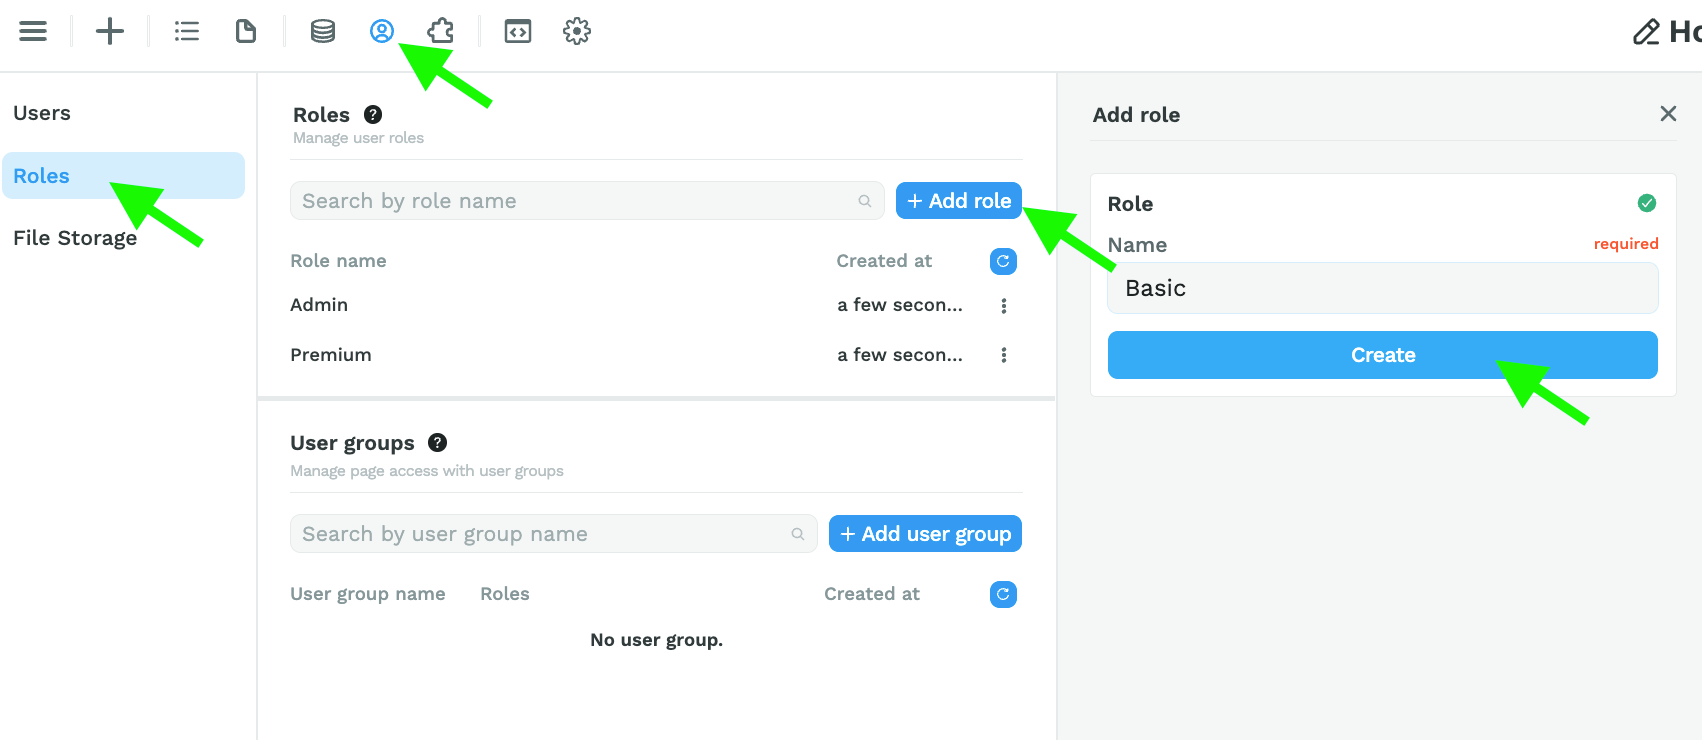
A user group is a combination of user roles.
Let's say you're building a web app for a car rental company.
You could have 2 user roles:
- Admin, for employees, and
- Premium, for users that get preferential treatment.
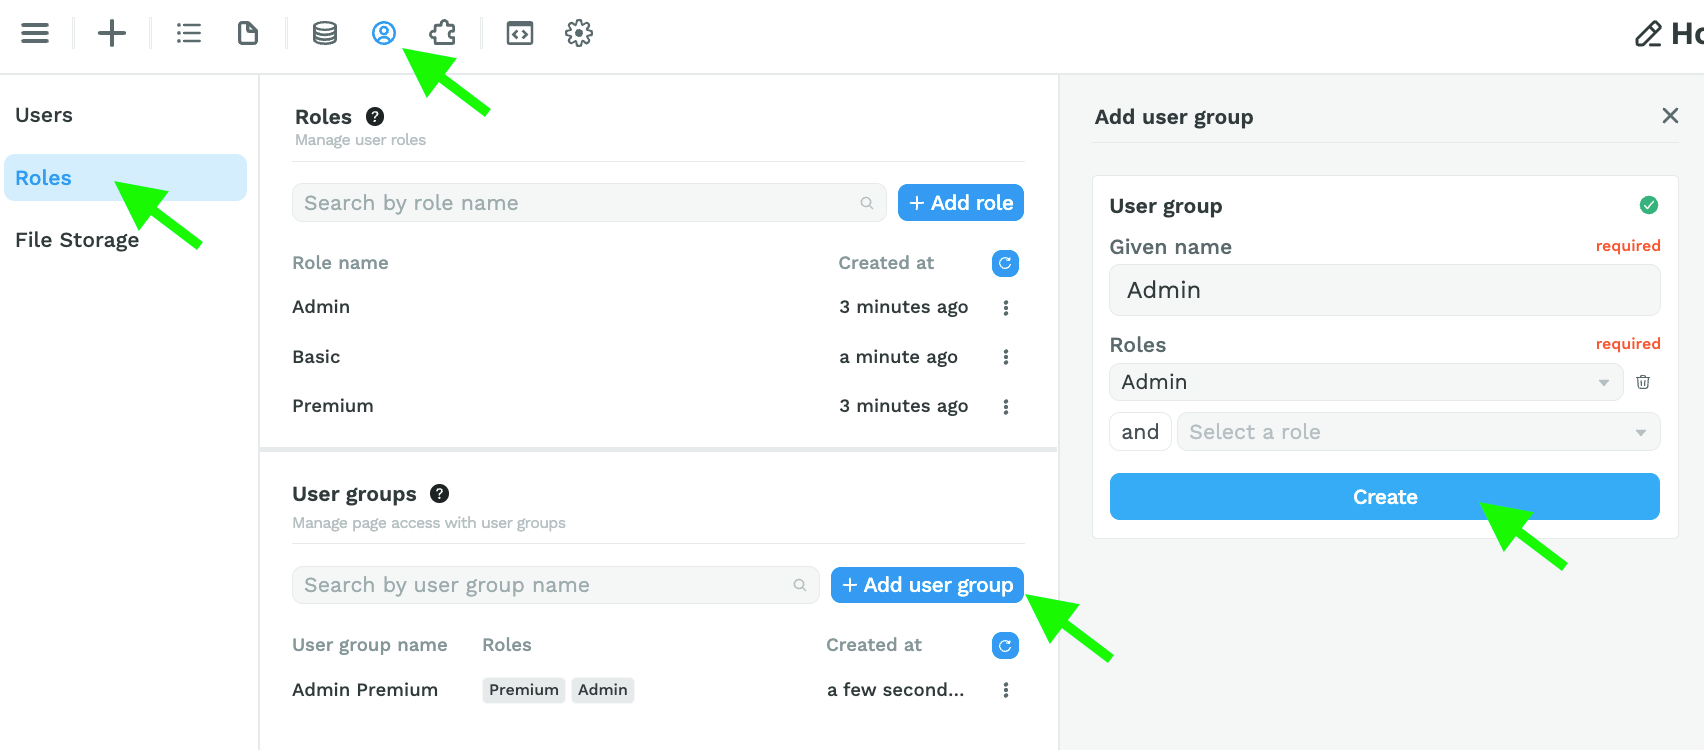
And 3 user groups:
- Admin, that would allow you to gate content so non-employees can't access it
- Premium, that would display the best cars to premium users but not all employees
- Admin Premium, that would display the best cars and give access to admin pages
It's important to understand that a user needs to have all the roles detailed in the user group.
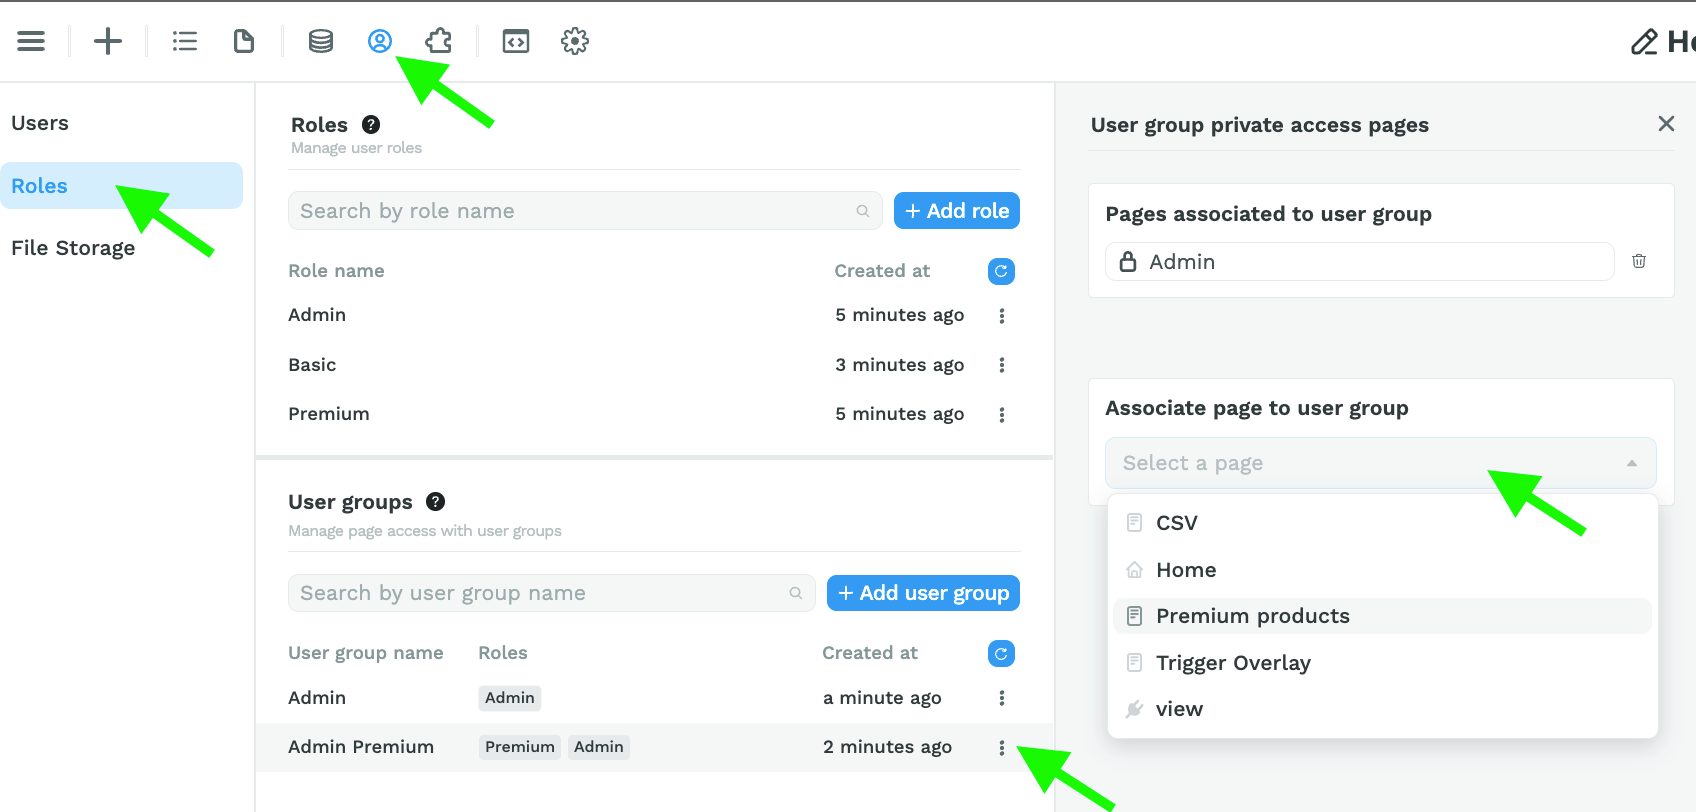
Members of the Admin Premium User group must have the "Admin" and the "Premium" roles associated with their User profile:
Step 5 – Gate Pages Based on User Groups
One of the main uses for user groups is to gate content.
If a user is part of the Admin user group for example, we grant them access to Admin pages by associating these pages to the Admin user group:
If a user is not part of the Admin user group however, they won't be able to view the pages that are associated to the Admin user group.
Step 6 – Enable User Sign-up, Sign-in, and Sign-out
Once you have added the WeWeb Auth plugin, you'll want users to be able to:
- sign-up,
- sign-in, and
- sign-out.
For now, we don't have built-in WeWeb Auth elements that appear automatically when you add the plugin.
You'll need to create your own forms, buttons and no-code workflows to trigger the following actions:
- signup
- login
- update user profile
- change password: when the user is logged in, they can change their password by writing the old password and new password
- forgot password: when the user is not logged in, they'll need to enter their email to receive an email with a verification code
- confirm password: the user will need to confirm their password request, using the verification code received in the previous step, and type in a new password
- logout
Workflow:
- Trigger: click on "Forgot password" on login page
- Action 1: Change page => go to Forgot password page
- Action 2: Forgot password => input email address in form
- Action 3: Hide Forgot password form & Display verify form => got to Verify code page (both the forgot password and confirm password forms need to be on the same page)
- Action 4: Confirm password => input verification code and new password in form
- Action 5: Change page => go to Login page