🔑 Xano Authentication
602
In order to set up Xano authentication in your WeWeb project, there are three prerequisites:
1- you already have an account with Xano, it’s free for up to 10,000 records ✅
2- you have a user table in your Xano database with at least two fields: login and password ✅
3- you have the three authentication API endpoints in Xano ✅
Some Xano templates include a user table and the three authentication API endpoints.
However, if you don't have both in your Xano workspace, you'll need to set them up manually.
Here's how.
- Setup a User Table in Your Xano Database
- Create Authentication API Endpoints in Xano
- Copy Xano Authentication Endpoints Into WeWeb
- Create Roles and Permissions to Gate Content
- Gate Content Based on User Roles
- Add Signup and Login Workflows
- Display Login or Logout Buttons
- Fetch Current User Data
- Troubleshoot
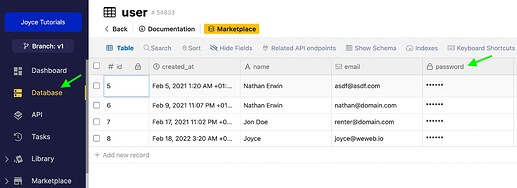
Setup a User Table in Your Xano Database
Your user table should include at least two fields:
- one field where you store the login, for example, a string field with a name or an email field with an email address, and
- one field of field type “password” where you store the encrypted password.
🔥 Pro Tip 🔥
Choose the field type “password” when creating your user table in Xano to ensure that the user input is encrypted when the user first creates an account with your web-app.
Hashing passwords is best practice and will ensure that you can use Xano’s authentication API points.
⚡️ Pro tip: if you’re starting from scratch in Xano, you can use the “Starter” template in their Marketplace.

Create Authentication API Endpoints in Xano
For Xano authentication to work, you need three API endpoints:
- signup
- login
- me
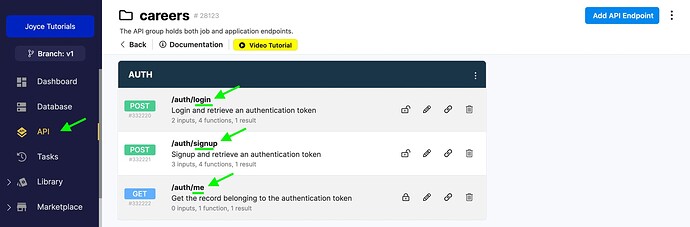
If you’re using a Xano template that includes authentication, you’ll find these endpoints in the API sub-menu.
Otherwise, you’ll need to create these three endpoints yourself by going to “API” > “Add API Endpoint” > “Authentication”
Copy Xano Authentication Endpoints Into WeWeb
In WeWeb, you can add the Xano Auth in the "Plugin" menu in the top bar.
You will be prompted to paste the URL of each Xano API endpoint:
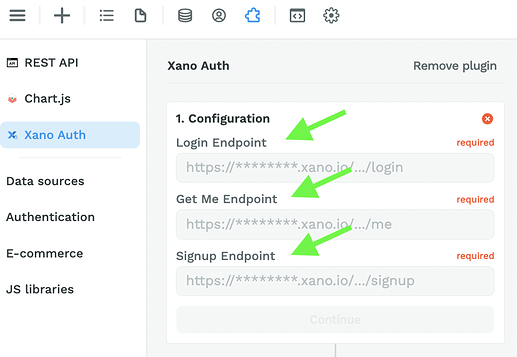
🚨 Warning 🚨
The order in which endpoints are displayed in Xano may vary. Make sure to copy the correct URL in each WeWeb️ .
Create Roles and Permissions to Gate Content
Adding Roles to Xano API Endpoint
In order to gate content in WeWeb based on user roles and permissions, you first need to create a role column in your Xano user base.
If you have a column with user roles in your Xano user base, you will be able to add it to the output of your me endpoint:

Once you’ve added roles to the output of the me endpoint of your Xano auth, you can add them to WeWeb.
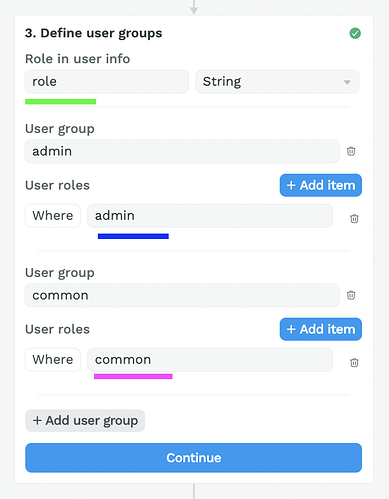
Telling WeWeb Where to Find the User Role Info in Xano
Here, it’s in the role column so that’s what we type in:
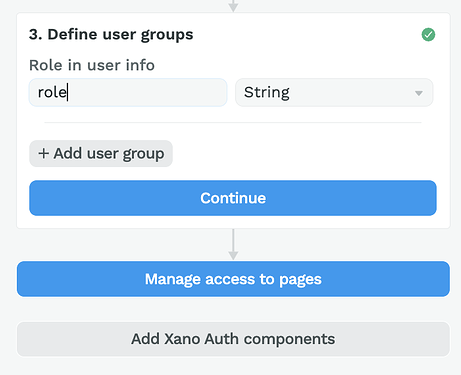
Then, you can add user groups where user roles match the data in Xano.
Adding User Groups in WeWeb
Note that user role categories in Xano match the user roles in WeWeb:
User roles in Xano
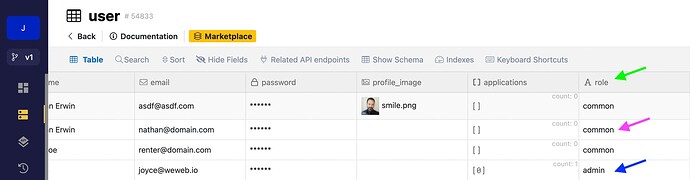
User roles in WeWeb
Gate Content Based on User Roles
Once you’ve setup user roles in WeWeb, you can Manage access to pages and define rules for Private access:
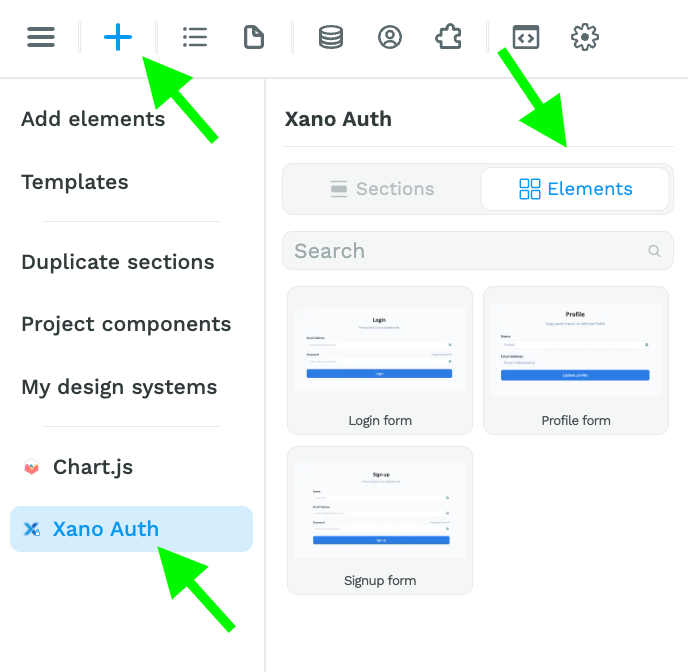
Add Signup and Login Forms
When you add the Xano Auth plugin to a WeWeb project, 3 new elements will appear in the "Add" menu:
- a signup form,
- a login form, and
- a user profile form.
You can add an authentication form by drag-and-dropping it in a Section on the Canvas.
The signup and login Form Containers both contain a default Workflow.
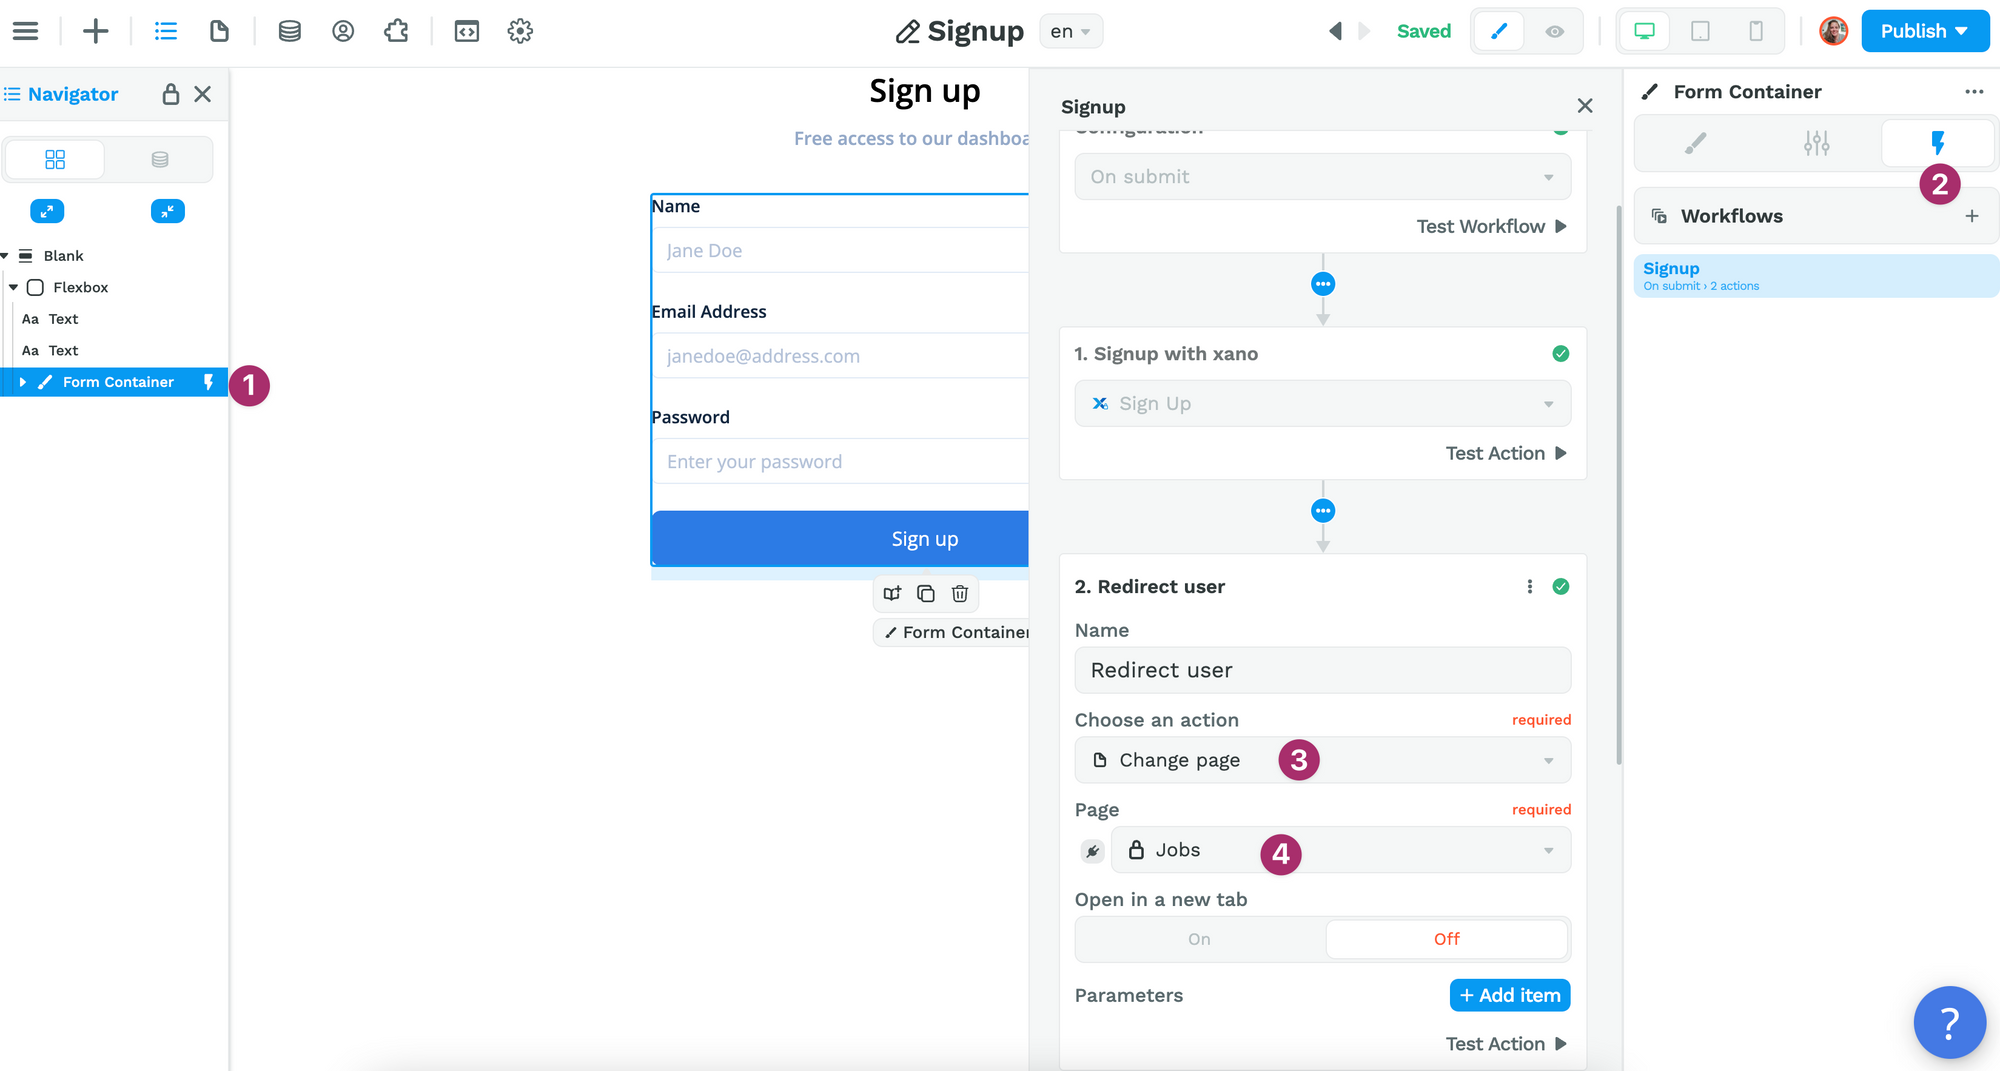
Signup Form
The signup form includes workflow with a Signup Action. Make sure to add a Change Page action to redirect the user after they signup:
🚨 Warning 🚨
Signup Workflows will fail if the user already exists in the Xano user base or if the password does not match the requirements defined in Xano.
Login Form
The login form includes a workflow with a login action. Make sure to add a Change Page action to redirect the user after they login as you did with the Signup Workflow.
🚨 Warning 🚨
Login Workflows will fail if the user does not exist in the Xano user base or if the password does not match the user's stored password.
Display Login or Logout Buttons
One you've setup user authentication, you'll probably want to display some things conditionally.
For example, you'll want to display a logout button when the user is authenticated.
You can do this by binding the display of your login and logout buttons to the "isAuthenticated" variable in the "User" tab:
We go through the entire process in this video:
Fetch Current User Data
Once you have setup authentication in your project, you'll probably want to display data that is related to the current user.
For example, if you were building a web-app where users can view and download their pay slips, you'd want to fetch and display only the pay slips from the user who is currently logged in.
In theory, you could get all the pay slips from all the users and filter the Collection in WeWeb based on the current user but you definitely do not want to do that.
Why?
Because if you did that, you would be loading all the information from all your users in the frontend.
Even if you added a filter and only displayed the current user's information on the page, other people could access it in the browser.
So what should you do?
You should filter the data on the current user at backend level, i.e. make sure Xano only sends you the information from the user who is currently authenticated.
How do you do that?
In Xano, you would have a table with all your users, and a table with all the pay slips. Each pay slip would be linked to a user.
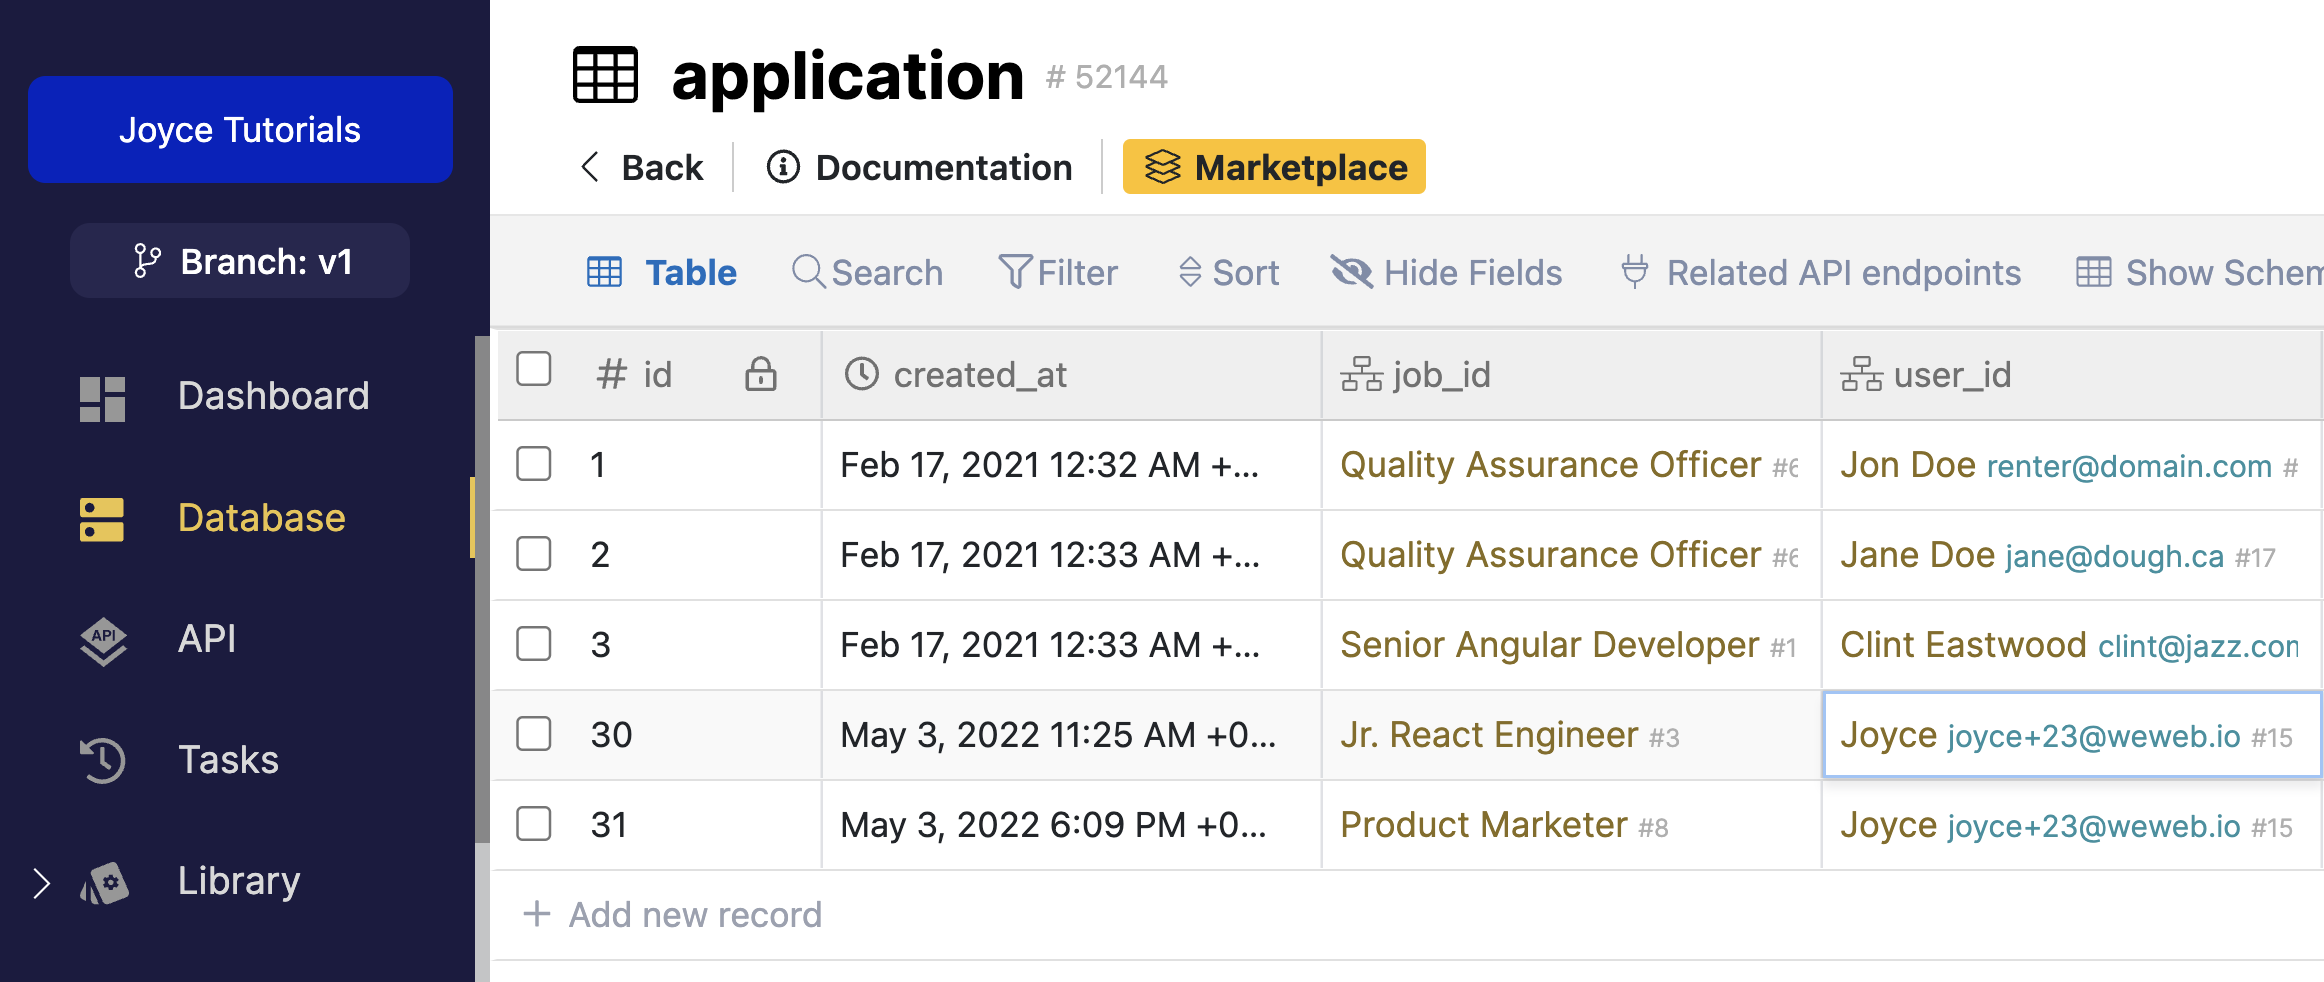
Now let's take a different example. Let's work on a web-app where users can apply to jobs.
In Xano, we have a list of job applications. Each job application is linked to a user in the user table:
Clone the API endpoint closest to the data you need
In our case, we want to return a list of job applications for the current user.
In the API menu, we have a default API to GET all the applications.
Let's clone this endpoint to create a new one that will only GET the applications of the authenticated user:
Secure the endpoint with authentication
Now that we have this new "user-application" endpoint, we need to make sure our GET request will only go through if the user making it is authenticated:
Pre-requisite: you have set up a user table with authentication endpoints in Xano.
Why are we doing this?
So that we can get the user's id from the authentication token provided by Xano when the user logs in. This ensures that no one can guess what API request to call with a user email for example.
Add a filter to query user specific records
Instead of querying all Records from the application table, we want to query only the Records where the linked user's id matches the id in the authentication token generated when a user logs into our web-app:
Getting the filtered data to WeWeb
Now that we have an endpoint that requires authentication and sends back filtered data based on the authenticated user, we can create a Collection in WeWeb:
Pre-requisite: you have logged in using Xano Auth to access the user's accessToken.
And that's it!
You've now ensured that only an authenticated user can access their own data.
Troubleshooting Xano Authentication
If you're experiencing issues with the Xano signup or login forms, you can test the Action in the Workflow and look at the response when it fails:
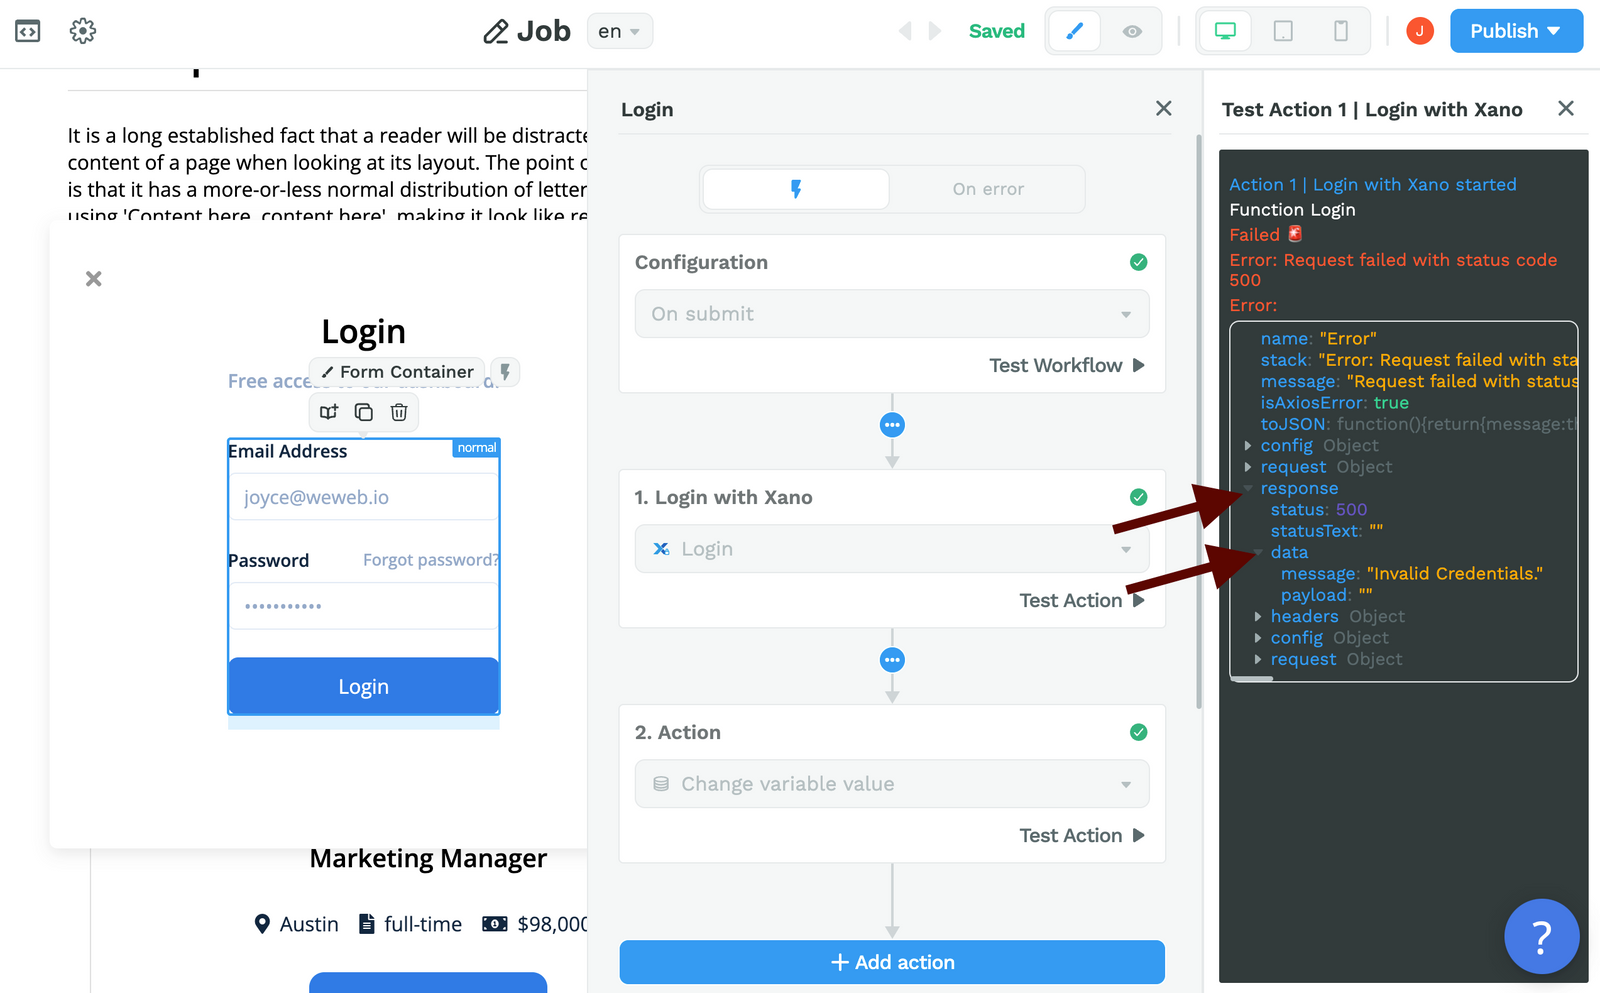
Common errors include:
- trying to sign up a user that already exists in the user base in Xano (need to login instead),
- trying to sign up a user with a password that doesn’t match Xano’s default requirements (at least 6 characters and 1 capital letter at the time of writing),
- trying to login a user that doesn’t exist in the user base in Xano (need to signup instead).